Let's Hoo Hoo Hula!~ Owl Cake Topper Tutorial
Hi everybody~ Today's Owl Cake Topper tutorial is a fun one, especially if you love an owl in a hula skirt!
If you've followed our site for a while, or if you've scrolled through our oldies in the blog, you may have seen an owl tutorial that we made a few years ago called "Owls in Love".
I mentioned in that post that owl-themed prints, bedding, cakes, and decor were popping up everywhere...and guess what? They STILL are!
I think that our love for owls is here to stay--so I thought we'd celebrate with another owl tutorial. It's luau time!
Table of Contents
Using Rice Krispies Treats for your Cake Toppers
I've been using Rice Krispies treats for my cake toppers for years! When modeling figures that are smaller or thinner, I use straight gum paste, but when I'm making chunky 3D cake toppers like our owl today, cereal treats are the way to go.
The reason is that Rice Krispies Treats can be easily compressed and molded into the shape that you need, and they hold their shape immediately. When using gum paste or fondant, your pieces take much longer to dry.
After molding the cereal treats into the desired shape, coat with vegetable shortening as an adhesive and layer on your fondant or gum paste. (When using fondant, I prefer to knead in a little tylose powder so that it will set up more quickly).
That's it! If your first layer of fondant has a bumpy look from the cereal treats, you can always go back in and add another layer of fondant to smooth out the look.
How to Make an Owl Cake Topper
*Find the printable instructions at the bottom of this post
Our 3-D owl cake topper is filled with rice cereal treats goodness. I used three (22g) Rice Krispies Treats to mold and compress into the owl shape that you see here.
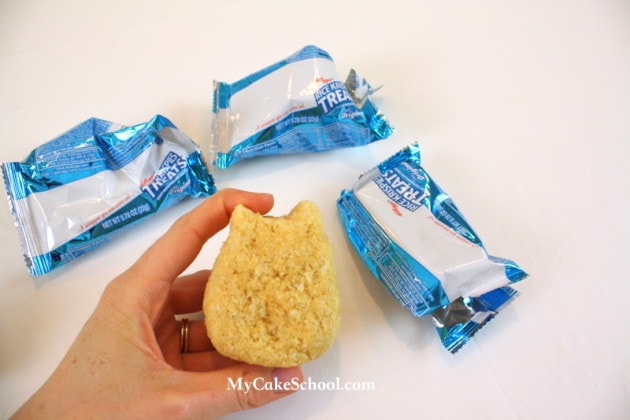 I ate half of another one before realizing that my owl maybe needed some feet (mainly because I wanted a little more height since she would be wearing a hula skirt.)
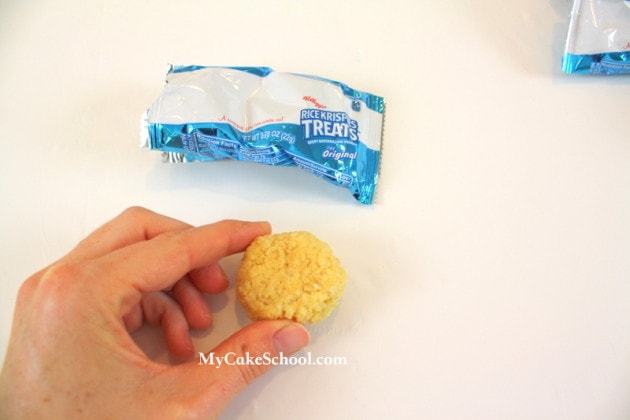
SO, the other half of my rice cereal treat was shaped into the "feet" that you see here. I shaped this flattened circle into more of a heart shape, which you'll see in a minute.
 Next, I lightly coated my owl with a little vegetable shortening (for "glue") and then covered my owl shape with two layers of fondant.
I used two layers because after the first layer, it was still a little bumpy (as you see below). By the way, I'm using Satin Ice brand fondant which is tinted with a little Americolor Deep Pink.
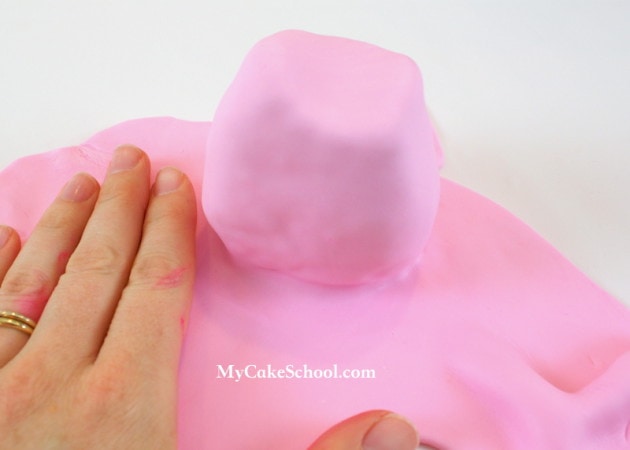 After covering the owl with the second layer of fondant, I smoothed over my owl and redefined the ears.
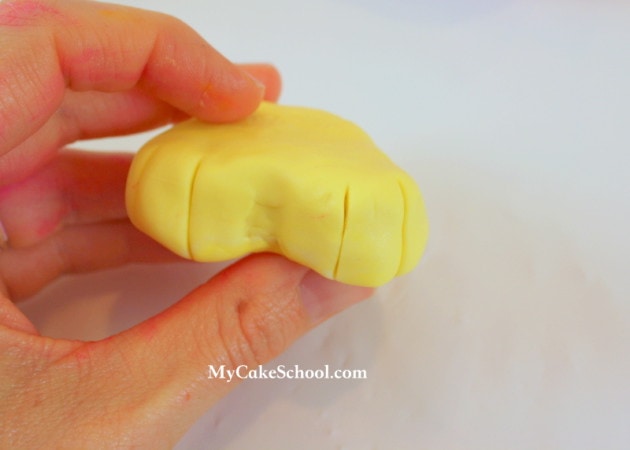
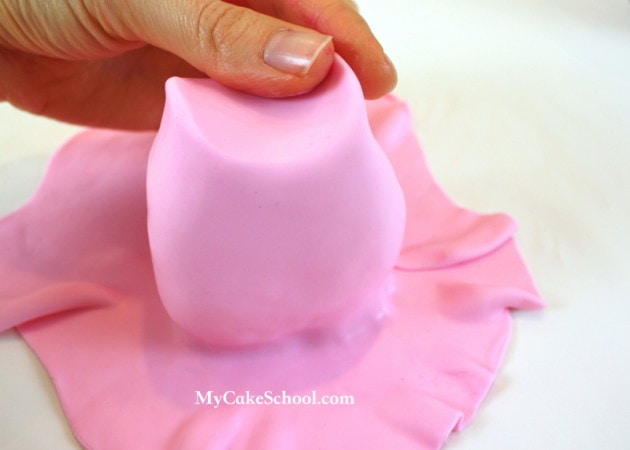 Remember our feet? I shaped that circle of fondant into almost a heart shape, and covered with yellow fondant. I used a knife to add toe impressions.
Don't worry too much about the feet--they will be almost completely hidden unless your owl is going to wear a really short skirt!
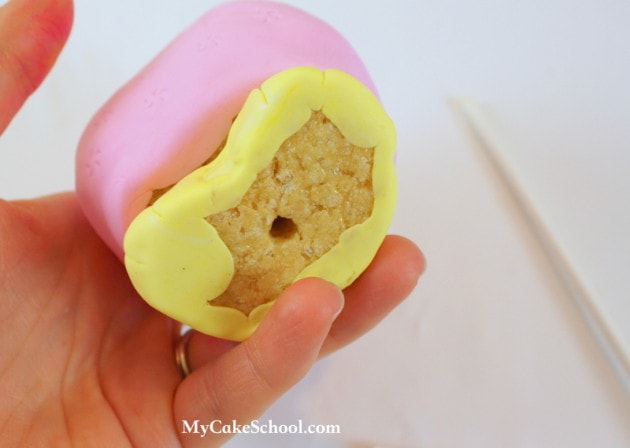
 Now for an optional step-- If you feel the need to anchor your owl, you can use a lollipop stick to create a hole in the bottom of your owl that travels through the feet and partially into the body.
My owl was stable and balanced and so I didn't feel that I needed to use the lollipop stick...but if I wanted to, I could have easily pushed it into the hole before placing on the cake.
I "glued" the body of the owl to the feet with piping gel. Melted candy melts, royal icing, or piece of dampened fondant would have worked well too.
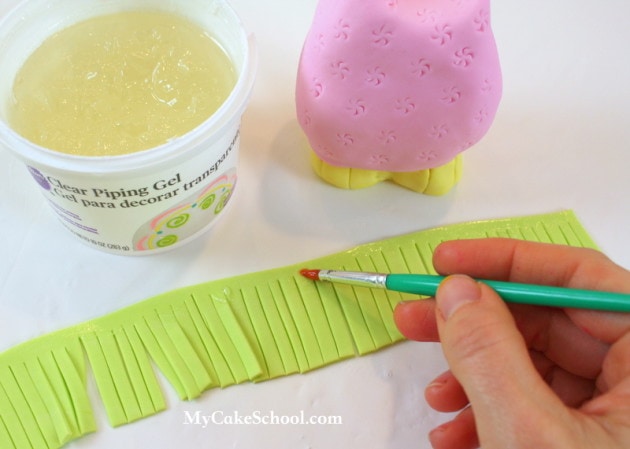
There are a few things happening here. First, I used a piping tip to make pinwheel impressions in my owl's fondant. This was a tip 106. Impressions are optional--but if you'd like to spice things up, your piping tips are always a great place to look first!
I also rolled out a strip of fondant (tinted Americolor Electric Green) and fringed it with my knife. To speed up your dry time, you can knead a little tylose into your green fondant (or even use gum paste).
If you are working with straight fondant, allow it to set up at least a few minutes so that it will be easier to handle.
Piping gel is my glue of choice in today's tutorial but you could also use sugar glue or even a little bit of water.
Next, wrap the skirt around the owl! ** You may find it easier to cut & apply the skirt in sections. If it tears, don't start over--just piece them together and nobody will know ;0)
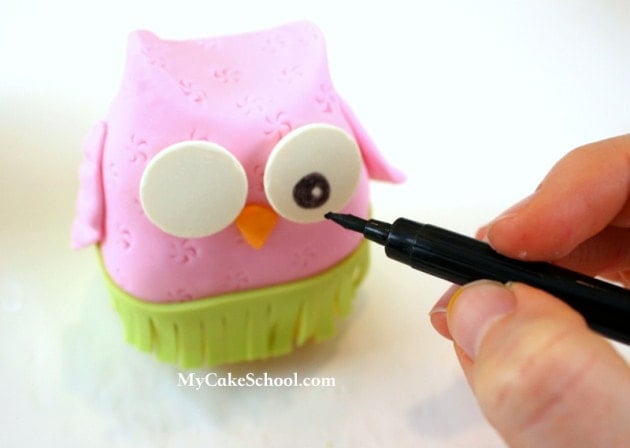
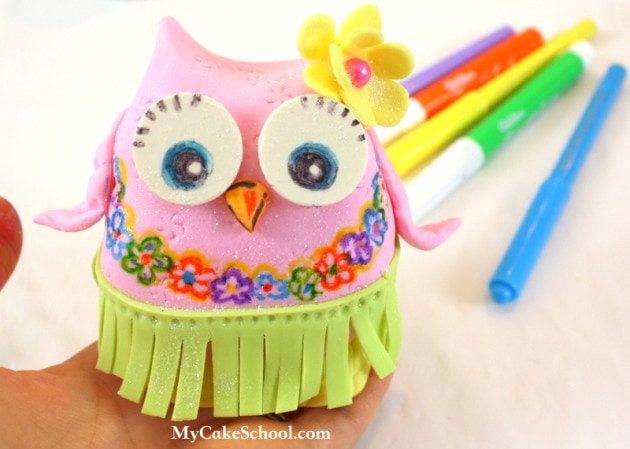
 My owl's eyes are Merckens Candy discs...but Wilton Candy Melts would work too! You could also use circles of fondant or anything else that you may think of ;0)
I added a small triangle of orange fondant for the beak, and fondant tear drop shapes for wings. Everything that I just mentioned was glued on with piping gel.
I was able to draw on the eyes pretty easily with my Americolor food coloring pen. However, some candy discs are waxier than others and don't accept coloring pen so well.
You can use fondant circles or even a crusting buttercream to pipe on the eyes if you have trouble drawing on your chocolate discs.
 What a difference a little bit of color makes!! I used my Food Writers and Americolor Pens to give our girl some personality! This was my favorite part ;0) -- I also gave her a little fondant flower (cherry blossom cutter) with a sugar pearl center.
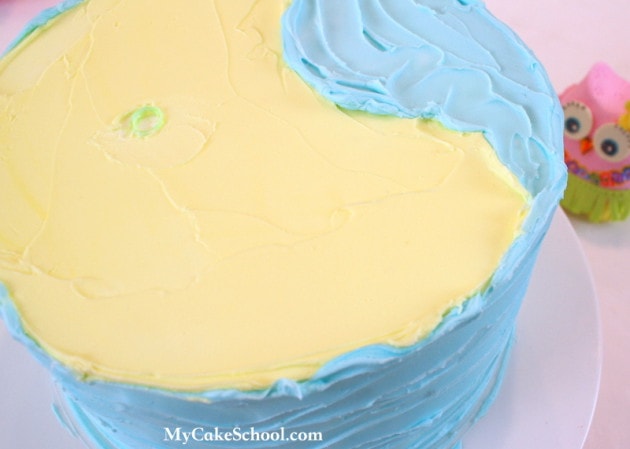
 Now all she needs is a cake! I frosted an 8" cake with a little Americolor Lemon Yellow frosting for sand, and Americolor Sky Blue for water. You can see that I didn't get too technical with the frosting ;0)
That little green circle is the top of a bubble tea straw cut to the same height as the cake. Whenever my cake toppers have a little weight to them, I like to sit them on top of a support of some kind just to ensure that they don't sink.
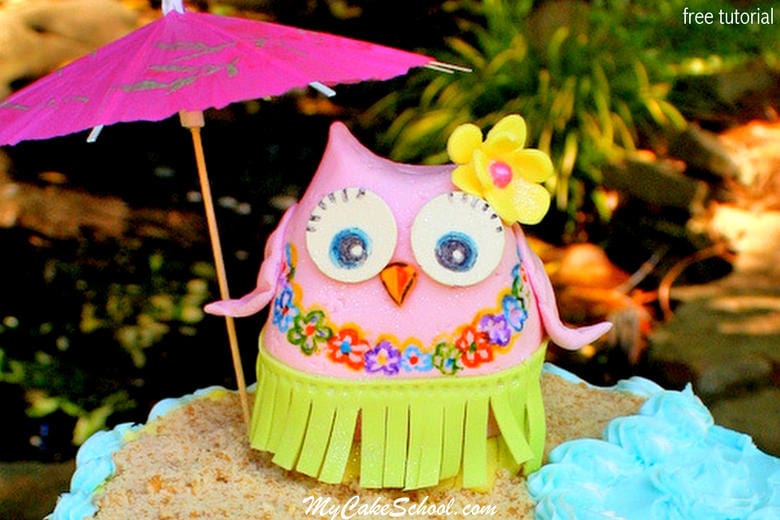
 For an even more realistic look, we crushed Vanilla Wafers to create sand. I used my small spatula to give us the look of waves--and then used my Wilton star tip 21 for borders and little accents.
I have a stash of cocktail umbrellas that I love for beachy themes ;0)
Look for more Owl Themed Cakes and Cupcakes? Don't miss these fun favorites!
Owl Love You Forever- Free Cake Tutorial
Sweet Woodland Owls Cake- Member Tutorial
Winter Owl Cake (Carved Cake)- Member Tutorial
Owl Cupcakes- Free Cupcake Tutorial
Check out More of our Favorite Cakes for Summer Here!
Find our favorite cake tutorials and recipes for Summer in this roundup! Favorite Summer Cakes, Tutorials, Recipes, and Ideas!
How to Make an Owl Cake Topper- Luau Theme!- Free Tutorial
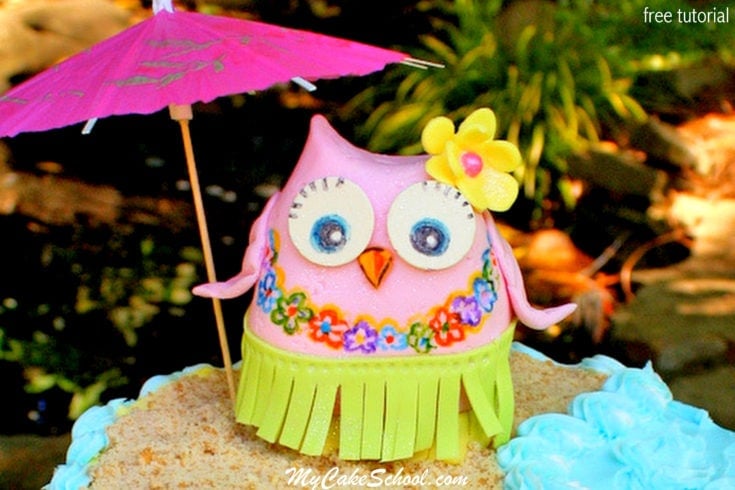
Learn how to make a cute and easy Owl Cake Topper with a Luau Theme in this free step by step tutorial!
Materials
For the Cake
- We decorated a three layer, 8 inch cake that was frosted with our Classic Vanilla Buttercream. This design works for any size of cake tier or sheet cake.
- Coloring Gels: Americolor Egg Yellow (sand), Sky Blue, Deep Pink, Electric Green
- Piping Tips: Tip 21 for frosting borders, ,waves, Tip 106 for impressions on owl - optional
- Bubble Tea Straw or drinking staw for added support beneath the cake topper (cut to height of cake)
- Crushed Vanilla Wafers (optional) for sand
For the Owl Cake Topper
- Rice Krispies Treats- I used 4 of the pre-made 22g size. I used 3 for the body and ½ for feet.
- Vegetable Shortening (for coating the shaped cereal treat)
- Fondant (As an optional step you can knead in a little tylose powder so it will firm up more quickly)
- Candy Melts/Disks/or Fondant Circles for eyes
- Foodwriter Pens for eyes (or you can layer on fodant)
- Miscellaneous- Cocktail umbrella, fondant flower cutout, etc.
Instructions
- Frost the cake to look like a beach, with sand on top. (We used buttercream tinted with Americolor Sky Blue, Sand tinted Americolor Egg Yellow- and then later decided to add crushed vanilla wafers for more realistic sand.)
- Add a bubble tea straw or stiff drinking straw cut to the height of the cake and position where the topper will be placed. This will prevent the topper from sinking.
- Shape three rice cereal treats into the shape of the owl. Try to compress and make it as smooth as possible. Coat with a thin layer of vegetable shortening and layer on the pink fondant (rolled to about ⅛ to ¼ inch).
- Cut a thin strip of fringed fondant and wrap around the owl, attaching with piping gel or tylose glue (tylose powder+a little water).
- Attach the eyes with your "glue" of choice- A little piping gel or tylose glue may work but another great option is to dampen small balls of fondant until tacky and use to attach the eyes. Add orange triangle for beak (we outlined with a black food writer pen)
- Add flattened teardrop shaped fondant wings using a little piping gel or tylose glue.
- Add additional details with food writer pens or if you don't have these pens, you can use fondant accents or you can paint on accents using coloring gel mixed with a small amount of vodka or lemon extract.
- Optional- Fondant flower/cutout, Cocktail Umbrella, etc.

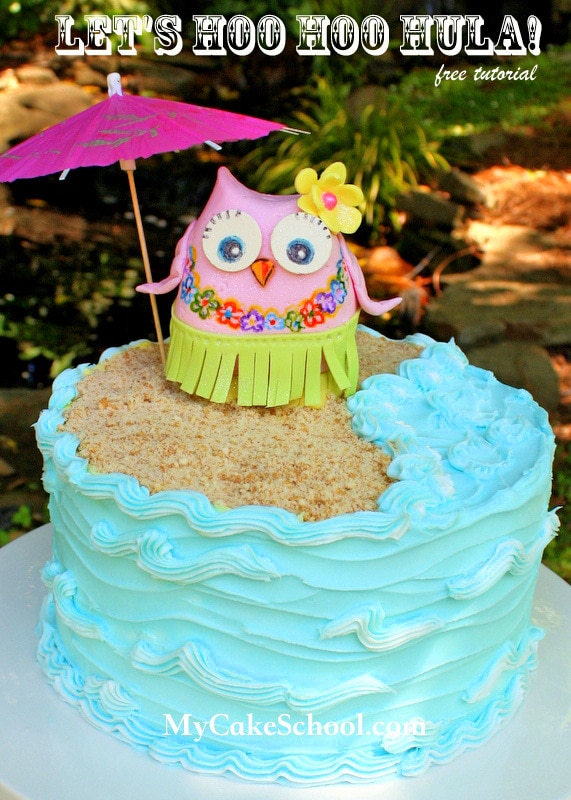
She couldn't be any cuter, and I love the ocean waves!
I saw this on Pinterest and had to check it out - what a great tutorial and such a cute cake!! I love it, thank you so much for sharing!
Perfect timing! I'm doing a water/beach themed cake and never thought of Vanilla wafers, I was only thinking brown sugar, but that's quite a 'sugar-high' for a 50th birthday cake ;)
Oh my gosh!! This is so Stinking cute!!! How fun for the summer!!! I love it!!! Way to go MCS!!!
What size cake pan and how many tiers is this cake?
This is so cute and I love how you did the beachy cake!
This is such a fun summer cake with a spin on the owl theme. Great job!!
LOL, this is just so very cute!
You made me smile :) I love the way you made the waves on the side and top of the cake!
Very cute,love the waves in the buttercream. Also I am now receiving my e-mails. Thanks
Thanks, Anita, and I'm glad the email problem has been solved.
This is absolutely genius!! I really liked it.
This is so adorable, I love owls and your site. You are so full of great ideas and helpful tutorials. I have never made one of these cakes but I get a huge kick out of looking at your stuff, amazing I am in awe. Thank you for this wonderful site.