Back to School Cake & Cupcakes!
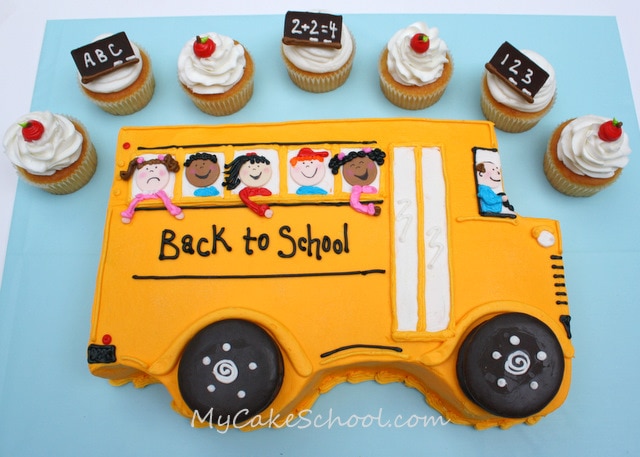
Today I'm going to share with you the CUTEST back-to-school cake and cupcakes! These are so much fun to make.
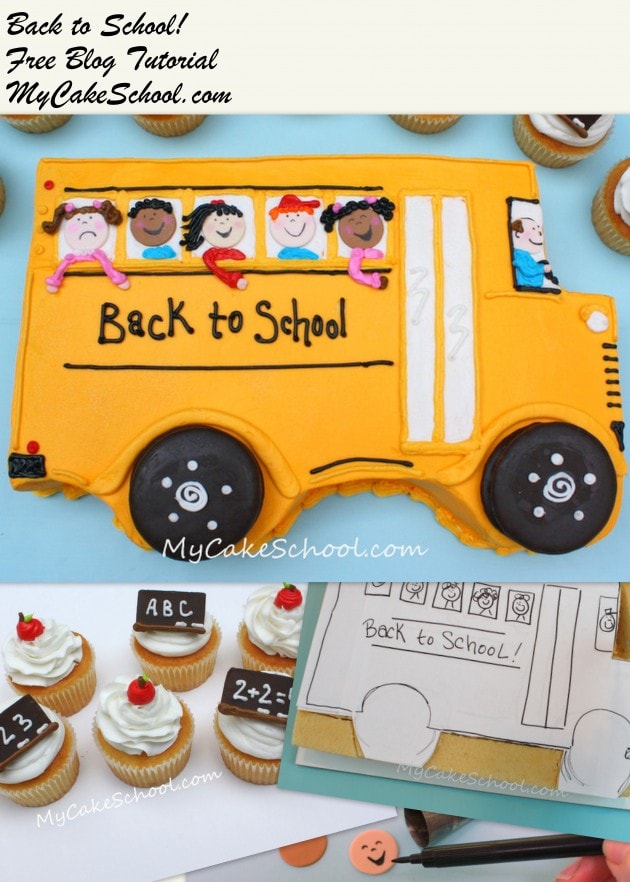
For most of you, school is just about to begin. I can't believe it!
Time to shop for new crayons and markers and paper.... time to meet the new teacher, and time to set the alarm earlier.
It's also this time of year every year when I think of this song....and I sing it A LOT. If only the first day of school involved this much dancing.- Thanks Grease 2!
Okay, let's get back to it!! So, if your kids are like mine and not counting the days to return to school, maybe a cake or cupcakes will help ease the pain.
Or maybe you can be the favorite parent of the class from Day 1 by bringing in a back-to-school cake or cupcakes!! Whatever your motivation, I hope you like today's project-- :0)
Table of Contents
How to Make a School Bus sheet Cake
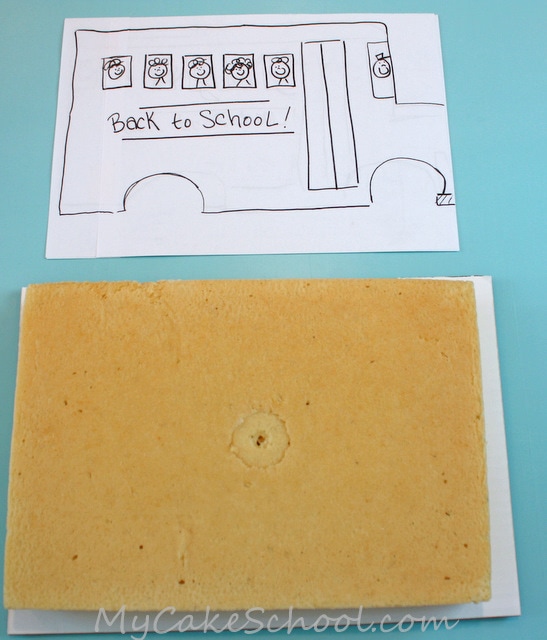
First, let's start with the cake. We're making a school bus! I made a 9x13 single layer sheet cake....and I also made a template to lay on top.
It doesn't have to be a perfect template, but sometimes it's nice not to have to eyeball it when carving. If you want to borrow mine, here it is: Bus Template
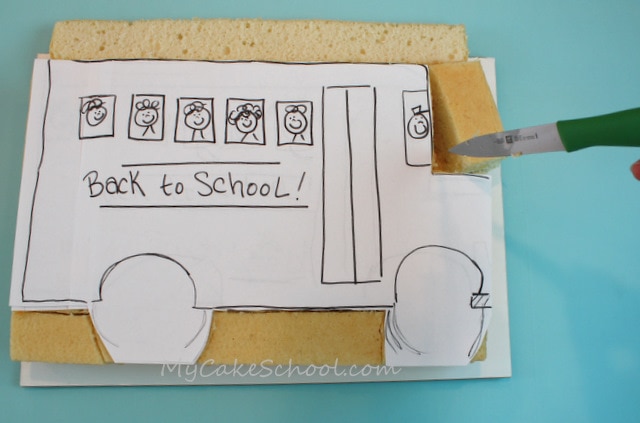
Next, start cutting away excess cake, leaving only what's beneath the template. Remember to account for the wheels--If you cut away that part, your wheels will be too low!
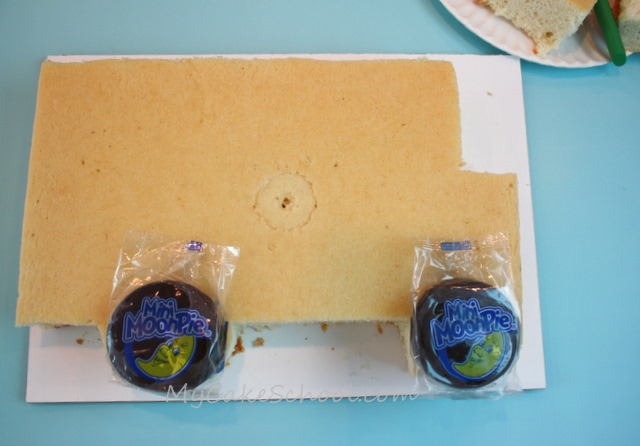
I'm going to use Mini Moon Pies for my wheels. Is that just a Southern thing? I don't know. But if you don't have any Mini Moon Pies, chocolate doughnuts or big chocolate cookies will work well too!
Perfect fit :0)
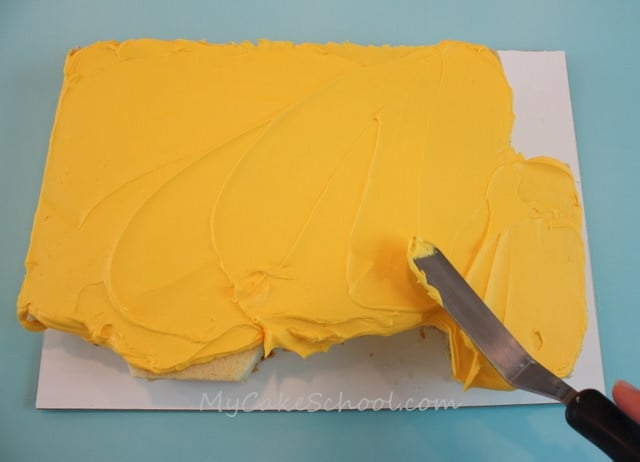
Now, It's time to start frosting. I used a crusting vanilla buttercream tinted Americolor Egg Yolk Yellow. You could also use a combination of yellow with a little bit of orange for the same effect.
After the buttercream had crusted, I smoothed over everything (as always) with a Viva brand paper towel.
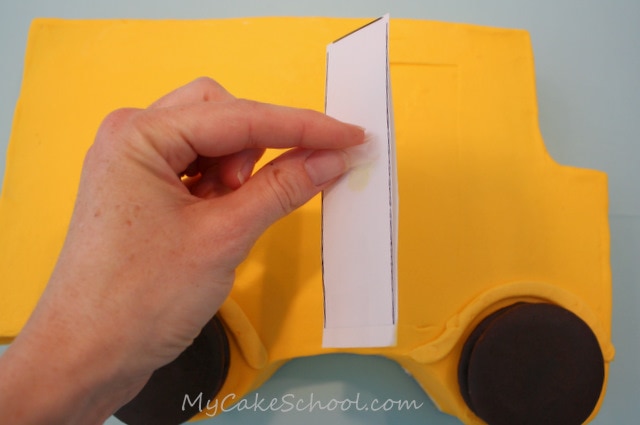
I made some cardstock templates for the bus doors (optional), as well as the windows. You really can leave off the doors since one side of the bus doesn't have them :0) --I didn't think of that until later!
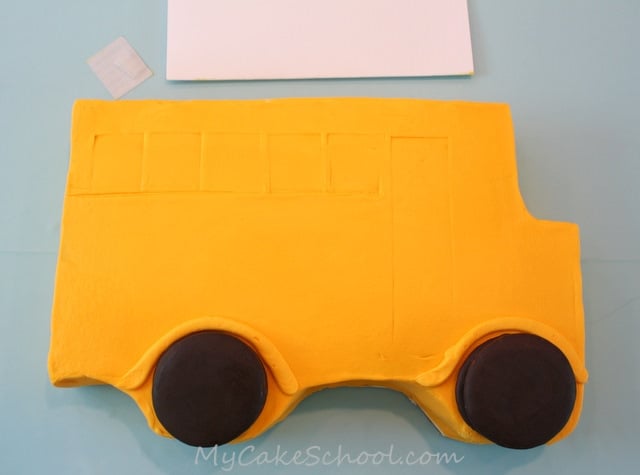
I waited until my buttercream had crusted and then I made impressions. That way, I could trace them later. If you're good at freehanding, you can skip the templates. You could also cookie-cut fondant squares to use for windows.
Here's my cake after I made the impressions. I used a folded sheet of typing paper to make the line that would run beneath the windows (2 ½" from the top of the cake).
If you want to borrow my template for the doors and windows-- Click Here.
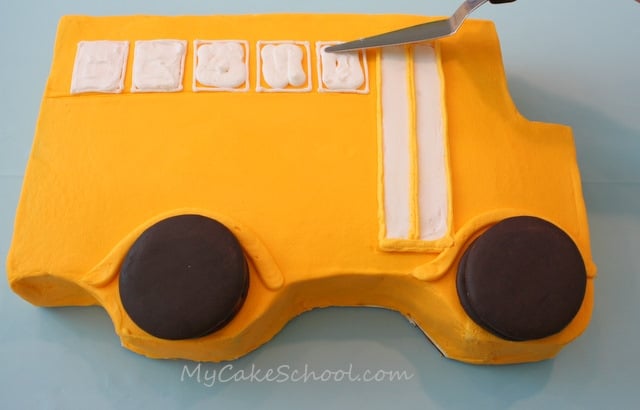
I outlined everything with a tip 3, and filled in with a tip 12...then smoothed with my spatula and smoothed even more with a piece of a Viva paper towel after everything had crusted.
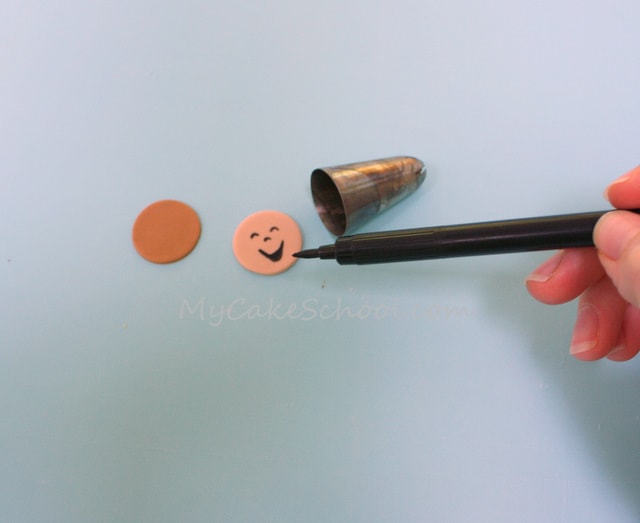
With a 2D tip, I cut out circles of fondant for my kids' faces. Then I drew on them with my food coloring pen.
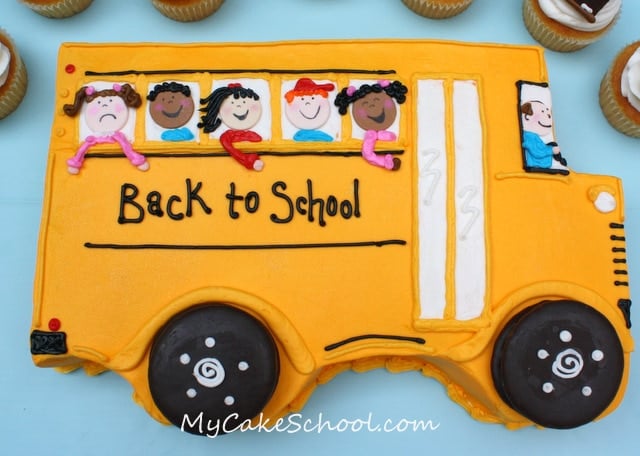
Then, just fill in the details! I drew on just about everything with a tip 3 or 4 in varying shades of buttercream, with the exception of the piping above the tires, which was done with a tip 12. I also used a tip 16 star tip for the border along the bottom of the cake.
Look how cute!
Back to School Cupcakes
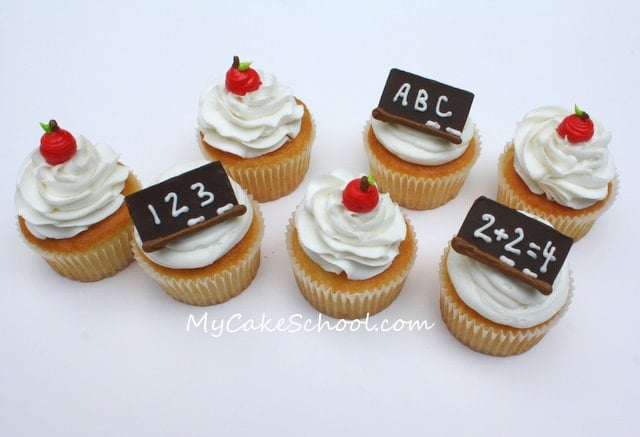
The only thing that would make this cake cuter is to be surrounded with cupcakes!! I made two really simple designs--- and if cupcakes are your thing, skip the cake altogether and make a platter full of these!!
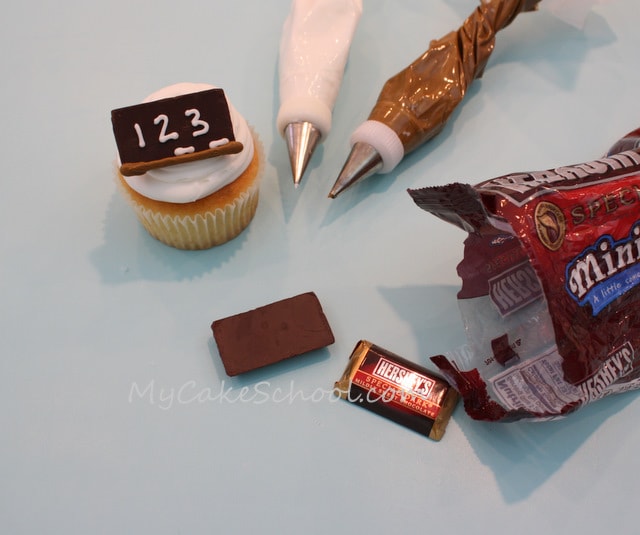
I made these blackboard toppers with a pieces of dark chocolate. (I used mini Hershey Special Dark candy bars). Then I piped the white buttercream writing on with a Wilton tip 2. The brown piping at the bottom edge is done with a Wilton tip 4.
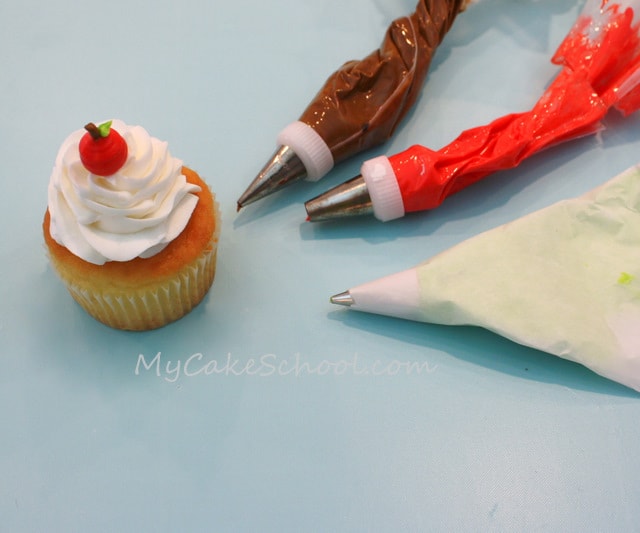
The second design is an apple--(red buttercream piped with a Wilton tip 12, and buttercream stem and leaf piped with Wilton tip 4)
Group Shot!....
That's it!! Let's have a look at the big picture!-- I think my favorite child is the one in the very back... hee hee. Just keeping it real ;0)
Hope you enjoyed the tutorial!! If you give the back to school cake or cupcakes a try, we would love to see!

Adorable! I can't wait to make one!
What a great idea....I think I'll try it. Oh and Jen the viva paper towel trick is an easy way to smooth your buttercream icing but it has to be a "crusting" buttercream. I'm sure Melissa has a tutorial on this site or you may be able to find info in the message boards.
What a wonderful blog, amazing tutorials you have here!!! I absolutely love it :)
Cookies for wheel - simple and awesome idea :)
espectacularrrrrrrrrrrr..love it,,god bless your hands
I love this cake, Melissa!! Very cute. Wish I had someone to make it for. :)
---Kathy
Everybody-thanks so much for your comments! I really do SO appreciate each one.
Jen--that sounds like a great tradition to me! As for the Viva paper towel method- what Tina said :0) -If you're not a member, I'm sure that you can find info also in a Google search--I didn't invent the method but I do love it!
Mrsscurry- Next year we'll have to do a homeschool theme too! :0) -- The cupcakes would work! I've seen some really cute BIG pencil cakes, or maybe a 3-D apple or books! :0)
Melissa, you always have the cutest designs!! I want to do this cake whenever I have the chance!!! :D
I just found about about your site from Twitter! And I love it so much! This cake looks pretty awesome!
I just made this cake last night for a back to school party. It really was so easy thanks to your tutorial. So appreciate all you do to teach us your mad cake skills!
Love it very cute
This is just to adorable, love it!
I LOVE the simple blackboard idea. Those are so cute, and everything together is just wonderful.
I also really loved the Reese's cup cupcake idea... maybe it doesn't hurt that Reese's are my fave!