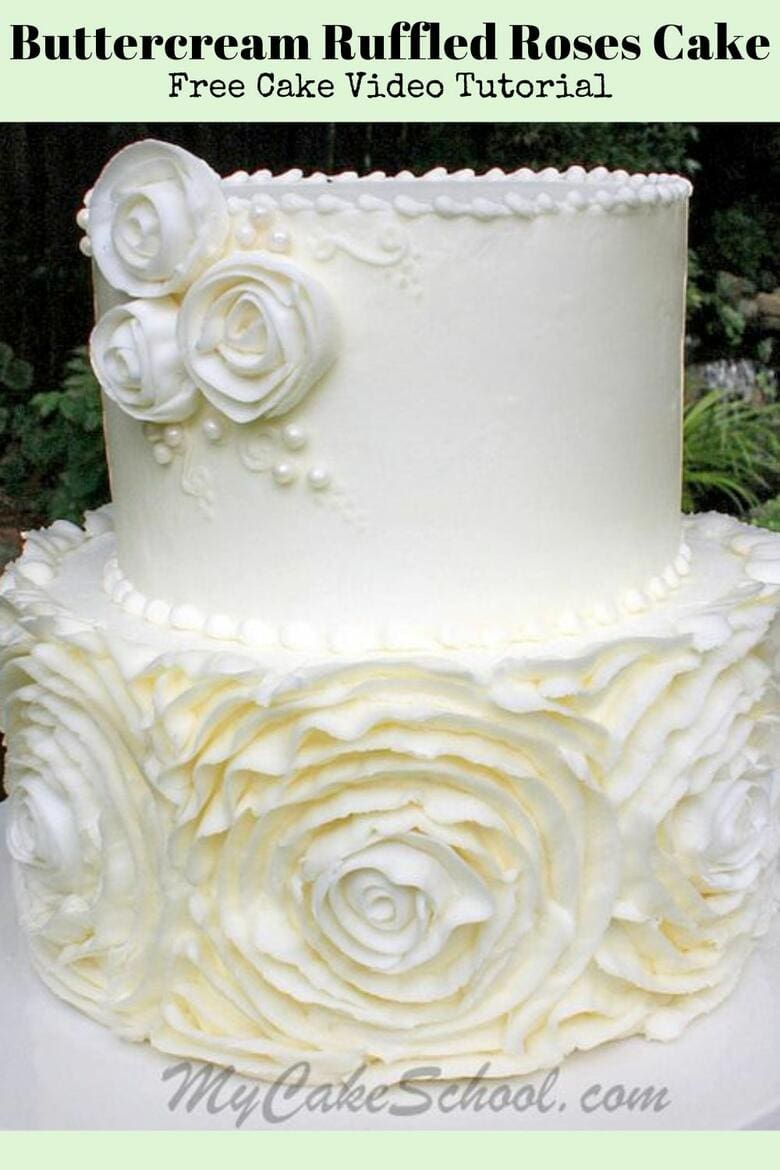
Buttercream Ruffled Roses Cake
I'm excited to share today's Buttercream Ruffled Roses Cake with you for a few reasons... its elegant, it is not nearly as difficult as most would imagine, and it's a technique that I previously thought was only possible in fondant!
Hooray for new buttercream techniques ;0)

Ruffles in all forms continue to be extremely popular in cake decorating, and I love the trend of incorporating large fondant ruffled roses around the sides of cake tiers.
Table of Contents
Fondant Ruffle Roses Option
I made a tutorial a couple of years ago on how to apply a single, large fondant ruffled rose to the side of the cake: Easy Fondant Ruffled Rose Cake But I have to say that I've been inspired by the trend of carrying several ruffled fondant roses all the way around the cake!
We later did an elegant Tiered Ruffled Roses Cake in Fondant as well!
Since I have a soft spot for buttercream & piping, I wanted to try this look in buttercream. I was so HAPPY to find that it is not nearly as difficult as I thought it would be!
Buttercream Ruffle Roses
The buttercream ruffled/ribbon roses that you'll see in my video are very similar to the ones that I have made in past cupcake tutorials, and even in my cascade of buttercream flowers tutorial.
This video just takes the technique one step further...and involves drying the small centers 2 days in advance. (See our note at the bottom of the page for an alternative to drying the centers!)
I hope that you enjoy it!
Materials:
My tiers are 8"/6", (each 4" tall)
I frosted my cake with High Ratio Buttercream Frosting- You could also use our Classic Vanilla or Fluffy Vanilla Buttercream.
Piping Tips Used: Wilton 104 petal tip for the roses, and Wilton 3 small round tip for the borders, and a Wilton 2 tip for scrollwork accents on the top tier.
Rose Nails
Waxed Paper cut into squares
*I used 7 roses around the sides of my cake and so I needed to dry 7 centers, plus another 3 centers for the top tier--for a total of 10 centers. (Dry a few more than you think you'll need.) -
Sugar Pearls- Optional
The usual: You'll need a cake board cut to the size of each tier, your supports of choice (I use bubble tea straws for 2 tiered cakes), and your cake base/pedestal
Freezing Option for Centers
***In a time crunch? If you are unable to dry your centers in advance, you can instead freeze the centers for 15-20 minutes or until firm.
Place on the cake and proceed as usual! The centers may have a bit of condensation as they warm to room temperature, but the shine will evaporate. This is a great time saver and a technique that I also use in our Buttercream Floral Wreath Cake Video Tutorial!
Enjoy the Video
Thanks so much for stopping by, we hope that you enjoy this elegant buttercream ruffled rose technique- it really is a lot of fun and we love the look! Keep this design in mind for birthdays, bridal showers, and even weddings!
The bottom tier would be beautiful in pink also- anything goes! ;0) Have fun with it!

Love the cake design and cake stand!
Wow...you make it look so easy and it's so lovely. I will have to try this.
This is such a great video! I think that it looks so much easier than using fondant. Can't wait to try this one out.
It's really lovely! I am thinking it would be beautiful for a small wedding cake. How do you think it would travel? Is there anything you'd do to prepare it for transport, or do you think you'd need to pipe the roses on site?
I am mexican,but i love you design and i want to take your classes
Its so pretty and elegant! You guys have done another wonderful job! Love it! Thanks
Irma... las flores pequeñas son iguales... uso el mismo metodo que con las grandes, usando solo los centros y si quieres le añades solo unas cuantas vueltas para hacerlo mas grande.
Love the buttercream rose technique! Most people I know prefer buttercream
and this allows for a beautiful design!
As always, this was awesome! I really love all your tutorials and I am very impressed with your technique. And what a blessing to have your momma right there with you with her help and advise. I'm so happy I signed up for your classes. It was well worth the money spent. God Bless and keep up the good work.
I can't believe you "pulled this off" with buttercream. I thought the cake was fondant until I clicked on the video. Amazing! I can't wait to try it :)
As always, your tutorial was great and your cake was beautiful. I have a question, though - would it be possible to create the ribbon roses ahead of time - allowing them to dry completely? Perhaps not making them quite as large as the ones on the cake, but large enough so that there would be less piping free-hand. Any bride would be elated with such a gorgeous cake!
If i make a single tier what could be done for the topper??