Christmas Tree of Buttons~Cake Blog Tutorial
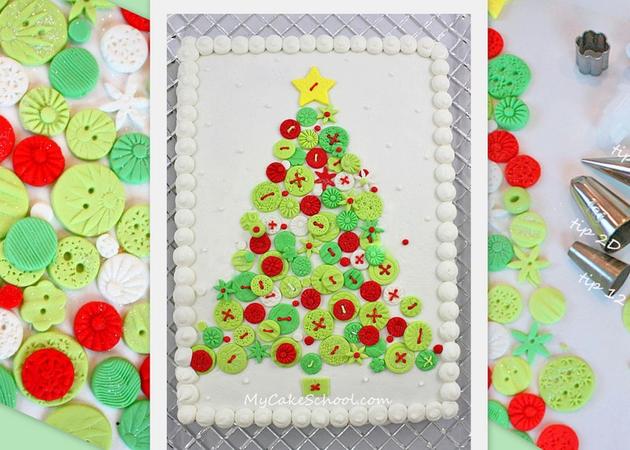
Today I'm going to show you how to make an adorable, unique Christmas Tree of Buttons cake design!
I've been going through a button phase lately--I've seen SO many cute and crafty decorations that incorporate multi-colored buttons in all shapes and sizes.
The designs are so happy and cheerful that I knew I wanted to jump on the button bandwagon. I'm not all that crafty, but just about anything can be translated into a cake design. This week, it's all about the buttons!
Have you ever made a button from fondant? If not, I'm about to show you how--
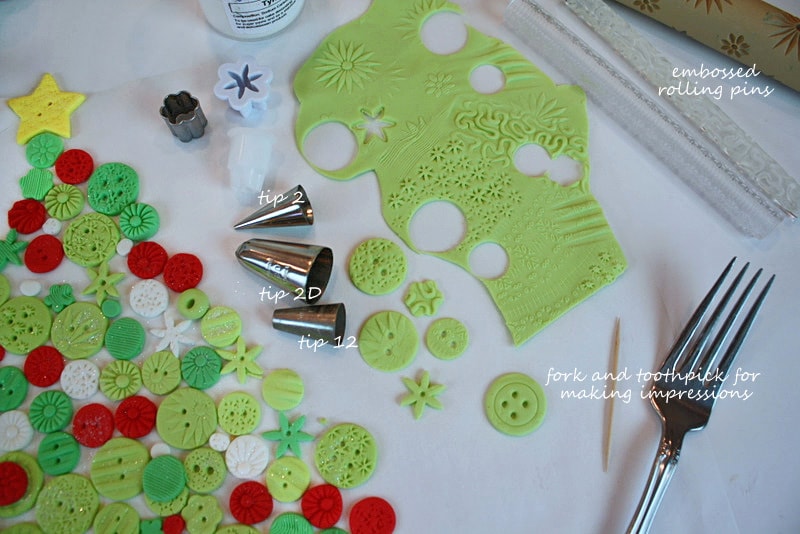
So basically all that you need is your desired colors of fondant (I knead a little bit of tylose into mine so that they will dry more quickly), you'll need tools of your choice for embellishing, a toothpick or small piping tip for creating the holes, and small cookie cutters or piping tips for cutting out your button shapes.
I used my 2D piping tip to cut out fairly large circles of fondant. It is also great for making star-like embellishments in the fondant. For smaller round buttons, I used my piping tip 12. A fork will give a nice ridged pattern in your fondant--be creative with your patterns!
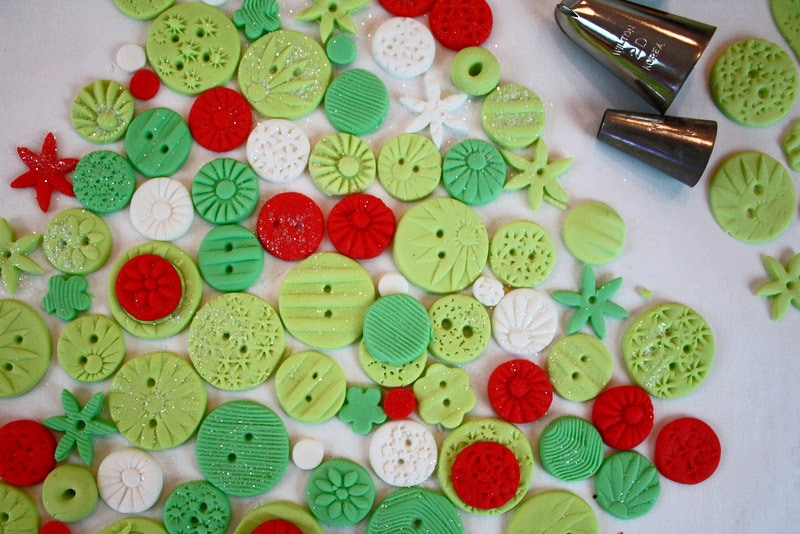
Here's a closeup. The shades of green that i used are Americolor Electric Green & Wilton Leaf Green. (The red fondant was pre-colored, ready made.)
I let my buttons dry on parchment paper for a while before placing on the cake so that they could set up a little.
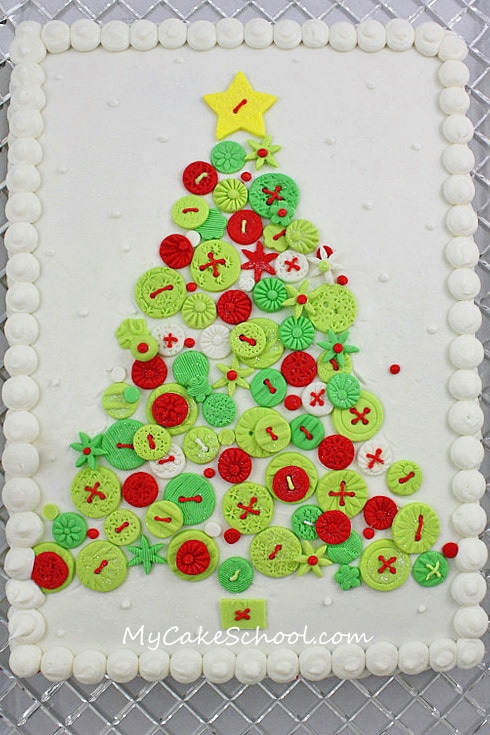
Next, it's time to transfer the buttons to the cake. in this tutorial, we're working with a 9x13 sheet cake, frosted in our Classic Vanilla Buttercream Frosting (with a ball border piped from a tip 12)
I started working from the top of the tree to the bottom, trying to keep a nice balance between the colors. You can overlap them for more depth.
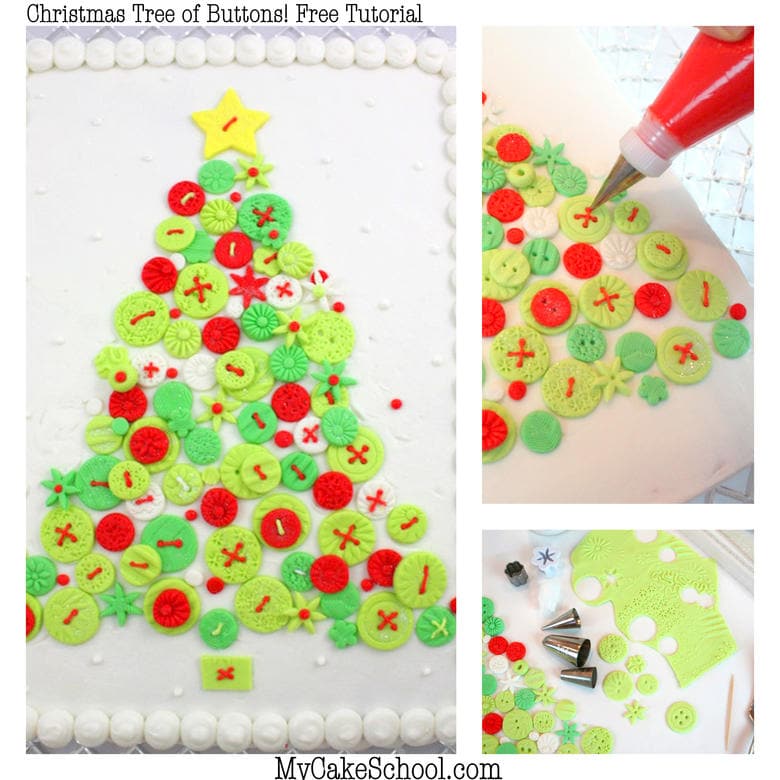
**You may find it helpful to chill your frosted cake in the freezer for 10 minutes just until the frosting is firm. Then, place your buttons. (This gives you the option of picking them up and moving them around if you'd like!)
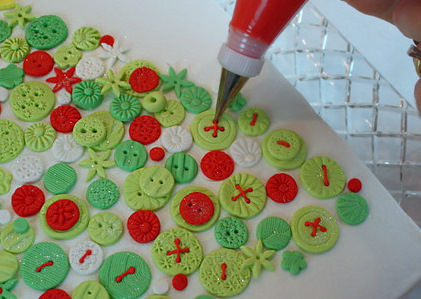
Finally, my favorite part---piping on the buttercream "thread". After arranging the buttons into the tree shape that I wanted, I used a piping tip 2 and gradually threaded my buttons with buttercream. This small step really pulls everything together.
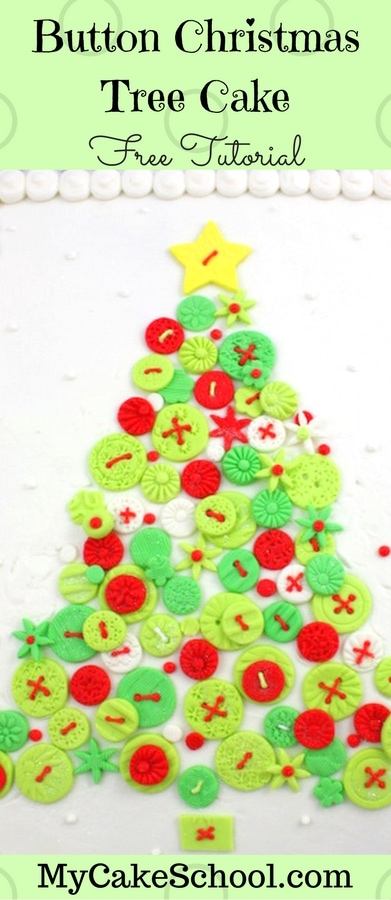
That's all there is to it! Here's our cute little tree!
I just love the cheerful, homemade feel of this cake design. So simple and fun. We hope that you enjoy this design as much as we have!
Thanks for stopping by!
Make sure to check out our Recipes Section for the BEST tried and true cake and frosting recipes! For more Christmas ideas, don't miss our Roundup of favorite ideas! You can find it here: Roundup of Christmas Cakes, Ideas, and Recipes!

Hi, we used the Fluffy Buttercream (half butter, half shortening) from the recipe section
The colors are stunning. Beautiful cake for Christmas.
I love this to infinity and beyooooooooond! (and then some.)
Love Love Love it. What an adorable cake M. You out do yourself every single time. Gorgeous. Got a macaron book for my bday yesterday and it has Christmas macarons in them. Think I am goingto try my hand at the famous cookie. There is even a macaron cake in the book. Cake with macarons all around the outside rimm. Adorable. Thanks for the idea. You always give us the bestest ideas. Have a blessed day girl!!!!! And to BE BE too.
What an adorable cake. I love it. Thanks Melissa.
Such a clever idea! Thanks:-D
I just love this. I think I am going to play all day and create!
Oh what a fabulous idea Mellisa, will have to try this one. Thank you once again for your great inspirations!!!!
Another fabulous cake! This is so adorable, Melissa.
Just love it! Very cute!!
That is sooo adorable!
What a crazy good idea! Thank you.