Devil's Food Cake with Raspberry Filling- Scratch Recipe
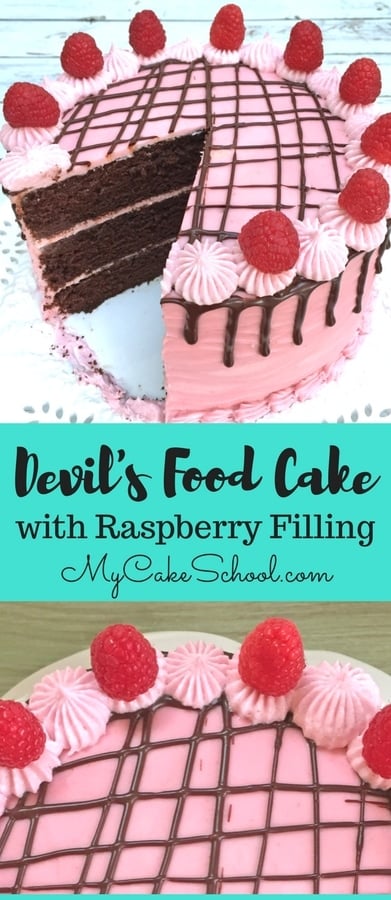
We are so excited to share a brand new scratch Devil's Food Cake recipe with you, complete with a raspberry and ganache filling and raspberry buttercream frosting.
The combination of rich chocolate cake with refreshing raspberry flavor is divine!
Much like our scratch Classic Chocolate Cake, this Devil's Food Cake is ultra moist and filled with chocolatey goodness.
Table of Contents
Reverse Creaming Method and Buttermilk Give this Cake Wonderful Texture!
Although our Devil's Food Cake recipe calls for the traditional mixing method, the resulting cake reminds me of cakes that use the reverse creaming method, as it has a velvety, melt-in-your-mouth quality.
This tenderness can likely be attributed to the buttermilk in the recipe, as the acidity of the buttermilk softens the gluten in the flour.
We've also added melted chocolate to the recipe, in addition to unsweetened cocoa, which lends a decadent flavor and deep color.
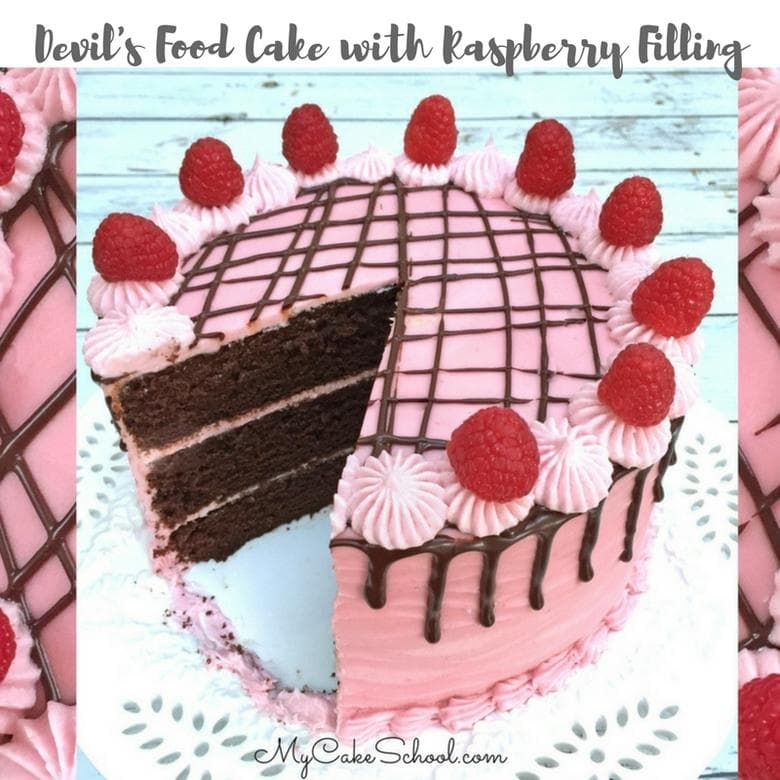
Raspberry Buttercream Frosting
Raspberry Buttercream is a new recipe for us, and it complements the devil's food cake perfectly!
As you'll notice in the recipe, we used a raspberry puree in our frosting recipe as well as for a simple glaze in between the cake layers.
The most time consuming part of the puree is straining out the raspberry seeds. If you are short on time, you can use seedless raspberry preserves instead, although you'll likely want to add a touch of pink coloring gel.
Now for the fun part...assembly!
How to Make a Devil's Food Cake with Raspberry Filling: Assembly
We piped a dam of buttercream on the first layer of Devil's Food Cake, followed by a thin glaze of raspberry puree.
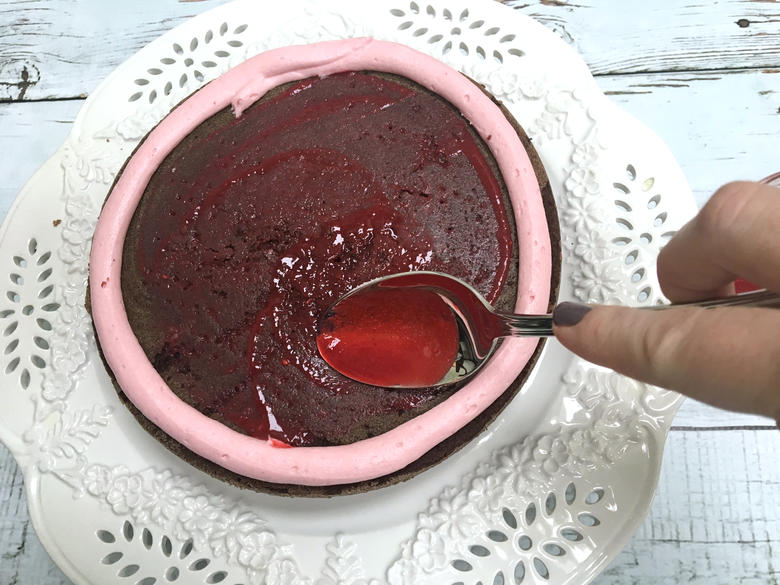
Next, we spread on a thin layer of ganache...
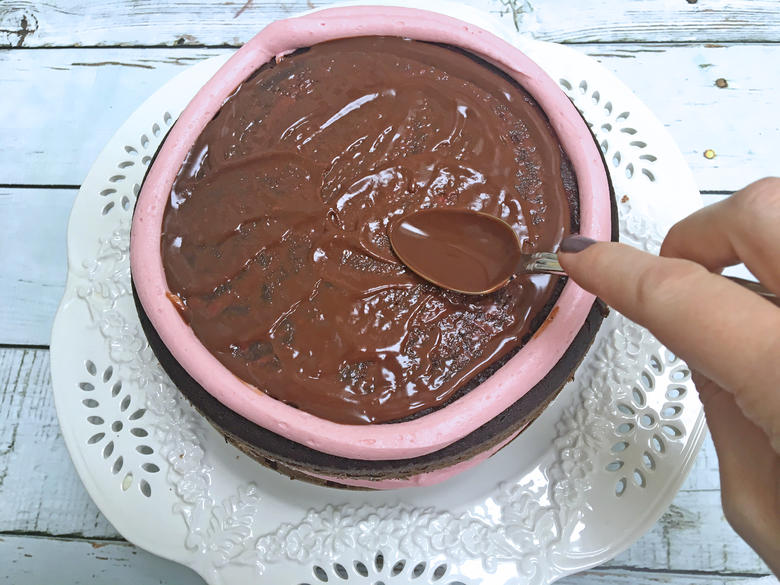
We followed up with a layer of raspberry frosting. (I find it's easier to pipe on and smooth the raspberry buttercream filling since we're layering it on top of the ganache filling.)
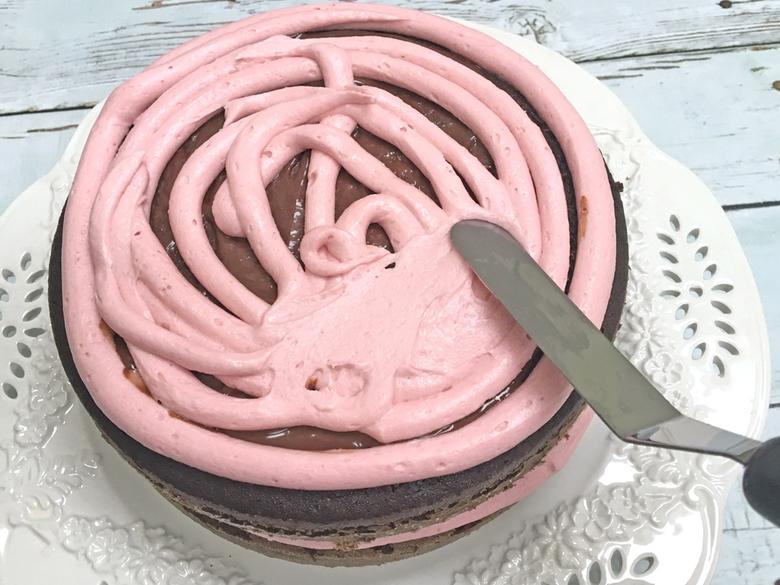
Repeat the steps for the second layer, and then finish with the top layer and a coat of raspberry buttercream!
Decorating the Devils Food Cake with Raspberry Frosting
When I frost my cakes, I like to do a thin crumb coat of frosting first. Then, I chill it in the freezer for about 10-15 minutes. I like to firm things up a bit before going back in with the final coat of frosting.
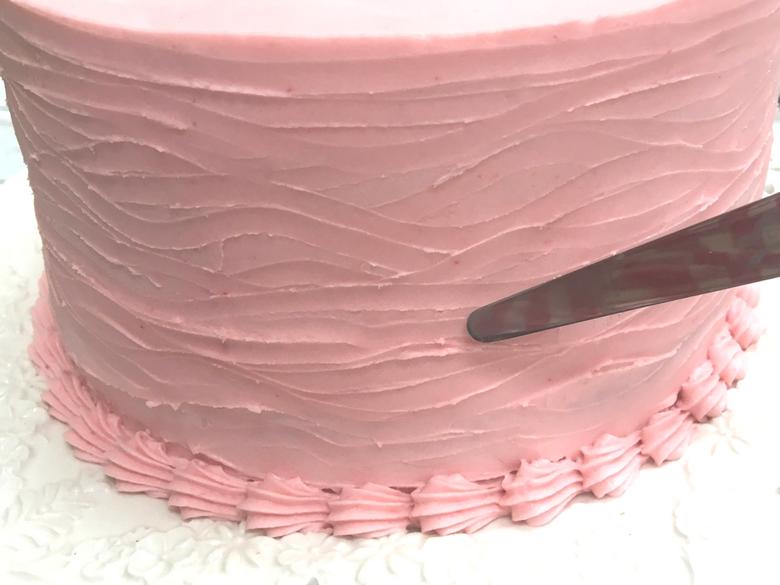
I smoothed the frosting as usual with a bench scraper (a spatula works too), and then went back over with my small, tapered offset spatula and applied it lightly to the frosting as I spun the cake on a turntable.
I moved the spatula slightly up and down as I worked my way around the cake. I love textured buttercream designs and this wavy texture is so unique (and so forgiving)!
To finish things off, I piped a simple shell border around the base of the cake using a tip 21.
Ganache Drip and Pattern
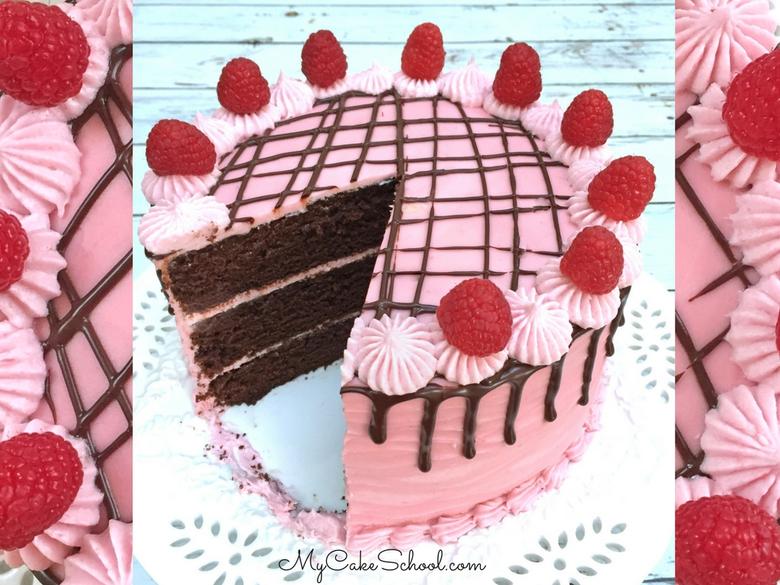
As a final touch, we added a simple ganache drip, a crisscross pattern of ganache over the top (piped through a disposable piping bag with the tip snipped away), and a buttercream border using a french tip 869.
Fresh raspberries was the final touch and I just love the look!
DON’T MISS THESE OTHER FAVORITE CHOCOLATE CAKES!
…and so many more! You can find a full roundup here: Favorite Chocolate Cake Recipes!
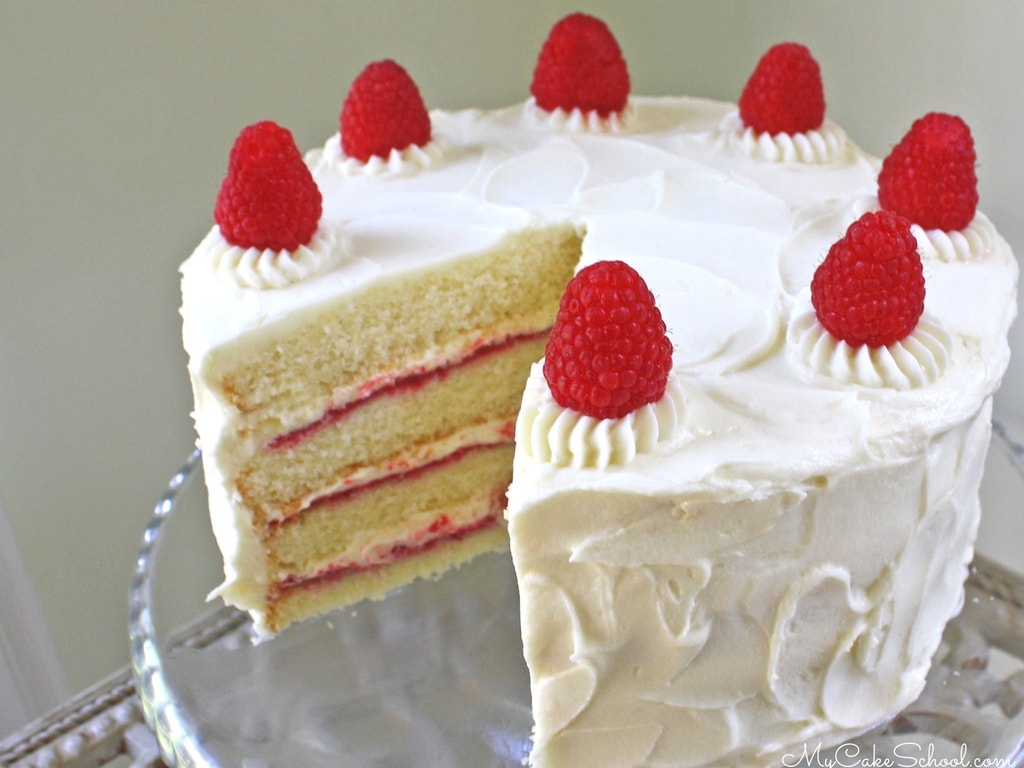
**Did you know that we have a White Chocolate Raspberry Cake also? Why not try both? Hop over to save the White Chocolate version for later!: White Chocolate Raspberry Cake
Enjoy the Recipe!
Devil's Food Cake with Raspberry Filling- Scratch Recipe
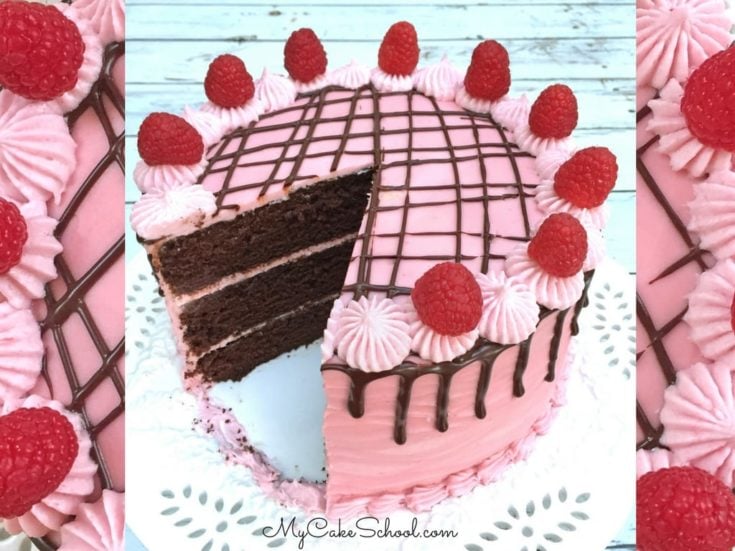
This Decadent Devil's Food Cake with raspberry filling, raspberry buttercream and ganache is sure to bring rave reviews!
Ingredients
For the Devil's Food Cake
- 4 oz. (113g) semi-sweet chocolate (coarsely chopped) - I used Baker's but other brands would be fine also
- 1 ¼ cup (302g) hot coffee - can be brewed or 2 rounded teaspoons (5g) instant coffee in hot water
- 1 cup (82g) unsweetened cocoa powder (measure, then sift)
- 1 cup (242g) buttermilk - a substitute for buttermilk is 1 Tablespoon vinegar or lemon juice in a 1 cup measuring cup then fill cup with milk. Stir and allow to sit for 10 minutes
- ¼ cup (54g) vegetable oil - I use canola oil
- 2 ¾ cups (322g) all purpose flour (plain in the UK)
- 2 teaspoons (10g) baking soda
- ½ teaspoon (2g) baking powder
- ½ teaspoon (2g) salt
- 12 Tablespoons (1 ½ sticks (170g) unsalted butter, softened slightly
- 2 cups (400g) sugar
- 4 large eggs
For the Raspberry Buttercream
- 12 oz. bag frozen raspberries, thawed. Seedless Raspberry Preserves can also be used, see NOTE below.
- 3 sticks (1 ½ cups) (339g) unsalted butter
- 9 cups (1035g) powdered sugar
- ½ teaspoon (3g) salt (optional) helps cut sweetness, popcorn salt is best to use as it will dissolve more quickly
- ⅓ cup + 3 Tablespoons (180g) raspberry puree — add more puree or milk as necessary to reach the spreading consistency you like
- 1 teaspoon (4g) raspberry extract, it gives a nice boost to the raspberry flavor
For the Ganache
- 6 oz. (171g) Chocolate (Semi-sweet or Dark) We used Ghirardelli
- 6 oz. (171g) Heavy Cream
- fresh raspberries for garnish
Instructions
For the Devil's Food Cake
Preheat the oven to 350 degrees
Grease and flour three 8 inch cake pans, add a wax paper or parchment paper circle to the bottom of each pan
Microwave the coarsely chopped chocolate for 30 seconds, let sit for a couple of minutes, stir, then microwave another 20 seconds.
It will not be completely melted at this point. Add the chocolate to the hot coffee and whisk the two together until the chocolate is completely melted.
Once you are sure the chocolate is melted, add the sifted cocoa and blend, then the buttermilk and oil, blend. A large 4 cup measuring cup is a good choice for holding this amount and for pouring. Set aside
In a separate bowl, add the flour, baking soda, baking powder and salt. Whisk for at least 30 seconds to blend. Set aside.
Add the softened butter to the mixing bowl and mix until smooth. Gradually add sugar and mix at medium speed 3 to 5 minutes until light and fluffy. Scrape the side and bottom of bowl.
Add eggs one at a time, mixing after each egg just until the yellow of the yolk disappears. Scrape the sides and bottom of bowl as needed.
Mixing no higher than medium speed alternately add the flour mixture and liquid mixture to the bowl, beginning and ending with the dry ingredients (3 additions of dry and 2 of liquid.
Pour into 3 prepared pans. Bake at 350 degrees for 25 to 30 minutes (test at 25 min.). The cakes are done when a toothpick inserted into the center comes out clean or with just a few crumbs attached.
Makes 9 cups batter
For Cupcakes: Bake at 350 degrees for 18 to 20 minutes
For the Raspberry Buttercream Frosting
Puree approximately 2 cups thawed raspberries in a food processor or blender. Put the pureed raspberries in a mesh strainer to strain out the seeds.
Press the raspberries through the strainer with the back of a spoon. It is thick so you will need to scrape the puree off the back of the strainer. You will use this for the buttercream recipe as well as for lightly glazing the cake layers.
In a separate bowl, cream the softened butter until smooth.
Gradually add the powdered sugar, ⅓ c. + 3 Tablespoons (180g) pureed raspberries, and raspberry extract, beating at medium speed until blended.
Continue mixing on medium speed another 3 to 4 minutes (longer if using a hand mixer), scraping the sides and bottom of the bowl occasionally. Slow the mixer down (#2 on a KitchenAid) and mix another minute, this will help to eliminate air pockets. If the buttercream is too thin add more powdered sugar, too thick, add more puree or a bit of milk.
Any extra raspberry puree can be thinly spread between the cake layers
Makes 6 to 6 ½ cups
*NOTE: If using Seedless Raspberry Preserves, instead of frozen raspberries the color will not be as pink so add a bit of pink gel coloring (we use AmeriColor Deep Pink). We added the color using a toothpick to control the amount. The amount of preserves will be the same as the frozen raspberry puree
For the Ganache
Place your chocolate into a microwave safe bowl.
Pour heavy cream over the chocolate and place in the microwave for 1 minute. (Times may vary, see our note below).
Remove and allow to sit for one minute.
Gently stir and press chips to aid in melting. If there are still unmelted chips, microwave for 5-10 seconds. Stir and repeat as necessary. Be very careful not to overheat.
*Microwave times may vary. If you are making a smaller amount of ganache, you should reduce the microwave time. If your chocolate hasn't melted after the recommended amount of time, simply microwave in small 5-10 second increments until it has nearly completely melted. Let sit one minute, then stir until smooth
Assembly
I piped a raspberry buttercream dam around the edge of the first layer of cake (about ¼ inch from the edge) using a disposable piping bag with the tip snipped away.
I glazed the layer with a thin layer of raspberry puree, followed by a thin layer of ganache.
Next, I piped on raspberry buttercream and spread it with a spatula.
Repeat these steps for the next layer of cake.
Top with the third layer of cake and frost with raspberry buttercream. (Before frosting, my layers were sliding a bit and so I chilled it in the freezer for 10 minutes to firm things up.)
After frosting the cake, I loaded a disposable piping bag with ganache, snipped away the tip, and created a ganache drip around the top edge of the cake as I rotated it on my turntable.
I then piped a quick ganache pattern over the top, and piped raspberry buttercream around the edge of the cake using a french tip 869.
I topped every other piped star with raspberries.

Oh that looks and sounds delicious! :-) I'm a huge raspberry fan. Can't wait to try it. Thanks ladies :-)
Wow! This is an amazing cake recipe and very pretty design. I know it'll be one of my personal favourites as I love both chocolate and raspberries. Cannot wait to try it! Great job as always.
Thank you Corinne, I happy you are going to give it a try. Let us know what you think!
I made this yesterday with my 2 granddaughters aged 11 and 9. This cake is absolutely delicious! The cake is moist and the deep chocolate flavor is wonderful. The cake, fillings and frosting blend together beautifully.
It is an involved cake to make but my granddaughters had a great time doing the various steps. We are novices at cake making and we were able to follow your direction and get a beautiful end result.
I have not been a fan of chocolate and raspberry in the past but this cake won me over.
My husband and all my other grandchildren loved it and gave it highest ratings. It is a spectacular cake to look at when finished.
Thank you for such a great recipe.
Hello Suzanne- Thank you so much for your feedback! I'm so happy to hear that you all liked the cake! xoxo
I made this cake for a friend. It was excellent. Everyone loved it. Very moist.
Hi Suzanne, Your post reminds me of when I used to bake with my granddaughters, lots of fun. They are teenagers now and like to bake when they have time. I'm happy all turned out well and your family enjoyed the cake. Thanks for taking the time to post your thoughts and review of this recipe.
Hi Fran, Wonderful!! Thanks so much for giving the recipe a try!
I have a question. The recipe calls for 1 cup unsweetened chocolate or 82gr. When I weighed the chocolate 1/2 cup was around 82 grams. I use Hershey’s unsweetened chocolate powder. I used 3/4 cup. What kind of chocolate do you use? And how much should I use?
Hi Fran, I use Ghirardelli unsweetened cocoa and I think it should be a similar weight to Hershey's. Are you using a measuring cup for dry measurements and did you zero out the weight of the measuring cup before adding the cocoa? Your cake should still turn out fine using 3/4 cup cocoa.
Hello,
Can it be stored in freezer for 4 days? Just tje layers...
I have a order due on Sun.. can i bake it on Wed.
TIA
Hi Tisha, Yes, you can freeze the cake layers. Wrap individually in plastic wrap and then aluminum foil. If you wrap while the cake layers are still warm it will add to the moisture of the cake. Cake layers can be frozen for 2 months with good results. To thaw, remove from freezer, once condensation forms on the aluminum foil, remove the foil and allow to come to room temperature. Cakes can be frosted with the layers partially frozen unless you are planning to use the Viva Paper Towel smoothing method. Layers need to be at room temperature for that smoothing method. Let me know if you have other questions.