Fish Cupcake Cake!~A Blog Tutorial
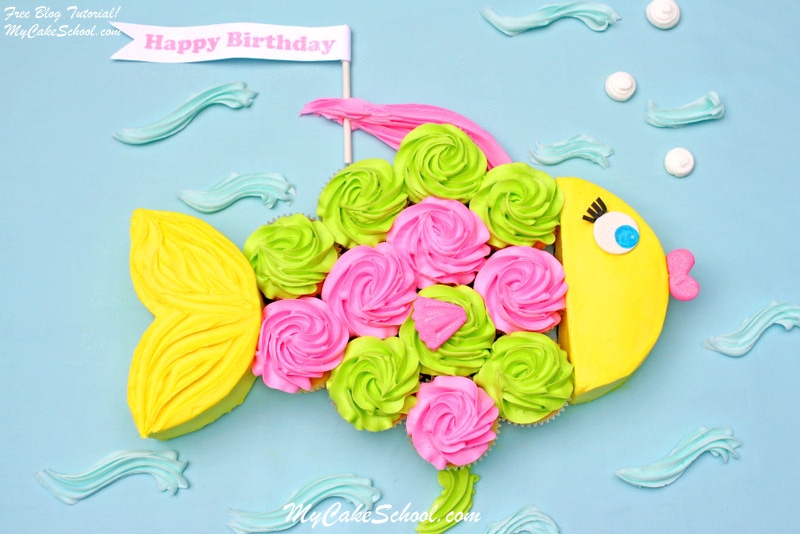
Today I'm going to show you how to make a fun & simple pull-apart fish cupcake cake design!
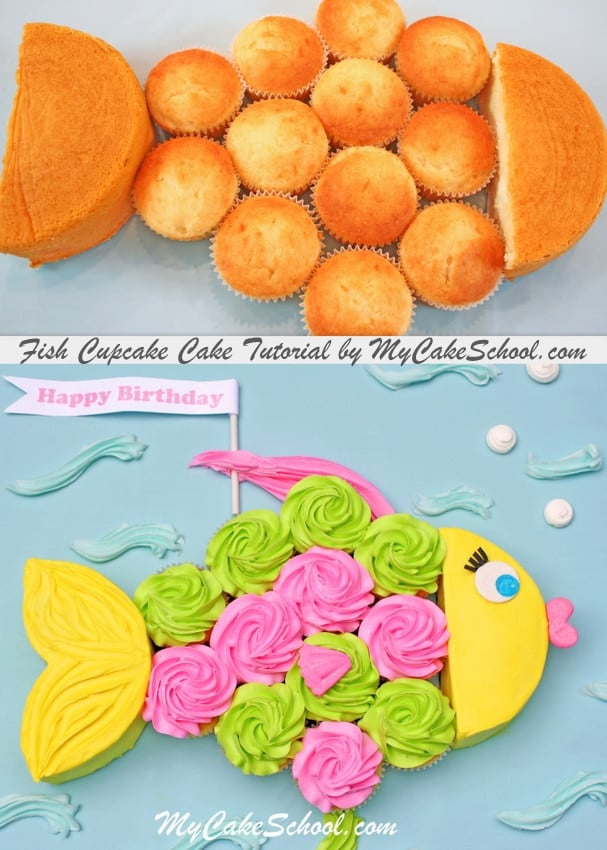
This cute and colorful cake is the PERFECT centerpiece for summertime or beach themed parties. All that you need are cupcakes and one small round cake layer!
Table of Contents
How to Make a Pull-Apart Fish Cupcake Cake
This is such a fun, simple technique! You can easily change up the number of cupcakes needed with this forgiving design. Here is what we did:
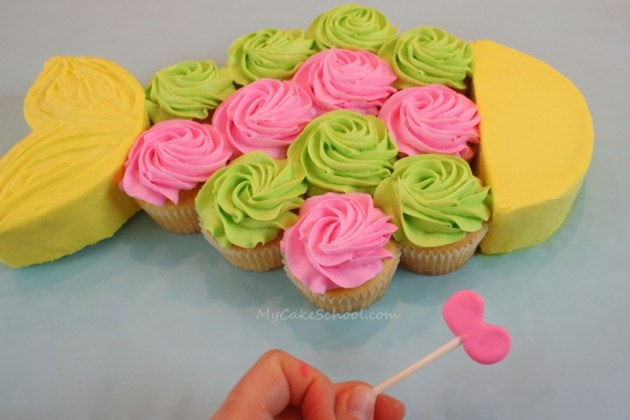
Arrange the Cake layer and Cupcakes into a Fish Shape
First, I started with one fat 6" layer (about 2" thick) and 12 cupcakes. My 6" cake layer is on it's own cardboard cake circle, and I split it into two parts (with one side being a little larger than the other).
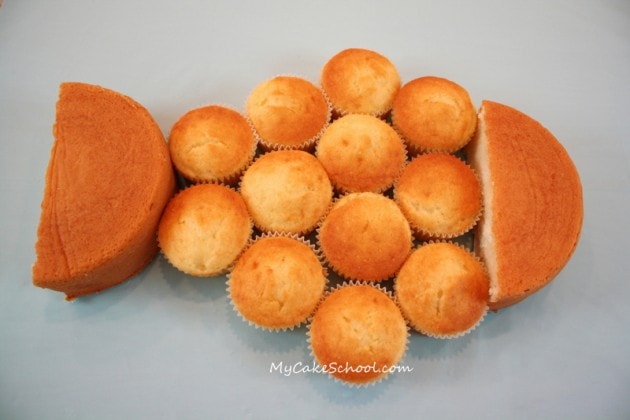
I nestled each row of cupcakes into the row next to it, so that the spaces in between the cupcakes could be kept to a minimum.
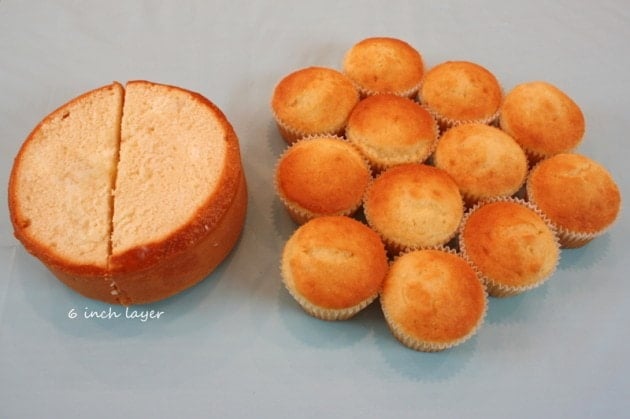
Here's the rough idea of Miss Fish. The part of the 6" cake that will become the tail is a little larger than the other half (which will be the face).
Both parts of my 6" cake are on a cake circle cut down to size. This makes moving them around easier (especially later after they've been frosted).
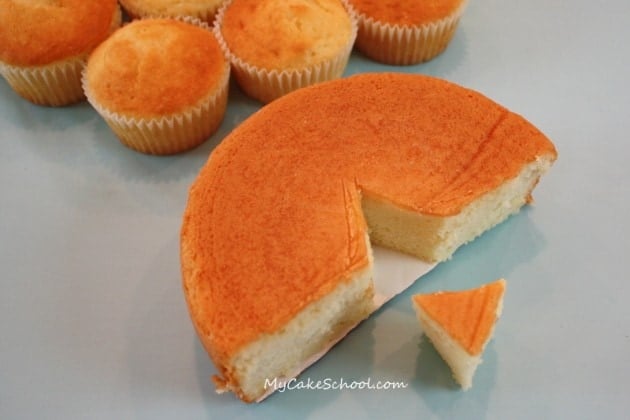
Using a serrated knife, I cut a little notch from the "tail end" of the cake to give it a better shape. Doing this exposed a little bit of my cardboard cake circle, which I then snipped away with scissors.
Frost the Cupcake Cake
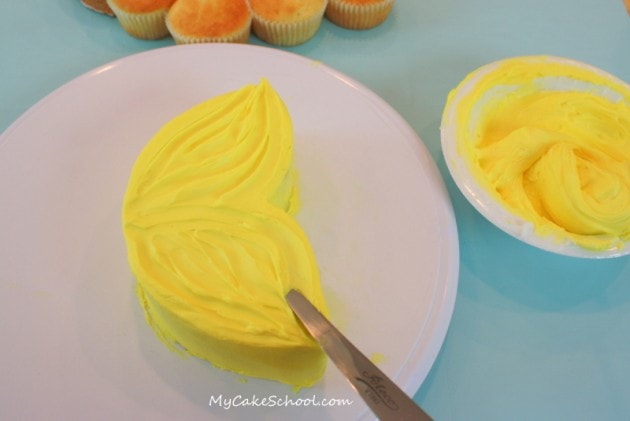
Time to frost our fish head and tail! First, the tail. I frosted it with a crusting buttercream (tinted Lemon Yellow) and then used my small tapered spatula to make ridges.
After frosting, I moved the small cake to the refrigerator to chill and firm up (so that moving it to the final board won't be as difficult later.)
*You can use any vanilla buttercream that you'd like. We used our Classic Vanilla Buttercream recipe but our Fluffy Vanilla Buttercream recipe would be a great choice also!
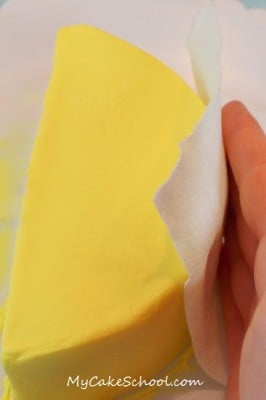
Next, I frosted the fishy head with the same yellow vanilla buttercream. I waited a few minutes for the frosting to crust, and then smoothed over it with a Viva brand paper towel.
(This is known as the Viva Paper Towel method of smoothing. Simply let your frosting crust, and then smooth over using a Viva brand paper towel or any brand of paper towel or napkin that has minimal impressions or quilting.)
Of course, this is an optional step--you can frost and smooth however you'd like! The hot knife method is another great option which involves chilling the frosted cake until firm and then using a hot spatula to iron out any imperfections.
 Moving the Cakes and Cupcakes to the Cake Board
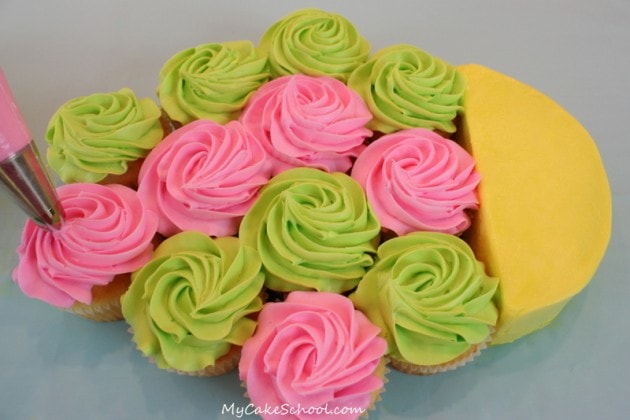
After chilling the head of the fish, I moved it to my final cake board and began filling in with the colorful cupcake body.
My cupcakes are swirled with buttercream (tinted Americolor Electric Green and Deep Pink) using a 2D large closed star tip.
For these basic swirls, simply do a basic outline the cupcake and then end in the center, pulling the piping tip up and to the side. (You can check out our free Cupcake Basics video tutorial for more details on swirls!)
To secure the head to the cake board, I spread the bottom of the cake cardboard that the head is resting on with a little buttercream.
For the cupcakes, I added a small dot of buttercream to the bottom of the cupcakes that make up the outer edge of the fish, to secure them to the board.
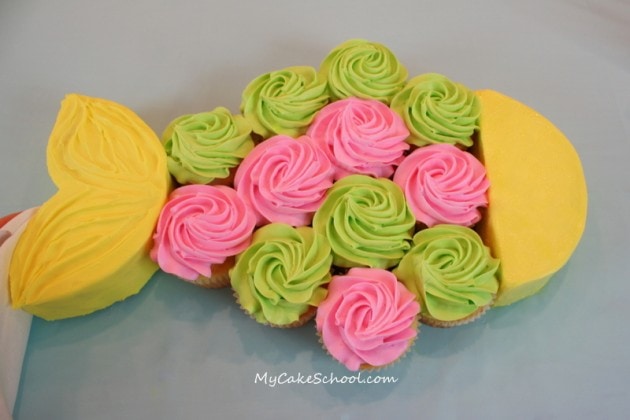
Next, I removed the fishy tail from the fridge, spread a bit of buttercream on the bottom of the cake cardboard that the tail is sitting on, and "glued" it to my board right next to the cupcake body.
In the photo, you can see that I'm gently pushing the cake tail close to the cupcake body--I'm using my paper towel to prevent fingerprints!
Now it's time to bring our fish to life! First, I made some funny fish lips from fondant (I kneaded in a little tylose to firm it up more quickly).
I wanted to keep these funny fish lips lightweight, but thick enough in the middle for me to insert a lollipop stick anchor. It dried for about an hour and was ready to go...but to be on the safe side, go ahead and make it a day or two in advance.
If you want to skip the fondant, just pipe on some buttercream lips with a Wilton tip 12 or other medium to large size piping tip.
Adding Fondant Accents to the Fish Cupcake Cake
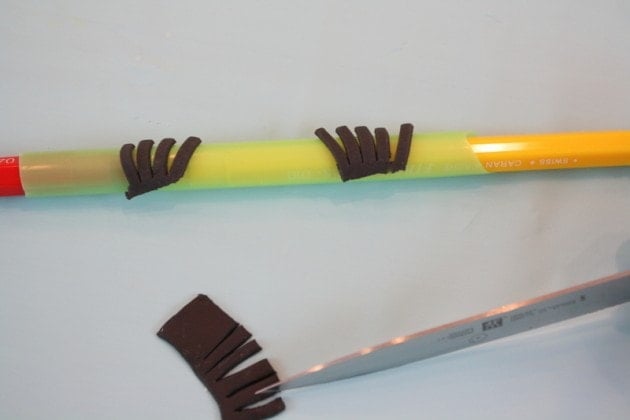
My fish cake is going to be a bit glamorous with nice, long eyelashes! I made more than I needed just in case there were any breakage issues.
You can see below that I cut a strip of black fondant (with a little tylose powder kneaded into it for a faster dry time) and fringed it with a knife to create the eyelashes. I dried them over a bubble tea straw, but any number of rounded forms would work.
After about an hour, the eyelashes held their shape nicely...(but again, dry times can vary depending on the humidity in your kitchen, etc. It's always best to allow 1-2 days or at least several hours for gum paste pieces to dry!) --
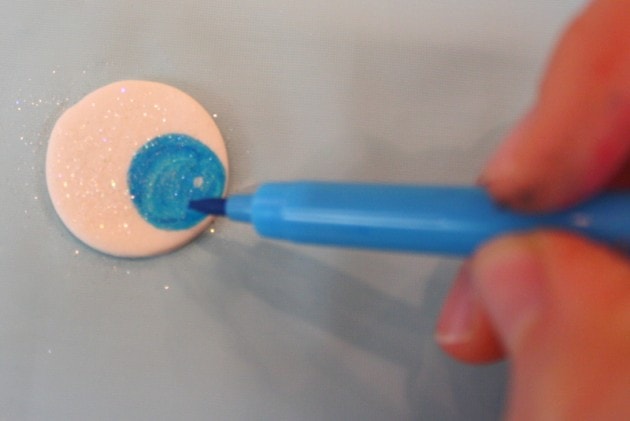
Next, I gave our fish a big blue eye using a circle of white fondant and a blue food coloring pen. I also gave it a little sparkle with some white disco dust ;0)
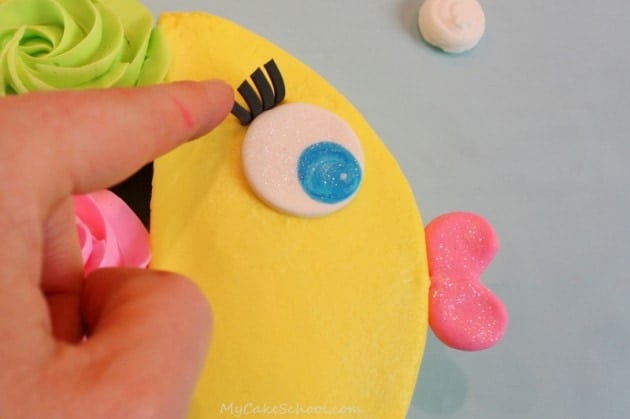
Now, we're ready to put everything together! I pushed in the anchor for the lips (and gave them a little sparkle of white disco dust). Then, I placed on her eye and pushed in the curled eyelashes!
Finishing Touches
I added a few final touches to tie everything together. Using a 2D tip, I added waves of blue buttercream, and I also added fish fins on top and bottom as well as a little fondant fin.
The air bubbles are piped in buttercream with a Wilton tip 12 (medium round tip). The birthday sign is made from white cardstock and simply wrapped around a lollipop (cookie) stick.
Ta da! So much cuteness! This sweet fish cupcake cake is swimming to a party near you!
More Beach Themed Cakes and Cupcakes
If you liked this tutorial, don't miss our other beach themed cakes and cupcakes! These would be great for kids birthdays, summertime parties, beach-themed parties and more!
Tiered Beach Cake- Free Video Tutorial
Mermaid Splash Cake- Free Video
Beach Cake with Beach Couple Cake Toppers- Free Video
Beach Cupcake Tutorial- Free Blog Tutorial!
More Cupcake Cake Tutorials
If you love the convenience (and cuteness) of cupcakes cakes, don't miss this collection of The BEST Cupcake Cake Ideas and Tutorials!

That is amazing and so simple, my daughter will love this. Thank you for sharing it :)
This is soooo cute... I love the design. You are such a talent!!! I will definitely be making this!
This is gorgeous, I love it...thank you!
fantastic
Too cute!!
Awesome...thanks for sharing!!!!
I love it! My daughters pre-k class just started a chapter on ocean & beaches to finish up the school year....this is perfect.....I'm making this! Thanks so much!
perfect as always!!! YUM! Love the colors you chose as well.
Very very nice!
Really Cute cake, and a great idea. Thank You for sharing this.
I love it. Thank you :)
It so cute u guys hav lovely ideas