Happy New Year Cake with Stars
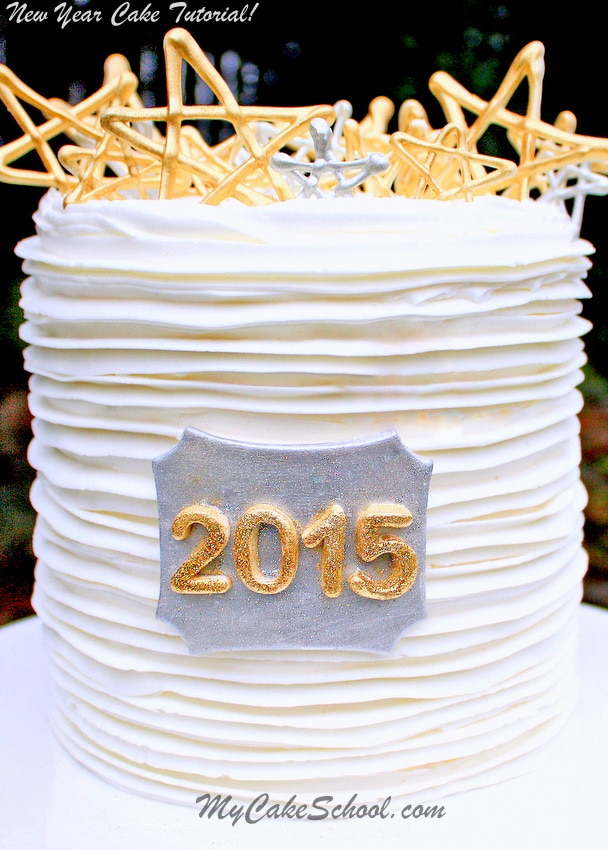
The new year is almost here and we wanted to share a quick and easy Happy New Year Cake with Stars cake design!
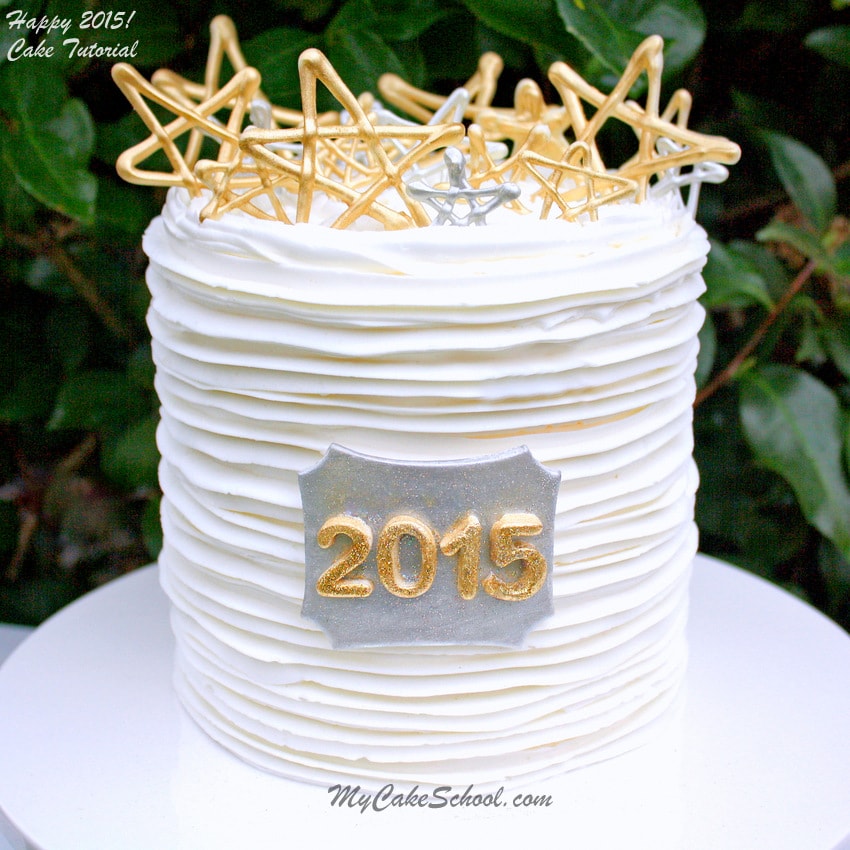
This beautiful, simple New Year's Eve cake design features elegant (yet very simple) buttercream piping around the sides, and is topped with chocolate candy coating stars!
Table of Contents
Fun & easy Piping Technique
First, I truly love the look of piped buttercream on cakes. In fact, the more piping, the better! It's often a quicker option than applying frosting with a completely smooth finish, and I love the dressed up feel.
I often use my trusty 2D tip to pipe vertical ribbons of buttercream onto cakes....but today I wondered what would happen if I piped horizontally instead. The result is so pretty...and so easy! It's my favorite part of this tutorial ;0) A 1M piping tip works great for this technique as well!
How to make Our New Year's Cake
First, I crumb coated my cake with a thin layer of buttercream.
We used this Fluffy Vanilla Buttercream but any frosting that holds it's shape nicely to piping would work well. Another great recipe is our Classic Vanilla Buttercream recipe, which is butter-based rather than butter & shortening based.
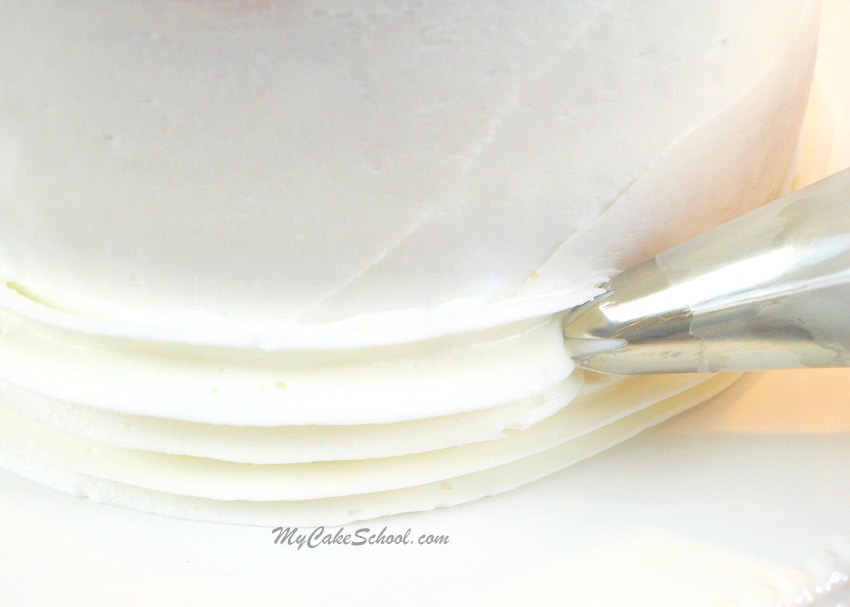
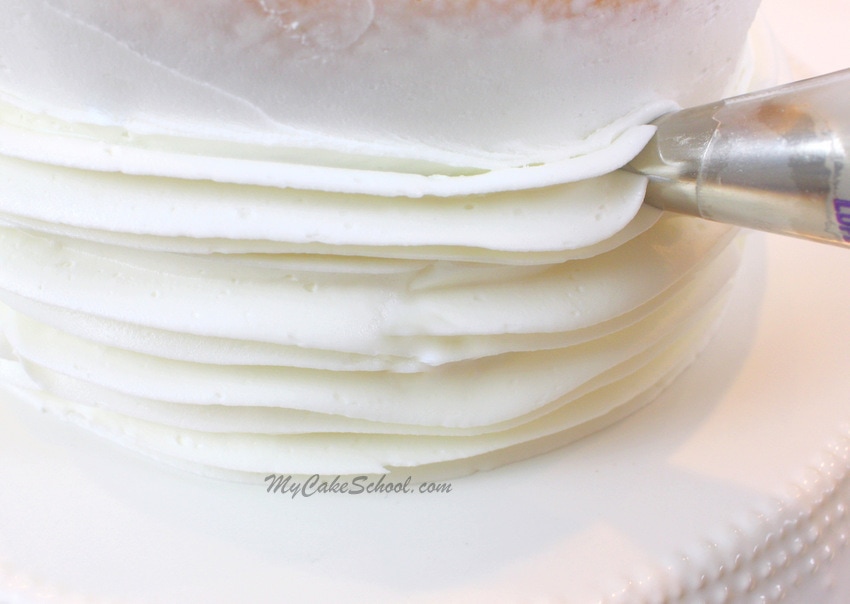
Just after crumb coating, and starting from the bottom of the cake, I piped long strands of buttercream with my 2D tip. If you have a turntable, it makes things a bit easier so that you can rotate the cake as you pipe.
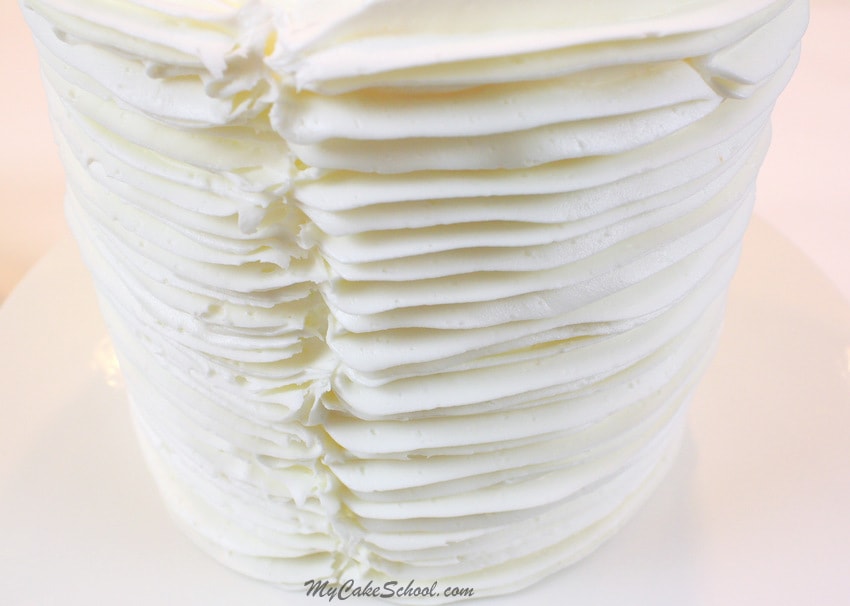
Here is a shot of the back of the cake. I stopped and started my bands of frosting in the same spot, creating a seam all the way down.
If the seam bothers you, you can pipe a vertical line of small rosettes, or add sugar pearl "buttons", but I like the look just as it is ;0).
The piped frosting was finished in just a matter of about 5-10 minutes!
For more fun piping techniques with a large star tip (1M or 2D), check out our cake decorating tutorial for Elegant Piping with a 1M Tip.
Creating the Fondant Plaque
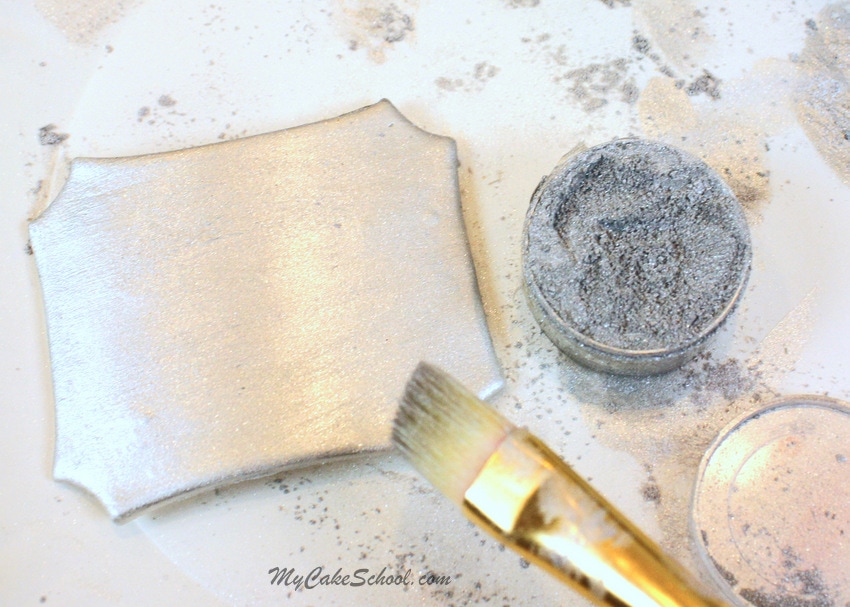
Next, I created a fondant plaque. We actually used a plaque cookie cutter for this.
If you don't have one & would like this same shape, you can use a rectangular cutter and then snip away the corners with a small circle cutter or piping tip.
I dusted my plaque with silver luster dust. (Rolkem Super Silver)
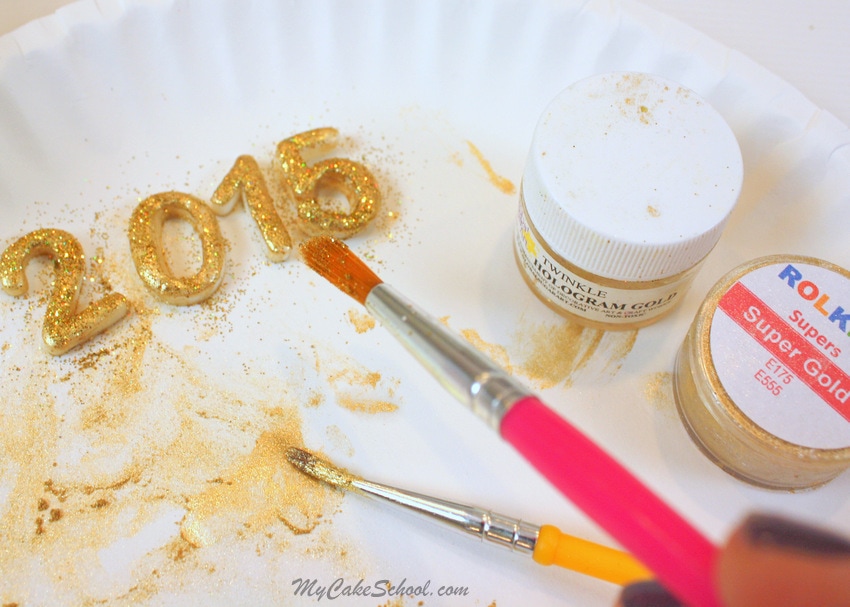
My fondant numbers were cut using a Wilton cutter set. I dusted with gold luster dust (Rolkem Super Gold) & sparkled with hologram twinkle dust.
 Chocolate Stars
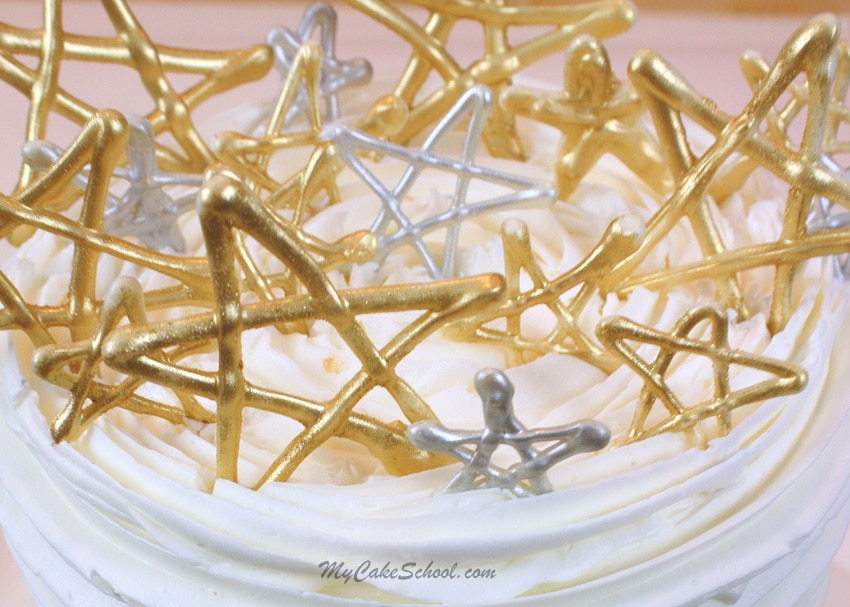
Now for the chocolate candy coating stars. I LOVE these and they give great height to the cake!
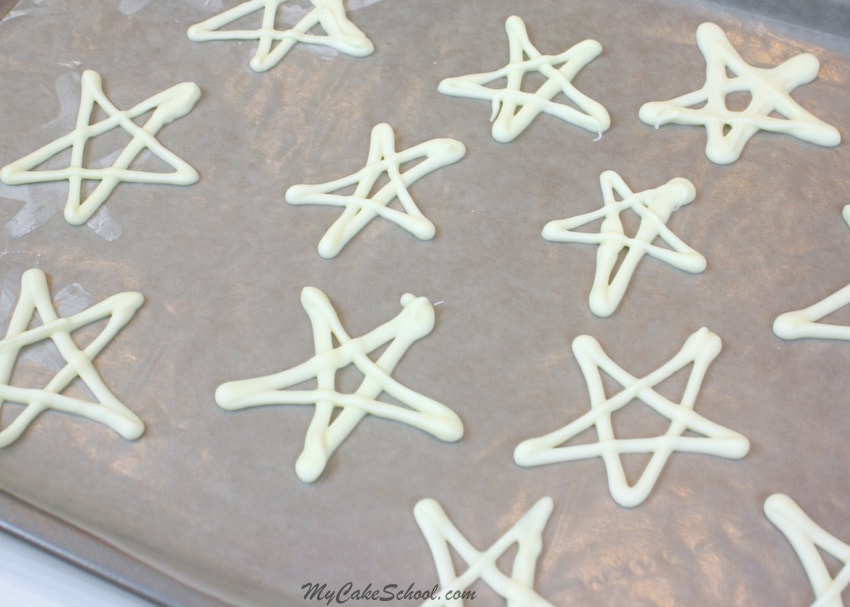
First, I melted white candy coating/bark coating and spooned it into a disposable piping bag (with the tip snipped away).
Then, I piped lots of stars onto a waxed paper lined cookie sheet. I chilled in the freezer for about 5 minutes so that they would set up much more quickly and could be easily handled.
Next, using a dry paintbrush, I dusted my stars with silver and gold luster dust.
Pearl dust would have been nice too! I chilled the dusted stars one last time for a few minutes before placing them into the frosting.
(* Use your preferred luster dust for your stars. I used Rolkem Super Silver & Rolkem Super Gold luster dust for mine, which I ordered online. You could also sprinkle your stars with sparkling sugar/sprinkles or sugar pearls before they set up, or by using a little piping gel as adhesive.)
Make sure that you check your metallic dusts to see if they are food safe!
And that's all there is to it! I love that his cake is a little bit elegant and a little bit rustic all rolled into one. It is such a fun and simple design that could be used for birthdays as well- and the piping technique works for any occasion!
Thanks for stopping by our site, we truly appreciate it! Wishing you all the best in the new year!
Don't miss our Collection of Favorite New Year's Cake Recipes also!

 Chocolate Stars
Dear Melissa. I'm sure my subscription has run out, since I always pay by check I need to have your address again for payment. My name is Barb Cox My email address is : babs101@fuse.net. Thank you, Barb
Hi Barb, I will send you that information.
I just got a Wilton decorating triangle. it gives different types of designs. I would like to try it on the sides of a cake. Do I need to smooth the cake sides first? Thank you.
Hi BakerJudy, you don't need to smooth the sides first. I do like to apply my frosting & then sweep around the sides with my bench scraper just to make sure the frosting is a consistent thickness. Have fun! I love decorating combs. ;0)
Love this Melissa!! I also love covering a cake in piped buttercream - so easy and so pretty!! xx
Thanks for sharing!
Best Wishes and Happy New Year to you! More Power
Melissa/Bebe,
This question does not pertain to the cake above. I was making a buttercream frosting today and the buttercream cuddled on me. Can you tell me what I did wrong. The buttercream came out like scrabble eggs, lost its volume with milk at the bottom of the mixing bowl. Did I over beat or perhaps had to much heat to the 4 egg whites, 1 cup of light brown sugar and 1/4 tsp salt which was over simmering hot water? I am thinking that I might have over beat the mixture when adding the 3 sticks of diced butter which was at room temp. After adding the butter, that is when the frosting came out looking like scrabble eggs. So I decided to use it on the cake any way because the flavor was great. Of course I had a hard time spreading it on the cake because it kept sliding off. The cake itself is great, it is just the frosting is lumpy. I will try this frosting again. Please give me feed back. Thanks for your help.
Hi Cecile, when the mixture separates and looks like cottage cheese or as you said scrambled eggs, you have broken buttercream, but it can be fixed. To repair broken buttercream, mix 5 minutes or a bit more to see if it will come together again. Another option is to remove about 1 cup of the mixture and microwave 5 to 10 seconds (soft but not hot) and slowly pour the melted buttercream into the mixing bowl while the mixer is on low speed. This should bring it back together. Click on this link for a short 1 minute video presented by Martha Stewart on fixing broken buttercream. I am going to give this method a try the next time it happens to me.
Absolutely love it!
Dear Bebe,
Thanks so much for letting me know what was wrong with my buttercream. Now I know what to do the next time when I have buttercream problems. I knew I was coming to the right person to get the right answer from you and Melissa. Again, many thanks.
Cecile
I love this frosting technique! Thank you for sharing.
Loved the cake. How did you make the plaque stay on the buttercream? Did you use more buttercream or piping gel?