How to Make a Cake with Zebra Stripes on the Inside!
Today I'm going to demonstrate how to make a cake with zebra stripes on the inside! This is such a fantastic surprise-inside cake and a fun alternative to a traditional chocolate and vanilla marbled cake.
By the way, I did not invent the zebra cake. I'm not sure who did--but if you google zebra cakes, you'll see all kinds of recipes that point to basically the same outcome--very cool looking zebra slices! You'll see that part in just a second.
First, let's talk batter-- You'll most often see chocolate and white zebra cakes, but for a fun twist, you can tint your batter with coloring gels to create all sorts of unique combinations of colorful stripes!
We went the boxed cake route and bought a box of Duncan Hines Devil's Food Cake, and a box of Duncan Hines French Vanilla. We chose these because they don't have pudding in the mix (like Pillsbury & Betty Crocker, which can be a little thick for this project--although I love them for anything else).
We prepared the batter for each cake mix separately and found the batter to be just the right consistency. If the batter is too thick, the effect will be more difficult to achieve. If they batter is very thin, it may spread too quickly.
(*** If you would like to try this cake with a scratch recipe, you can choose your favorite white or yellow cake recipe and then divide it approx. in half-- you can stir approximately 3 tablespoons or so of dutch processed cocoa powder into one of your bowls of batter to create chocolate batter.
Now, let's make a zebra cake!
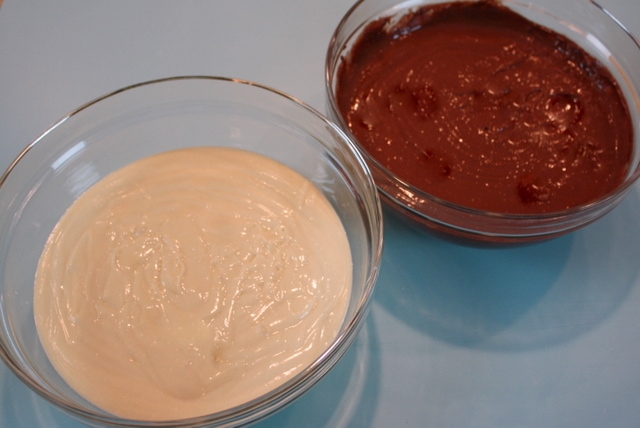
We started with our two bowls of cake batter....
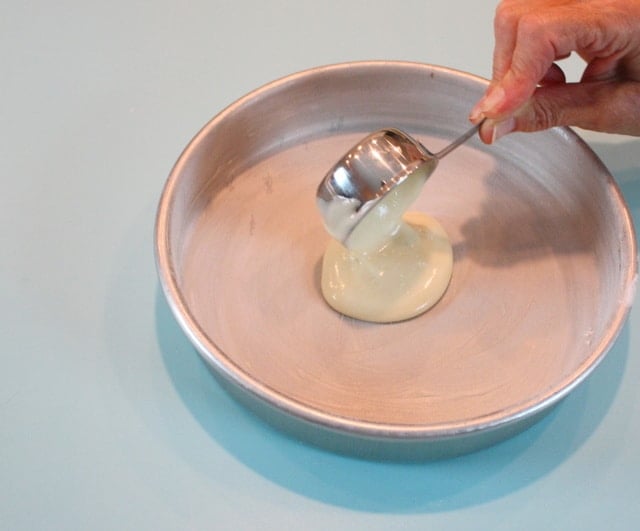
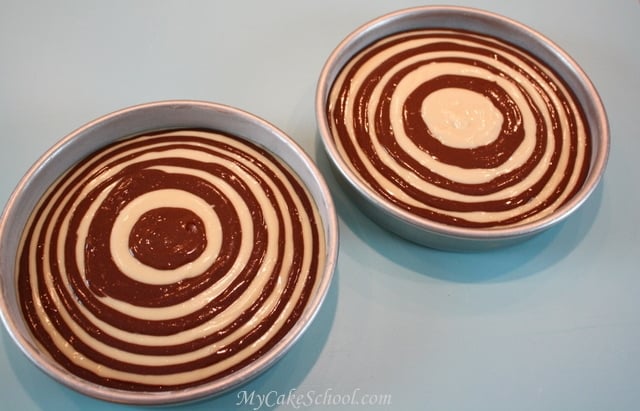
Then, we poured ¼ cup of vanilla batter into the middle of our 8" pan. It will spread a little bit. Then...
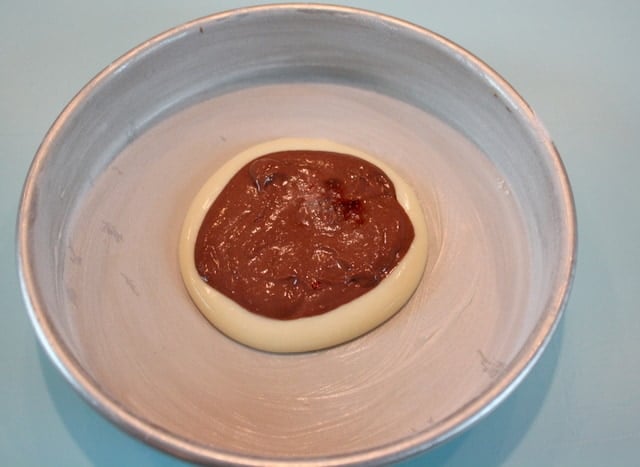
Measure out a ¼ cup of chocolate batter and pour it in the center of your vanilla batter.
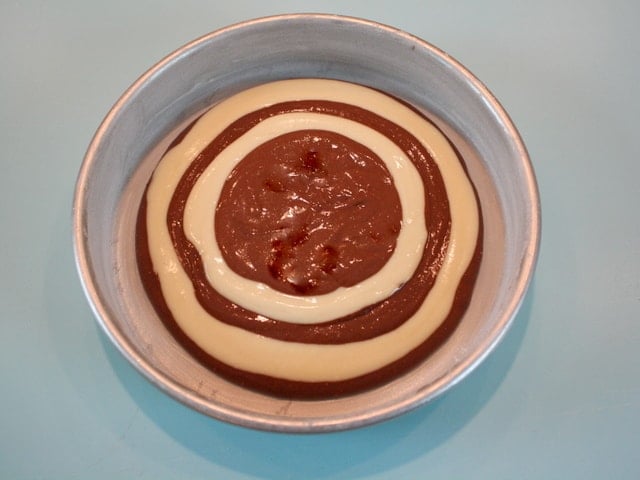
Repeat this process, continuing with ¼ cup scoops of alternating flavors, each flavor of batter dropped into the center of the previous circle of batter. The batter is thin enough that it does not take long at all for the batter to spread and push out a little bit.
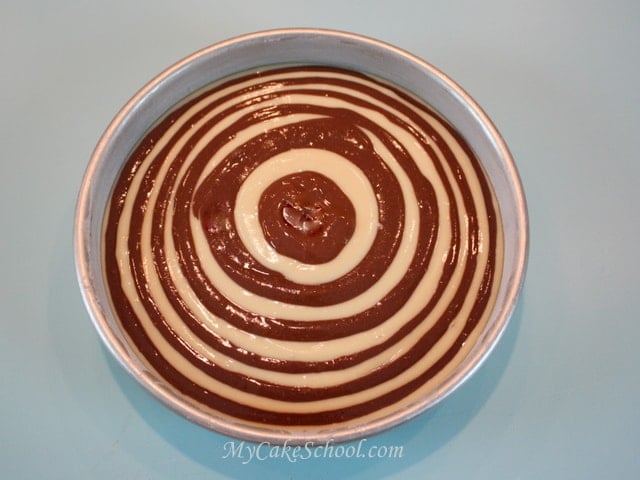
Continue the process until your pans are approximately ⅔ full. (We had a couple of cups leftover, which we used to make extra cake layers for another time.)
Look how pretty!...
This beautiful striped batter is ready for the oven!
Well...here's where it would have been nice of me to take a picture of the baked layers. They look exactly like the above picture, only...baked. :0)
I assembled my fat two layer cake as I always do...the bottom layer right side up, and the top layer top side down (with buttercream in between). I'm sure that the zebra effect would look pretty no matter how you stack your layers.
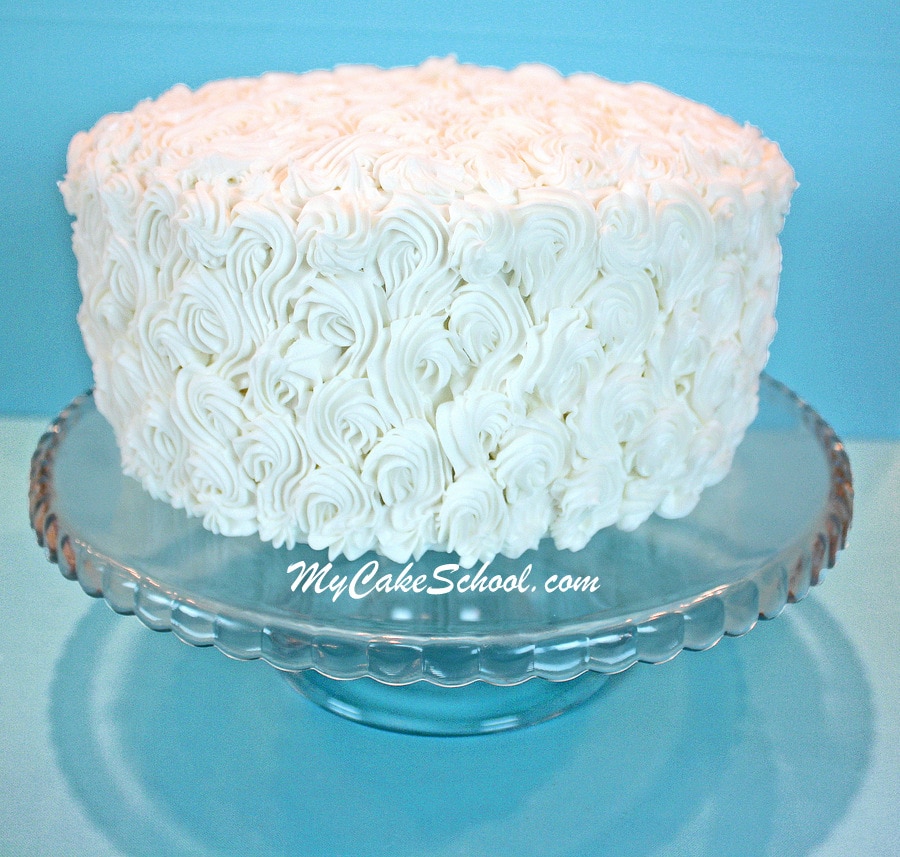
After crumb coating my cake with vanilla buttercream, I used a Wilton star tip 21 (one of my faves) to do a reverse shell pattern with my medium consistency buttercream.
I always love a nice reverse shell border, but I now like them even better when piped vertically!
You can see that I staggered mine a bit so that neighboring lines fit nicely together. Is it just me or does my cake look like it's wearing a snuggly buttercream sweater?! (Find out more about reverse shell borders in our tutorial on How to Pipe with a Star Tip!)
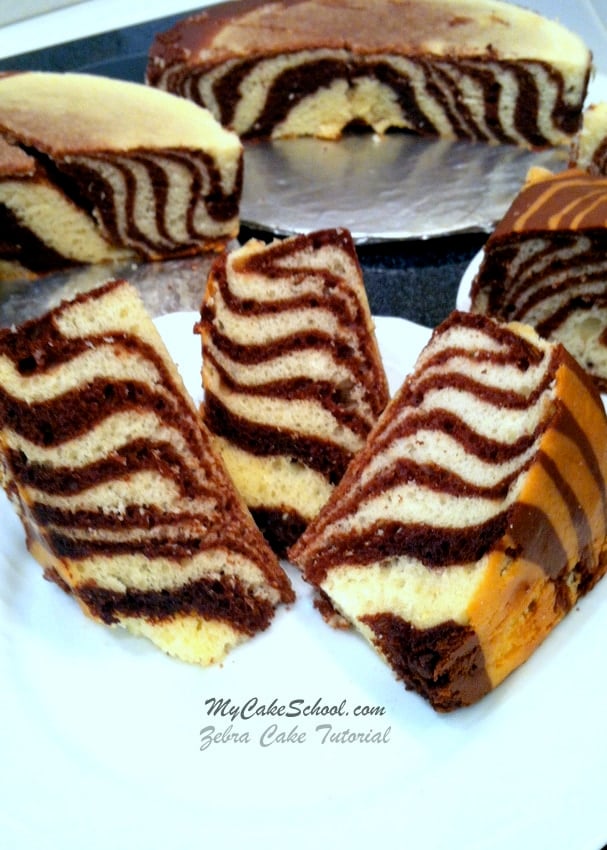
Okay, time for the big reveal! (I said a little prayer after all of that piping that the zebra stripes actually would be there when we cut into the cake!)
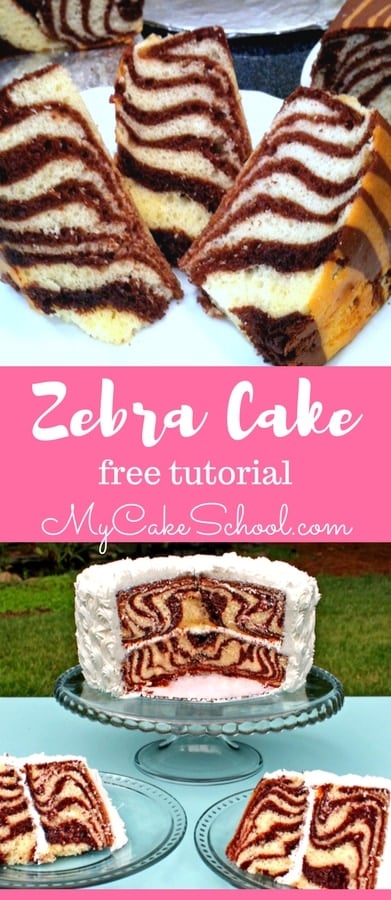
Whew! It worked! I couldn't be happier with the outcome. I LOVE these zebra print cake layers!
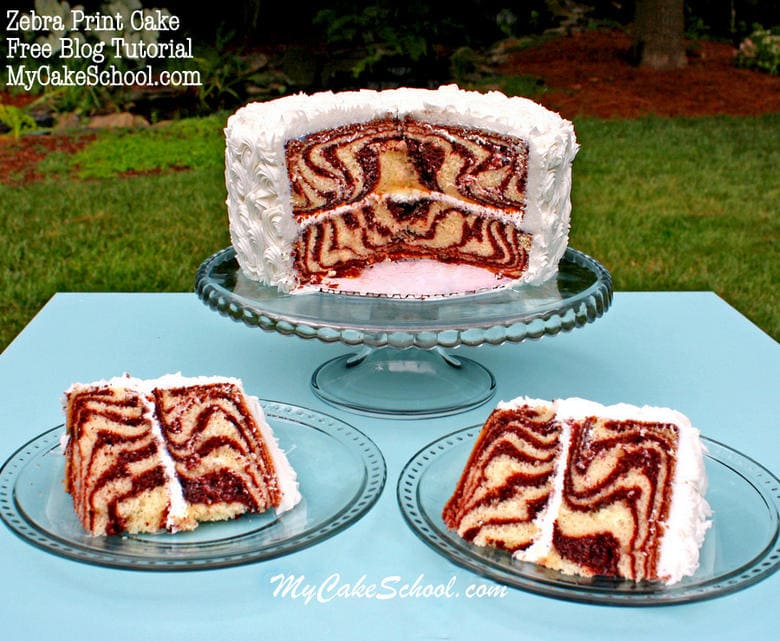
It's always nice to have a hidden surprise inside of the cake! If you haven't tried this method already, make sure to put it on your cake "bucket list". It's so much fun, and looks much more complicated than it actually is, which I love!
*An update~ When this tutorial was first created, the sizes of standard box mixes were larger (around 18.5 oz). Now, they are 16.5 oz. We tested the zebra cake again with the new smaller size and still had great results.
Thanks for stopping by, and I hope that you enjoyed the tutorial!
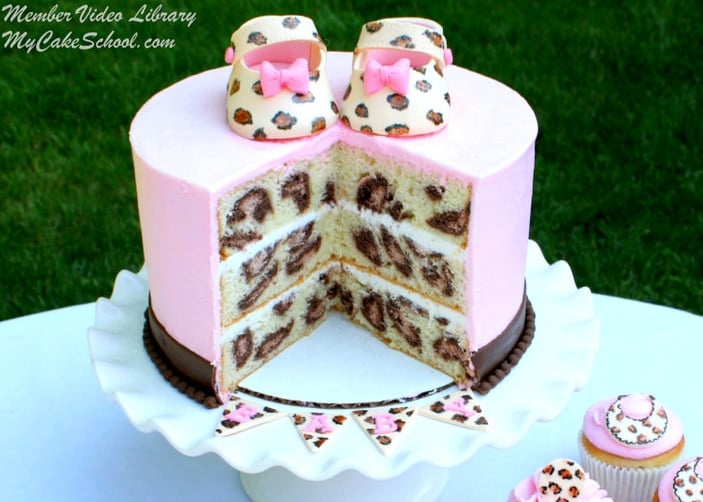
Did you know that we also have a leopard print (on the inside) cake video tutorial? It's one of our favorites! Leopard Print Cake Tutorial
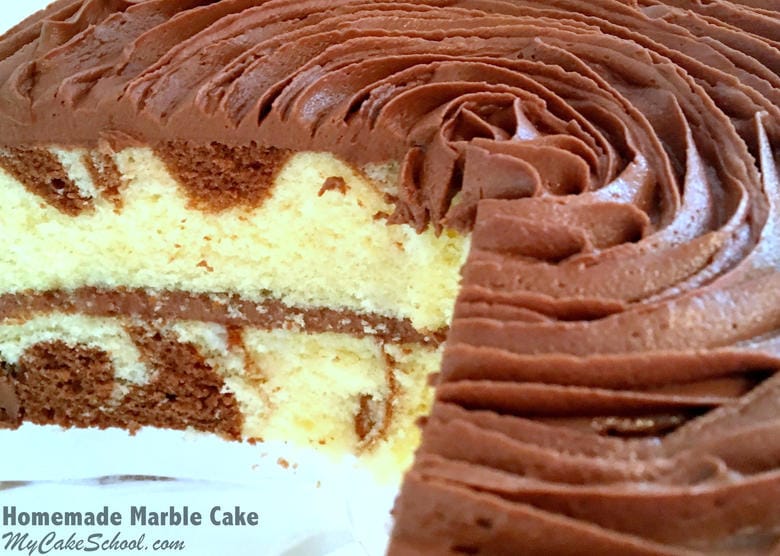
Or if you are just looking for a good old fashioned Marble Cake recipe, we have just the one! It's good to have options!

I made this cake last night. My frosting needs practice, but the cake is adorable.
You said you wrap the cake in plastic wrap and then foil. How long do you freeze the cake to making frosting it easier? (We will be making this a day prior to a birthday.)
This is so cute! Can I use 9" cake pans and just make them a bit thinner? I wanted to share that I got mix yesterday and Duncan Hines still has some 18oz mixes, they're called select. And meijer store brand is also still the old size, calling for more water. Hoping they will work!
Hi Lisa, the freezing of cake layers is a step that is optional. We think it makes the cake less fragile when applying the crumb coat. You could freeze for a short time 1 1/2 to 2 hours or overnight if making the layers in advance. We do a crumb coat with the cake partially frozen. However, cake must be at room temperature when adding the final coat of frosting if you are using a crusting buttercream or it will take it forever to crust.
Hi Katie, yes, 9" pans will be fine. That is good to know about the Duncan Hines 18oz. mixes, I'm going to look for it. Thanks for posting.
I attempted this tonight, BEFORE reading your blog. My batter was way too thick, and I did cupcakes. I am so glad I found this blog, and now will be adding more water to the batter. Is there a brand of cake mix you would recommend?
Hi Steph, we used Duncan Hines because it does not have pudding in the mix
Thank you so much for this tutorial. My daughter made this cake for me for my birthday! I had seen one on Pinterest without directions so I was thrilled to find you. The cake was gorgeous and everyone oohed and ahhed especially the grandkids. We used a hot pink icing, now I am going to investigate your blog and see what else I can make, or get my daughter to make.
how would u do this with a 1/2 sheet square pan. thanks
Hi Mary Jo, we have not made this in a square pan, but if I try it in this shape I think I would make oval shape circles. I think you would get good coverage of stripes, the corners just would not have any.
Will it work for cupcakes?
I love this and was thinking about doing it for my daughter's second birthday. I'm wondering if I can do this with the giant cupcake pan?