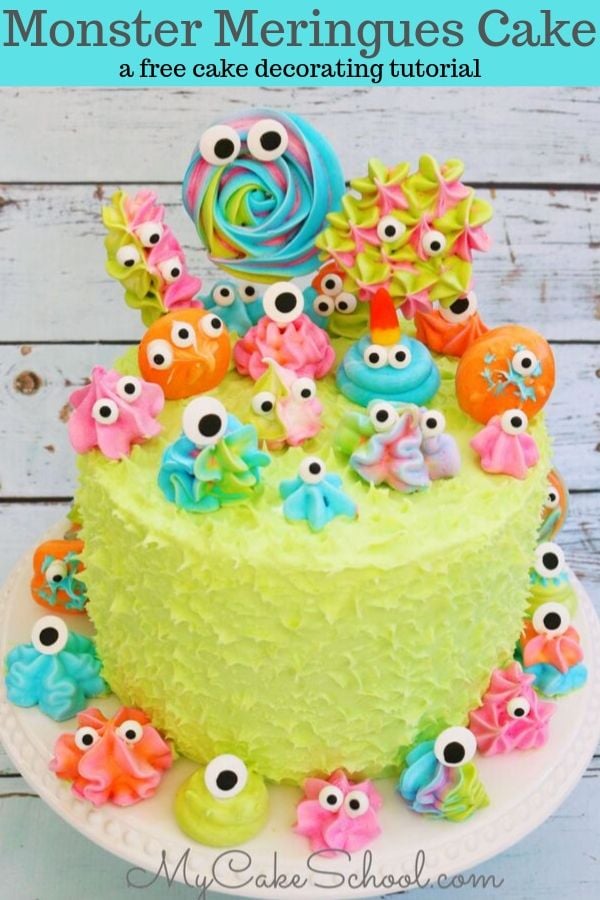
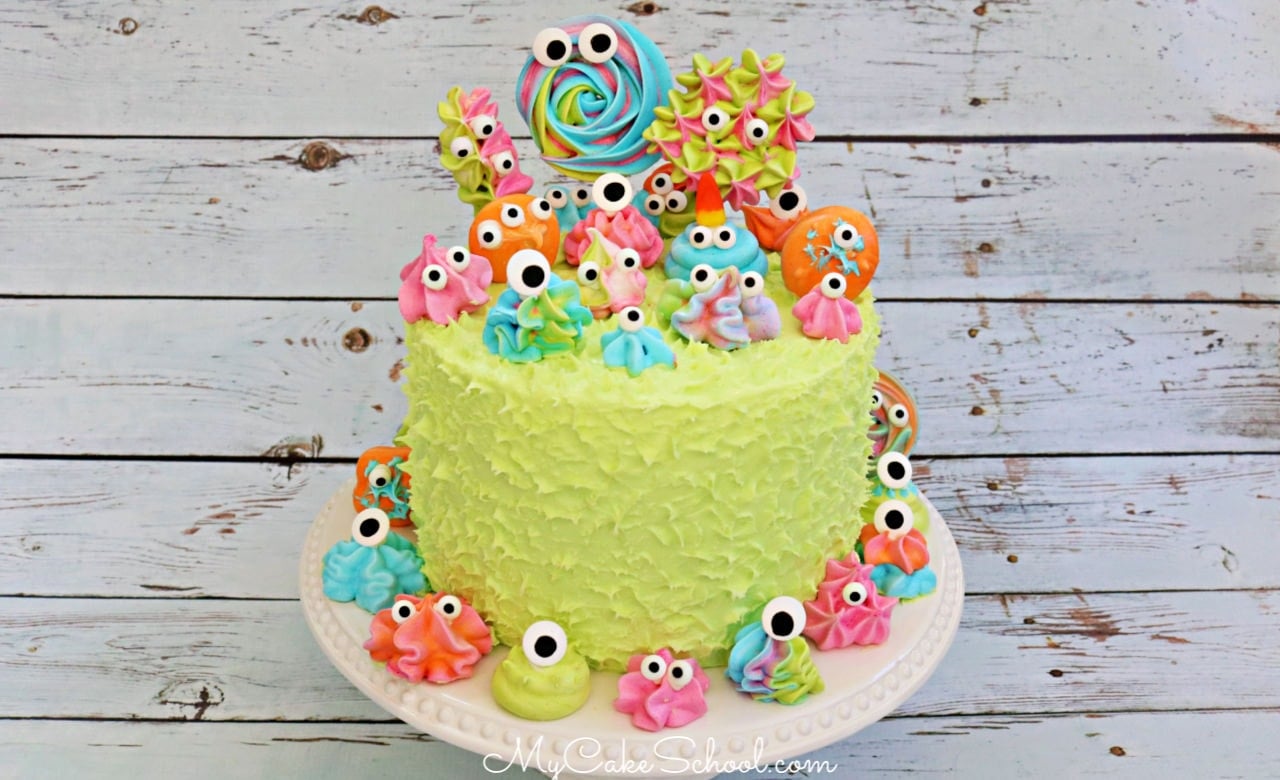
Monster Meringues Cake
With Halloween just around the corner, we have the perfect, FUN Monster Meringues Cake tutorial to share!
If you've followed our site for a while, you know that this is about as scary as it gets around here with Halloween cake designs, haha. We couldn't help but make these monsters cute & colorful!

I've made a few cake tutorials over the years that feature meringues in the cake design.
Meringues are such a great cake decorating medium. Not only are they delicious, but they have a unique, somewhat puffed look, are super lightweight, and are perfect for those who love to do a little piping.
Even if you are new to cake decorating, you must give these monster meringues a try!
The best thing about monster designs is that you can really let your imagination take over- anything goes and there are no mistakes! ;0)
Table of Contents
Helpful Tips when working with Meringues
As you'll see in the video, whipping up a batch of meringues is not difficult, especially with this meringue recipe as it is very simple! However, I wanted to list a few helpful tips to ensure the process goes smoothly!
- Your mixing bowl and whisk attachment must be completely free of grease. Otherwise, your meringue will not whip up properly.
- Meringues can be effected by humidity. Try to avoid whipping up a batch of meringue on very rainy or humid days as the moisture in the air can be absorbed by the delicate egg white & sugar mixture, preventing it from whipping up properly. Also, after baking, meringues may soften slightly in humid conditions.
- When tinting the meringue, gently fold in the color as the meringue can deflate.
- Pipe your meringues immediately after you've achieved the stiff peak stage (and tinted the desired colors). Meringue that isn't used soon after making may need to be rewhipped back to stiff peak consistency.
Meringues can be baked and stored in an airtight container at room temperature for 3 weeks, or frozen for longer.

Other Favorite Monster Cakes!
We've made a few other monster-themed cakes and cupcakes over the years! These are perfect not only for Halloween parties but also for children's birthday cakes year-round! Hop over and check them out!
Monster Cupcakes- Fun, buttercream monster cupcakes, a step-by-step photo tutorial from our Free Section!
Monster Sheet Cake- I love this EASY buttercream monster sheet cake video tutorial from our Free Video section!
Pretzel Monster Cake- Another fun Monster Cake video tutorial featuring funny monster pretzels!
Looking for More Meringue Cakes? Try these Fun Ideas!
Ghost Meringues Cake for Halloween
Enjoy the Video!
Thanks so much for stopping by! If you give this cake a try, we would love for you to leave a comment and photo below!
Monster Meringues Cake- A Free Cake Decorating Tutorial

This Monster Meringue cakes is sure to be a crowd pleaser! The meringues are deliciously sweet and make the perfect decorations!
Ingredients
For the Meringues
- 4 egg whites
- Pinch of salt (we used popcorn salt because it is finer)
- ¾ cup super fine sugar - if you do not have this you can make your own by processing granulated sugar in a food processor or bullet blender.
- ½ teaspoon (2g) clear vanilla (real vanilla will change the color)
- 1 cup powdered sugar, sifted
- Coloring gel- We used Americolor Sky Blue, Deep Pink, and Electric Green
For Decorating the Meringues
- Google Eyes (we used small and large pre-made Wilton Google Eyes)
- White candy melts/coating for gluing eyes onto meringues
For the Cake
- Use your cake recipe/size of choice. I frosted my 8 inch tier with our classic vanilla buttercream frosting recipe
Miscellaneous
- Disposable piping bags, small angled spatula, cake base/pedestal, turntable (optional), lollipop sticks (to add height to some of the monsters), cookie sheet, parchment paper
- Piping Tips: We used 1M & 2D piping tips for some monsters. Others were piped with a disposable piping bag with the tip snipped away.
Instructions
For the Meringues
You'll want to use the lowest rack position in your oven. Preheat to 175 degrees
Line baking sheet with parchment paper.
It is very important that your mixing bowl & whisk attachment/beaters are completely clean & free of grease so that the egg whites whip up properly.
In your mixing bowl, beat the egg whites & salt at medium-high speed (using whisk attachment) until foamy and soft peaks form (about 50 seconds).
Gradually add the super fine sugar and vanilla while mixing at medium speed. Follow with the powdered sugar (reduce speed as needed to prevent a cloud of powdered sugar!). Return to medium high speed until stiff peaks form. ***See Notes section below
If you wish to tint your meringues, divide meringues into smaller bowls and gently fold in color.
Pipe the desired shapes onto parchment-lined cookie sheet.
Bake for 2 hours (lower rack of the oven) or until meringues are dry and easily moved. Turn oven off but leave the pan in the oven for an additional hour to cool.
Once they are completely cooled, store in an airtight container away from strong lighting or sunlight. Light could cause the colored meringues to fade.
Meringues can be kept at room temperature in an airtight container for 3 weeks, or longer in the freezer.
Decorating the Meringues
Using small amounts of melted candy melts as my glue, I attached the eyes to the baked meringues. Anything goes!
If you would like to attach meringues to lollipop sticks for additional height on top of the cake, you can attach the meringues to the sticks with melted candy melts and allow to set up (or freeze for a few minutes). Or, do as we did in the video and pipe meringues onto the sticks before baking.
Decorating the Cake
Decorate your tier however you like. After frosting my tier, I immediately used a spatula to create fur-like texture all over the cake for an easy, fun look. Cover the cake in monsters and add more around the base of the cake!

Super cute & fun! Love it! :-)
Fun cake!?
Thank you! xo
What a cute cake. How long can the meringues be on the cake before they start to get soft? Just wondering how far in advance I can add the meringues to the cake. thanks
Hi Michelle, Meringues can be kept at room temperature in an airtight container for 3 weeks, or longer in the freezer. Be sure to keep them out of sunlight or fluorescent lighting or the colors could fade.
Hi - thank you for replying. I am sorry if my original comment was not clear. I’m wondering how long the meringues will stay crisp once they are on the cake. Can I add them a day at two in advance without them going soft? Thank you.
Hi Michelle, Your question was totally clear. I read the question late last night and decided to answer it this morning. Somehow my brain changed your question during the night hahaha, I should have re-read it. We have put meringues on a cake the day before serving and have not had a problem.