Park Your Brooms! Halloween Cake Tutorial
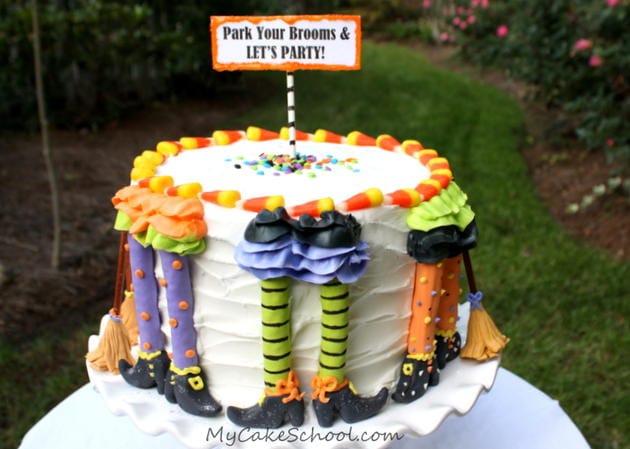
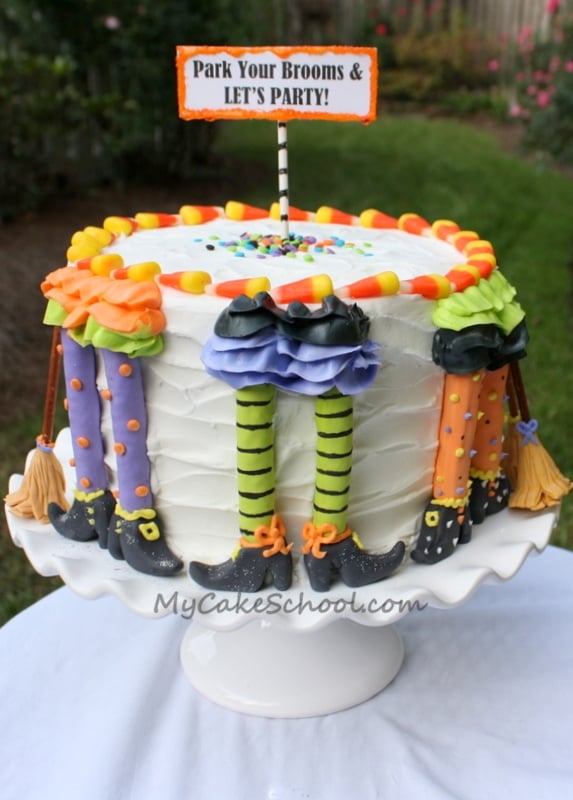
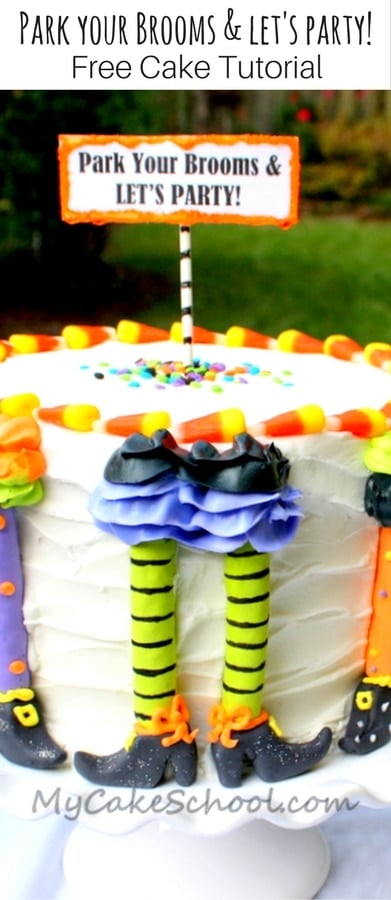
Today I'm going to share a FUN and festive "Park Your Brooms & Let's Party" themed Halloween Witch Cake!!
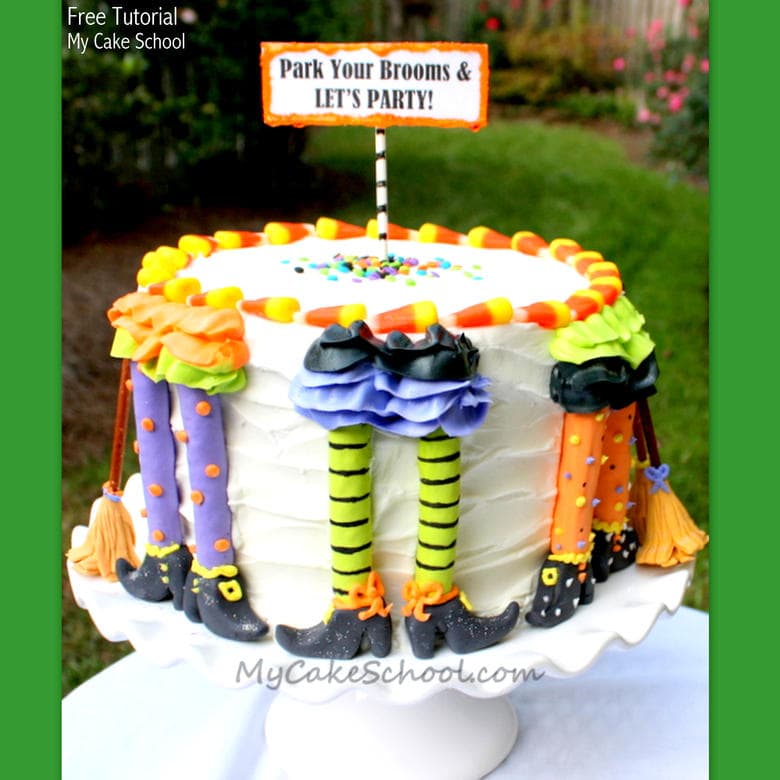
Last year I REALLY wanted to try a cake design that featured witch legs!
I know it sounds strange, but take a scroll through Pinterest in the fall, or your local home accessories or card shops and you'll notice that witches these days have a fabulous sense of fashion when it comes to their pointy black shoes & colorful striped tights.
I could never quite come up with a design that worked last year with this theme....but today, I had better luck! Now, I have a fun, and witch leg-tastic cake to share with you.
Here's what I did...
I started out with a basic 8" cake, and some crusting vanilla buttercream like our Vanilla Buttercream recipe. (I would recommend a crusting buttercream/frosting or ganache--anything that isn't overly soft or wet.)
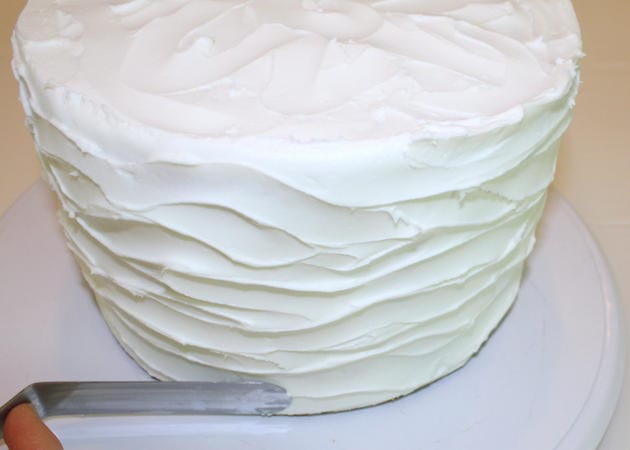
Next, frost however you'd like. I gently waved my spatula up and down as I spun my cake around on the turntable to get the pattern that you see. I wasn't in the mood for smooth today. As a matter of fact, I prefer textured buttercream whenever I can get away with it. (So much faster!!) ;0)
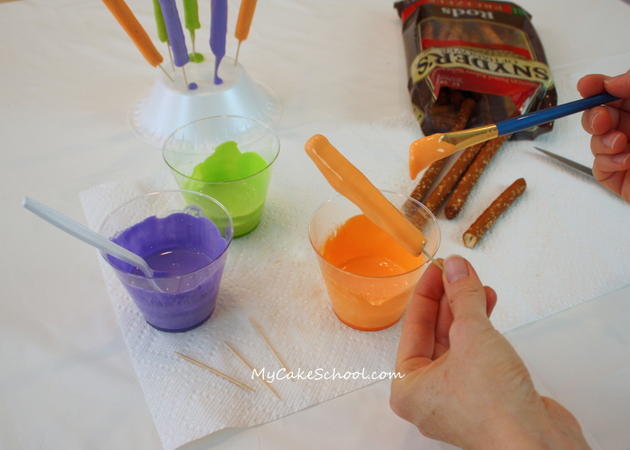
** A day in advance, I prepared the witch legs so that they would have extra time to dry. I tinted some royal icing with Americolor Orange, Electric Green and Regal Purple.
Next, I sliced some long pretzel rods in half to create the basic witch legs. I scraped a few of the obvious salt crystals off, and pushed a toothpick into the end of each pretzel. Then, I painted them with the royal icing. The royal icing was not runny, but thin enough to easily paint with. It was a consistency a little thicker than Elmer's glue if that helps.
For me, this was easier and smoother than dipping my pretzels in chocolate.
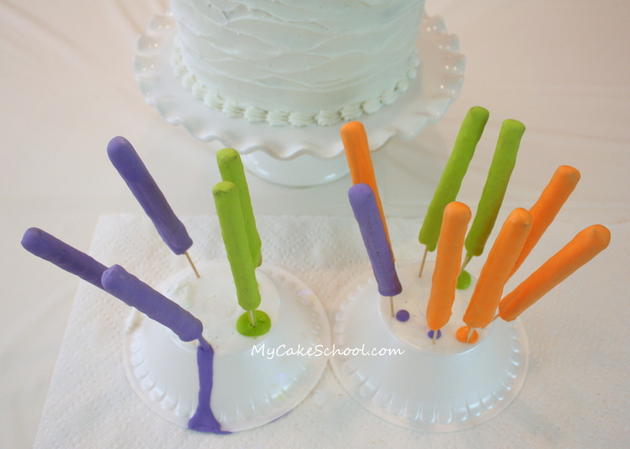
Next, I allowed the legs to dry in an inverted styrofoam bowl (styrofoam block or inverted paper cups would be good too).
If you'd rather let them dry flat on parchment paper, that should work too. You'll just want to move them after the excess has run off to keep things neat. The backs won't be visible anyway. My legs were dry and ready to use after a day. I probably could have used them sooner...but it's better to play it safe.
If you are into sugar cookies, I think that cookie legs would be adorable too!!
**No time for painting pretzel rods with royal icing? No problem. Simply roll snakes of colored fondant to create your witch legs. These could even be applied while the legs are slightly soft if you are not working in advance.
Next, I tinted some fondant (with tylose powder kneaded into it) using Americolor Super Black. Gum paste is a good choice too.
If you have neither, you could also just pipe your shoes in buttercream ...I'm sure there are other great alternatives for fun, witch shoes.
To make each shoe, I started with a ball of the black fondant, pinched the end to form the pointy toe of the shoe, and flattened what would become the back of the shoe.
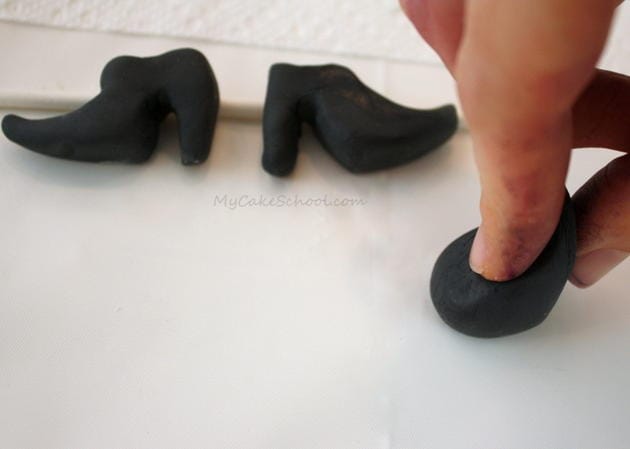
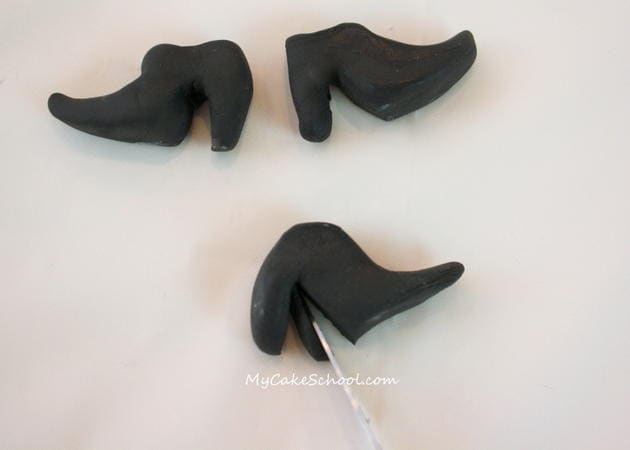
Then, I used a knife to cut out a small wedge so that I could form the heel. Flatten and pinch your way to your fabulous witch shoe.
Then, use your first shoe as a guide to create the other shoe. (I like to lay one shoe on top of the other to check the size.)
*By the way, I did not allow my shoes to dry for very long...(maybe about an hour)...but it always helps if you can work in advance.
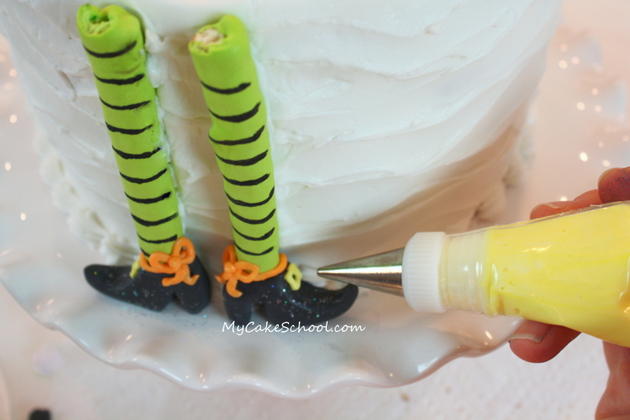
Now for the fun part! I used my black Americolor pen to create stripes, and I tinted buttercream for more accents on the tights and shoes.
All of the witchy details in buttercream were added with a Wilton Piping Tip 3 (but any of the small round tips would be fine!) I also added a small shell border around the base of the cake using a Wilton tip 21.
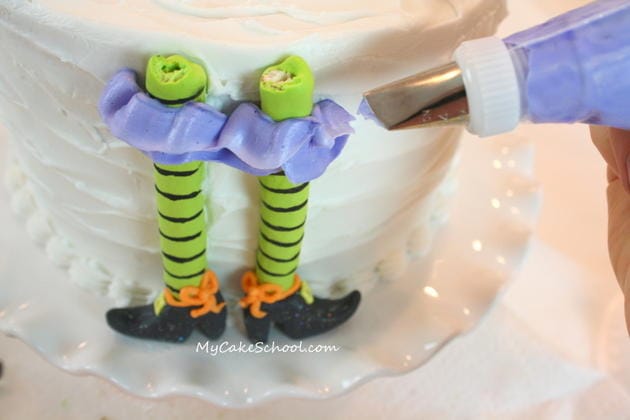
Our witches are sassy with their short ruffled skirts ;0) -- I used my tinted buttercream piped with a tip 104 (petal tip) to create the ruffles. (Make sure that the thin end of the tip is facing you as you pipe!)
Now for the next set of legs~ The basic idea is the same for all of these. I pressed the shoe into the icing first, then "glued" on the leg just above it with a little fresh buttercream.
The shoe is not supporting any of the weight of the leg...the pretzel legs are locked into place by that buttercream "glue" that we added to the back.
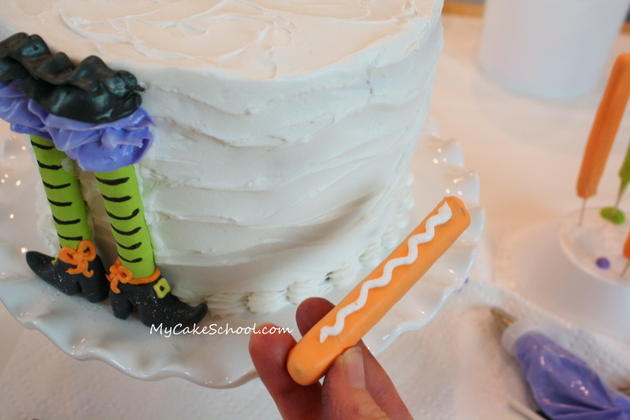
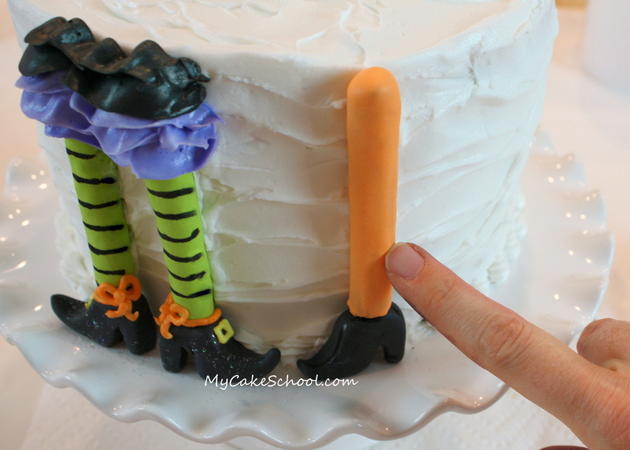
Here's my second set of legs...and you can see a bit of my candy corn border and brooms! (I demonstrated how to make brooms in my last witch themed tutorial.)
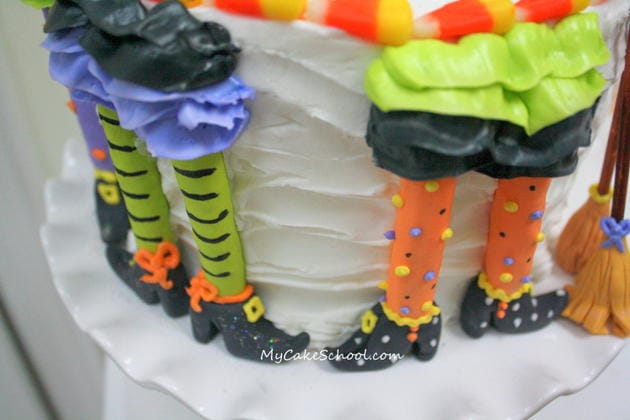
I added a third set of legs, a few sprinkles here, a few candy corns there and a cardstock/lollipop stick sign. And.........WE'RE FINISHED! Wahoo!
I hope you enjoyed our witchy leg cake. It was so much fun to make! I had a few other sayings in mind that I was deciding between--these were my two runner ups: "Witch Way to the Party?"... "Eat, Drink, & Be Scary" ;0) --There are lots of sites with fun sayings, but I think that I found the most on Etsy.
Let me know if you think of other ones...and especially let me know if you try the cake yourself. You know that I would love to see!
Thanks for flying by the blog...come back again soon!
**Don't miss our full collection of favorite free tutorials in our Free Cake Tutorials section! If you need fabulous cake and frosting recipes, look no further than our Recipes Section. You can find tons of tried and true recipes there.

I make it a habit to NEVER park my broom (just ask my hubby and daughter!) BAWWAAAHAHAHA.. However, I may reconsider that if offered a piece of this cake. It inspired me to try to make at least the legs for a fun treat that is for sure! The entire cake would be the BOMB!!!
This is so cute and I love how all of the witches have their own personality with their tights. Love it!!! 8-)
Do you keep royal icing made to use or do you make it every time you have a project?If so how do you store it to re-use it?
Hi Cindy, We use meringue powder to make our royal icing and our recipe keeps approximately 2 weeks in the refrigerator. I press plastic wrap onto the surface of the royal icing and it is in an airtight container. It will separate over time and you will need to remix when you are ready to use.
So cute, love it!
I just love this. Thanks again for sharing. This web site is th!e best
"Bottoms up, dont drink and fly!"
LOVE LOVE LOVE this cake! Love the "cute" side of Halloween! You're awesome Melissa and BeBe!!
From Spain. I love your delicious work. I will try to make your marvelous cake. Love your blog!!!!!
This is fabulous! So clever! Great job.
So cute; you mentioned this is an 8" cake, is it a double layer? What was the height on it?
Hi Peggy, This cake is three 8" layers and is approximately 5 1/2 inches tall.