Strawberry Sour Cream Cake
Today we're sharing a new delicious scratch Strawberry Sour Cream Cake Recipe!
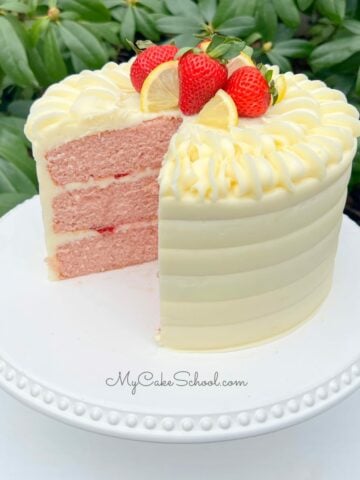
This flavorful strawberry sour cream cake with white chocolate frosting is SO good. It is super moist and the combination of cake and frosting flavors is perfect!
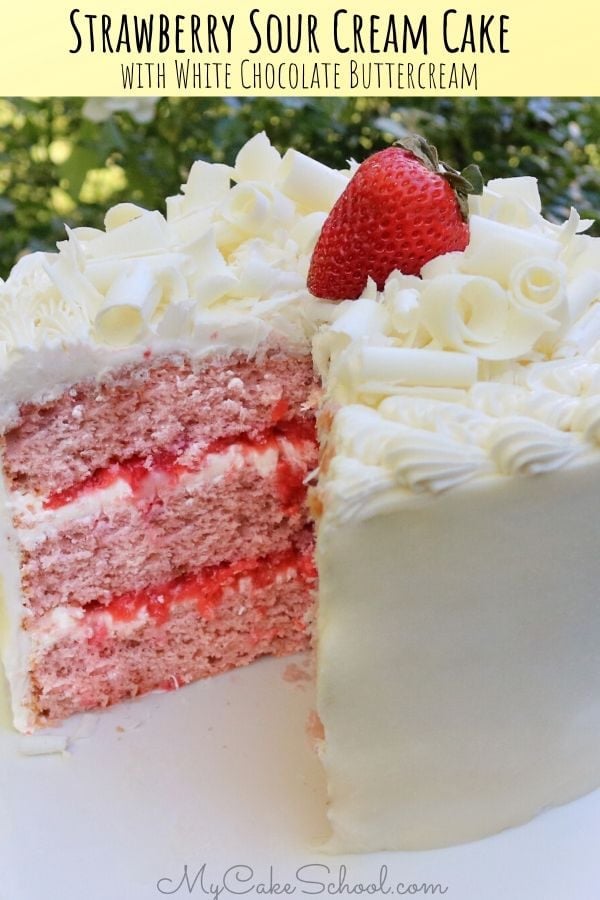
Even if you aren't a fan of white chocolate, these strawberry cake layers can be paired with all sorts of fillings and frostings from strawberry buttercream to cream cheese frosting, vanilla buttercream, lemon cream cheese frosting, and more!
Table of Contents
How to Make Strawberry Sour Cream Cake
You will find the full, printable recipe card at the bottom of this post. Here is a quick look at our steps!
This strawberry sour cream cake is made with the traditional creaming method of mixing (as opposed to the reverse creaming method), giving it a nice fluffy texture.
Advantage of Sour Cream: The boost of acidity from the sour cream in the recipe softens the gluten, making for a more tender cake. Sour cream also adds a richness to the cake batter. We love cakes with sour cream!
Combine Flour, Salt, and Leavening: In a medium sized bowl, add flour, baking powder, baking soda and salt. Whisk to blend for 30 seconds. Set aside.
Combining Wet Ingredients: In another bowl combine the sour cream, strawberry puree, vanilla, strawberry extract, & oil- blend and set aside.In the bowl of your mixer blend the butter until smooth, Gradually add the sugar and mix on medium speed 3 to 5 minutes until fluffy and lightened in color.
Add the room temperature eggs one at a time mixing until the yellow of the yolk disappears.
Alternating Dry and Wet: Add the flour mixture and the sour cream mixture alternately, beginning and ending with the flour mixture (3 additions of dry ingredients, 2 additions of wet ingredients. Mix until combined and smooth, do not mix above medium speed or over mix.
Time to Bake! Divide the strawberry cake batter between the three 8 inch cake pans. Bake at 350 degrees for 22 to 25 minutes or until a toothpick inserted into the center of the cake comes out clean or with just a few crumbs attached. Let cool 5 to 10 minutes, then turn out.
Should I freeze My Cake Layers?
Freezing cake layers is an optional step but one that I try to make time for. After removing your cake layers from the oven, allow the cakes to cool (still in their pans) on a cooling rack for about five minutes before flipping them out.
Wrapping the Cake Layers
Once room temperature (or still a bit warm), I place each cake layer on a foil-wrapped cake board (so that the boards can be reused). Then, I wrap the cake layer in plastic wrap & foil, and into the freezer they go.
I freeze my cake layers even if only for a few hours (but they can be frozen for up to three months and will still taste as fresh as the day they were baked)!
Thawing the Cake Layers
When it's time to assemble the cake, just thaw on the countertop, still wrapped. After condensation forms on the foil and the thawing is well underway, you can go ahead and remove the layers from the foil and continue thawing.
Many decorators prefer to assemble the cake while the layers are still partially frozen as they are easier to handle but that is up to you!
Fillings and Frostings for Strawberry Cakes
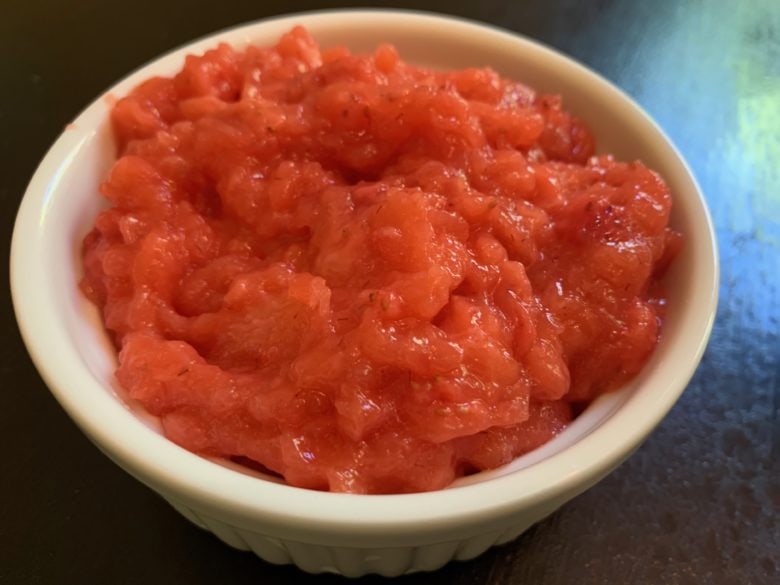
There are so many amazing pairing options for strawberry cakes. Today, we are using white chocolate frosting and a flavorful cooked strawberry filling for a fantastic White Chocolate Strawberry Cake, but the options are endless. Here are a few other favorites!
- Strawberry Buttercream
- Whipped Strawberry Cream Cheese Frosting
- Cream Cheese Frosting
- Sweetened Whipped Cream Filling (coupled with sliced strawberries)
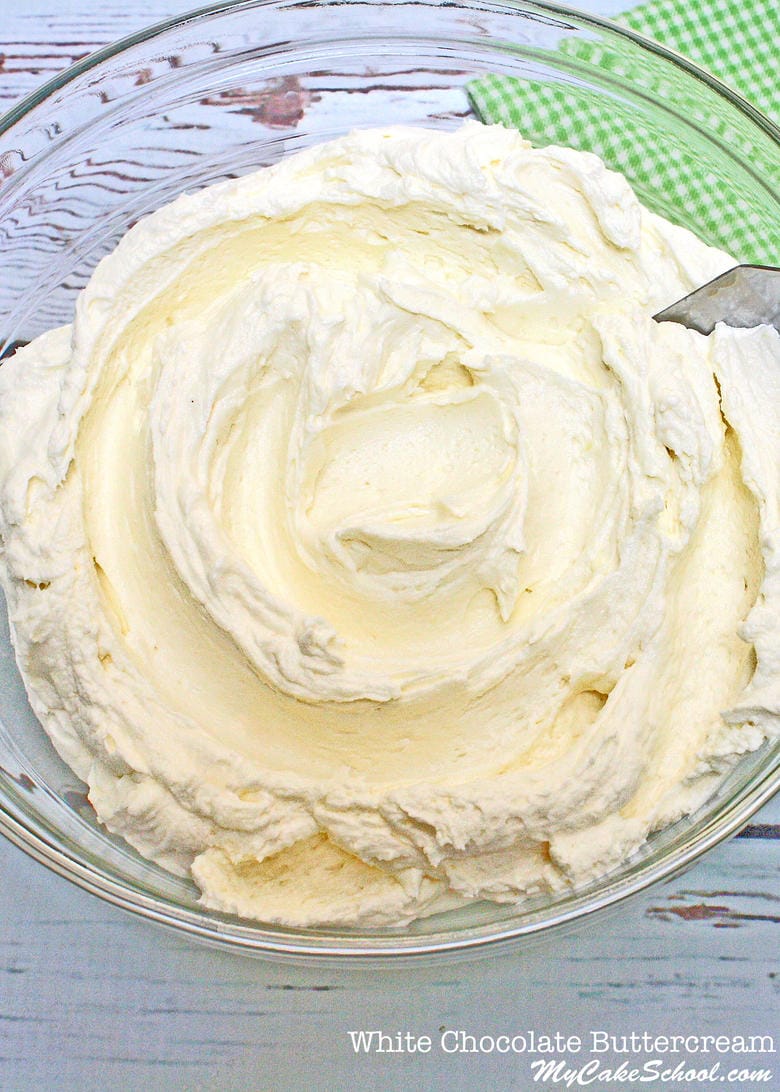
Assembling the Cake
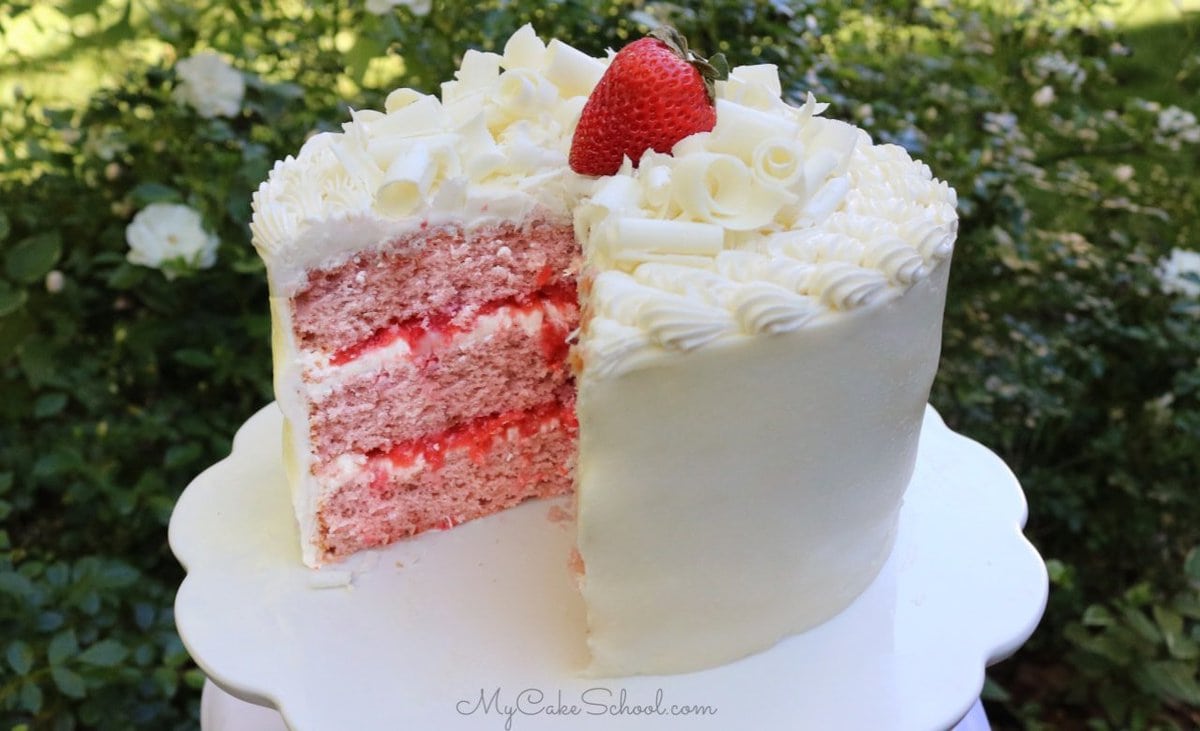
Place the first cake layer on your pedestal or cake base. Spread with a layer of white chocolate frosting, and then spread on the cooked strawberry filling. This strawberry filling adds great strawberry flavor to every bite.
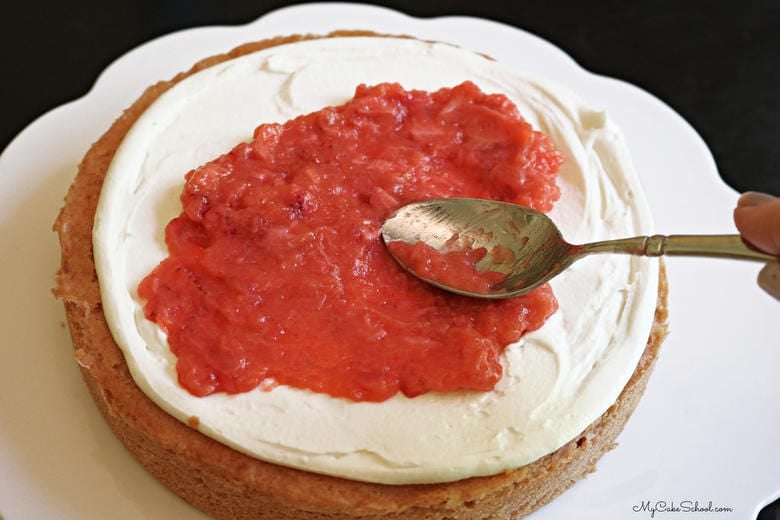
- You can pipe a dam of your frosting before adding the strawberry filling if you'd like to make sure that the filling stays fully enclosed.
- My filling was thick and so I didn't pipe a dam. When not piping a dam, keep the strawberry filling about ½ inch from the edge all the way around to be on the safe side.
- Add the next cake layer and repeat.
- Finally, add the third layer, fill in any gaps between layers with your frosting (I do this with a piping bag with the tip snipped away), and then frost the cake as usual.
- I like to frost my tier on a turntable when possible, so that I can easily spin it as I smooth the frosted sides with a bench scraper.
- Then, I like to chill the tier in the freezer for about 10-15 minutes (or longer in the refrigerator) until the frosting is firm. Then, if you'd like a smooth finish, go over it once more with a hot bench scraper and spatula.
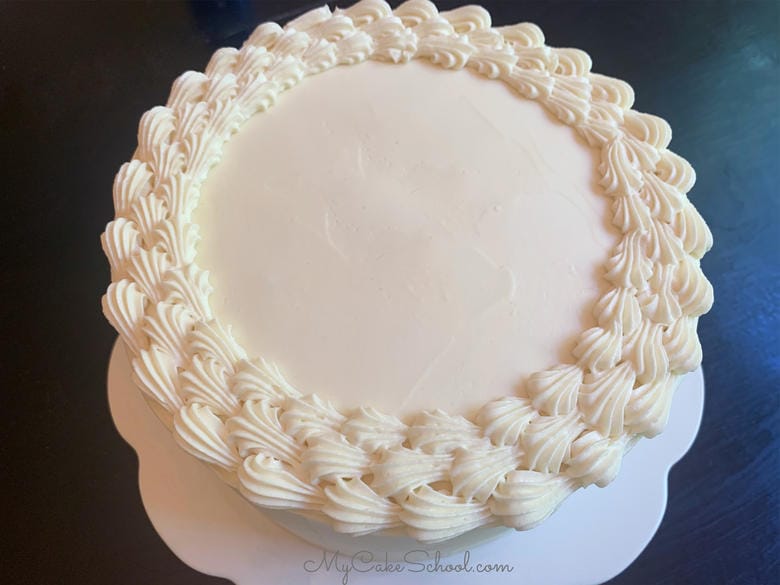
- As a final touch, I added a few rows of shell border around the top of the cake using a star piping tip 21, and then I filled inside of it with lots of chocolate curls! (Technically these are white chocolate candy coating curls, but you could use white chocolate also).
How to Make Chocolate Curls
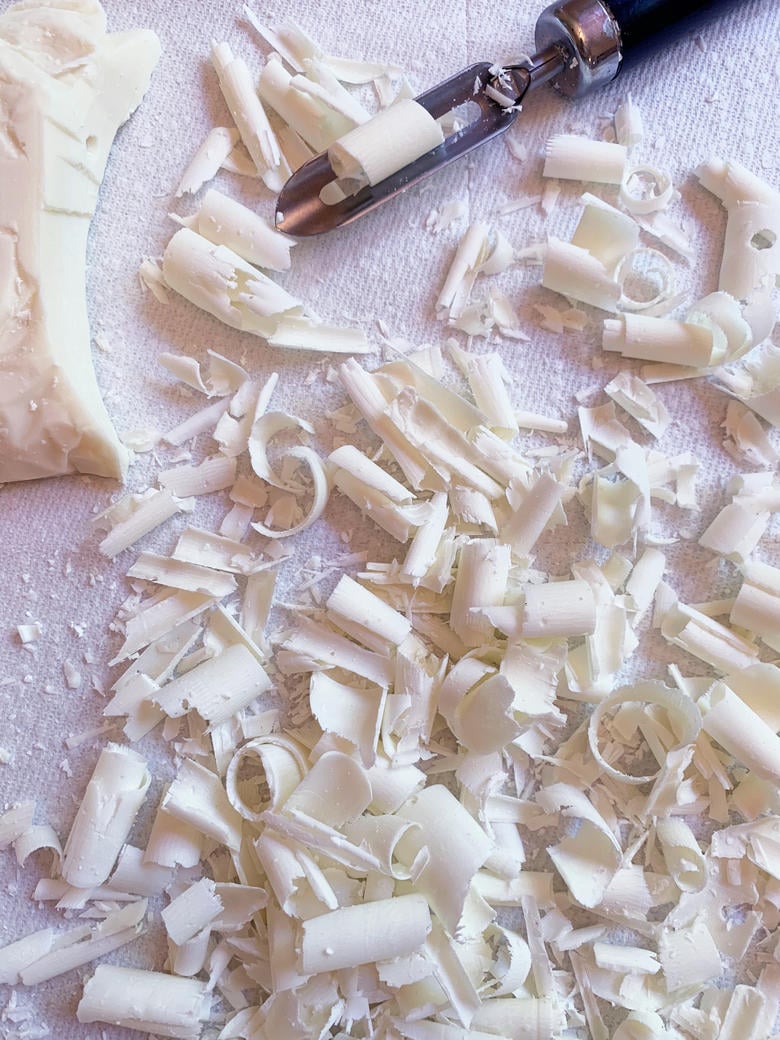
If you're feeling fancy, mounding chocolate curls on top of cakes makes for a beautiful presentation.
I have a mini loaf pan that I like to use for creating curls (it is about 3x6 inches). First, I melted a few blocks of chocolate candy coating/bark coating (I used CandiQuik) in the microwave in small increments.
When the candy coating is almost completely melted, just let it sit for a couple of minutes and then stir to help any remaining pieces disappear.
Then, I poured my melted candy coating into a *foil lined* mini loaf pan and placed in the freezer for about 15 minutes or until firm. You can refrigerate also or even let it firm up at room temperature but it will take longer.
Do you have to use Strawberry Extract in this recipe?
We use strawberry extract to add a little boost of strawberry flavor in most of our strawberry cake recipes. Although this recipe does contain ½ cup of strawberry puree, the strawberry flavor of the cake layers alone is fairly mild.
We find that often the fruit flavor is baked out of our fruity cake recipes and extracts are a great fix for this. This is also the case with our lemon cake from scratch and cherry cake recipes.
However, if you do not wish to use strawberry extract, the strawberry filling in this recipe is wonderful and lends a really nice strawberry flavor. You could also use freshly sliced strawberries in place of the strawberry filling if you would rather!
More Strawberry Cakes
If you love strawberry cakes, don't miss these other favorites from our Recipes Section! Some of our most popular are our Homemade Strawberry Cake, Strawberry Cake from cake mix, Strawberry Pound Cake, and Strawberry Cupcakes! We also have a great Strawberries and Cream Cake.
Enjoy the Recipe!
We hope that you love this White Chocolate Strawberry Cake as much as we have, and definitely keep this strawberry sour cream cake in mind for all sorts of fun filling and frosting combinations.
Don't miss our full collection of cake recipes and free cake decorating tutorials! We have so many cakes to share with you.
Have you made this? We would LOVE for you to leave a ⭐️ rating as well as a comment and photo below! We really appreciate your feedback!
Strawberry Sour Cream Cake with White Chocolate Frosting
Ingredients
For the Strawberry Sour Cream Cake
- 1 ½ sticks unsalted butter, softened (170g)
- 2 cups white sugar (400g)
- 3 large eggs, room temperature (Place eggs in a bowl of warm water for five minutes if in a hurry.)
- 3 cups cake flour (342g)
- 2 teaspoons baking powder (8g)
- ½ teaspoon baking soda (3g)
- ½ teaspoon salt (3g)
- 1 cup sour cream (full fat) (227g)
- ½ cup strawberry puree (Puree fresh or frozen strawberries) (129g) Liquefy in a blender. We did not heat on stovetop.
- ¼ cup vegetable oil (54g) (We use canola oil)
- 2 teaspoons strawberry extract (8g) (If no extract, you can substitute 2 Tablespoons powdered strawberry jello)
- *Pink Coloring Gel- Optional for desired color. We used a small amount.
For the Strawberry Filling
- 2 cups chopped strawberries (fresh or frozen — chop in rather small pieces)
- ¼ cup white sugar (50g)
- 2 Tablespoons cornstarch (cornflour in the UK) (18g)
- 1 Tablespoon water (9g)
White Chocolate Frosting
- 3 sticks unsalted butter, softened (339g) (do not soften in the microwave)
- 8 ounces white baking chocolate (227g) (I used 2 Ghirardelli Premium Baking Bars)
- 5 cups powdered sugar (575g)
- 1 teaspoon vanilla extract (4g)
- 4 tablespoons milk or cream (42g)
- ½ teaspoon salt (3g)
Garnish
- Whole fresh strawberry or strawberries for top
- White chocolate candy coating for curls You could also use a white chocolate bar
- *I also piped three rows of shell border around the top with a piping tip 21.
Instructions
For the Strawberry Sour Cream Cake
- Preheat the oven to 350 degrees, grease and flour three 8 inch x 2 inch round cake pans. You can use two 9 inch pans, just lengthen the baking time a bit.
- In a medium sized bowl, add flour, baking powder, baking soda and salt. Whisk to blend for 30 seconds. Set aside.
- In another bowl combine the sour cream, strawberry puree, strawberry extract and oil, blend and set aside.
- In the bowl of your mixer blend the butter until smooth. Gradually add the sugar and mix on medium speed 3 to 5 minutes until fluffy and lightened in color.
- Add the eggs 1 at a time mixing after each until the yolk is blended
- With the mixer on low speed, add the flour mixture and the sour cream mixture alternately, beginning and ending with the flour mixture (3 additions of dry ingredients, 2 additions of wet ingredients.) If adding a little pink coloring gel, you can do so at this time.
- Mix just until combined.
- Bake at 350 degrees for 22 to 25 minutes or until a toothpick inserted into the center of the cake comes out clean or with just a few crumbs attached. Let cool 5 to 10 minutes, then turn out.
For the Strawberry Filling
- Add all ingredients to a small saucepan. On medium/high heat allow mixture to come to a boil.
- Stir as the sugar begins to melt and the strawberries soften. When the mixture begins to boil, lower the heat and stir constantly until the mixture begins to thicken.
- You can press some of the strawberries against the side of the pan as they soften. Pour into a heat proof bowl to cool. It can be refrigerated in an air-tight bowl until ready to use. Use within 5 days. This makes enough filling for a 3 layer cake.
For the White Chocolate Buttercream
- Cut/chop the white chocolate into very small pieces, put into a microwave safe bowl and add 4 Tablespoons milk or cream.
- Microwave for 15 seconds let sit for a minute or two, stir and microwave again 15 seconds letting it sit a minute to soften further, stir. Be careful not to over heat the chocolate. The chocolate will continue to melt as it is stirred. Let the chocolate cool down before using.
- Beat the butter until softened and smooth, add the powdered sugar 1 cup at a time. Add the white chocolate and milk mixture. Add vanilla and salt. Add another Tablespoon milk if needed. Beat on medium speed for 3 to 4 minutes and it will become smooth and creamy.
- Makes 5 cups frosting. Makes enough to frost a 2 or 3 layer eight inch cake. If you will be doing a lot of decorative piping, you will need additional frosting.
Assembling the Cake
- Place the first cake layer on your pedestal of cake base.
- Spread with white chocolate buttercream within about ¼ inch to ½ inch from the edge of the cake. Then spread with about half of the strawberry puree filling on top of that (if you are frosting a three layer cake).
- Add next cake layer and repeat.
- Fill in any gaps between the layers frosting, then frost the cake with white chocolate frosting. Garnish with white chocolate curls & strawberries.

I was excited about making this cake but even more so about tasting it! Sadly, it turned out very dense. The strawberry mixture for the middle seemed only to enhance the curb appeal for the cake because the cake flavor overpowered it (and very little flavoring was added). In the future, I’ll attempt this again but use just my standard cake recipe instead of one with cake flour.
But the frosting??... the white chocolate frosting is fantastic!! and will definitely be used on other cakes.
My cake was very dense - way too dense for a layer cake. Will try again but I feel the recipe needs adjusted. Icing was very yummy.
Hi April and Deanna, I am sorry your cakes were dense, they should not have been. Following are some reasons that can cause a cake to be dense.
1. Not measuring correctly -- having a kitchen scale is the best way to go. If you do not
have a scale, spoon the flour into a measuring cup for dry ingredients, slightly overfill
and level off with the back of a knife. If you use your measuring cup to dip into the flour
container you will be packing flour into the cup, resulting in more flour than you need.
2. Preheat the oven at least 20 to 30 minutes before putting the cake in the oven. The batter
needs that burst of heat to begin the rising process.
3. Don't mix the cake batter above medium speed or for too long. Keep in mind that hand-
held mixer will take a bit longer in incorporate ingredients than a stand mixer.
4. Check the expiration date on the baking powder and baking soda. They cannot be out of date.
I hope you will try the recipe again, sometime.
I already have American Buttercream (made with high ratio shortening) in the freezer. I plan on re-mixing it for a couple of minutes before using it, but I was wondering if I could add the white chocolate while mixing the buttercream and what is the taste difference?
Also, I always use the cake flavor of yogurt instead of sour cream; will that affect this recipe?
Hi Susan, Adding the cooled white chocolate to your existing buttercream will be adding additional liquid so I don't know how much you could add before it could become too soft. You could use yogurt as a substitute for the sour cream. Greek yogurt would be my first choice, but you could use standard yogurt.
This looks delicious! My son would love it for his 5th birthday cake next week but will the structure stand up to being covered with white chocolate ganache and fondant or is it too moist?
Hi Mel Sen, You should have no problem using ganache and fondant.
can self rising flour be used and omit baking powder and backing soda, then use the procedure to add cornstarch to flour?
Hi Linda, I don't have first hand experience in trying this. I have read in the link below that since self rising flour includes only baking powder, if your recipe has both baking powder and baking soda ( as this one does) you will need to add the baking soda.
https://www.kingarthurflour.com/blog/2015/09/09/substitute-self-rising-flour-purpose-flour
Saw your mention of freezing cake layers, my mom used to make custom wedding cakes (pound cake recipe) and she always baked them a week ahead of time and froze them. Then she would assemble them a day or so before the wedding and decorate them. They were so moist!
Hi Rhonda, Yes, it does make a difference. Thanks for posting.