Swimsuit Cake Blog Tutorial~ (with simple beach cupcakes!)
Today I'm going to show you how to make a sweet swimsuit cake as well as an easy beach themed cupcake design!
Table of Contents
How to Make a Swimsuit Cake
The most difficult part of this cake was creating a template--which really wasn't difficult at all.--
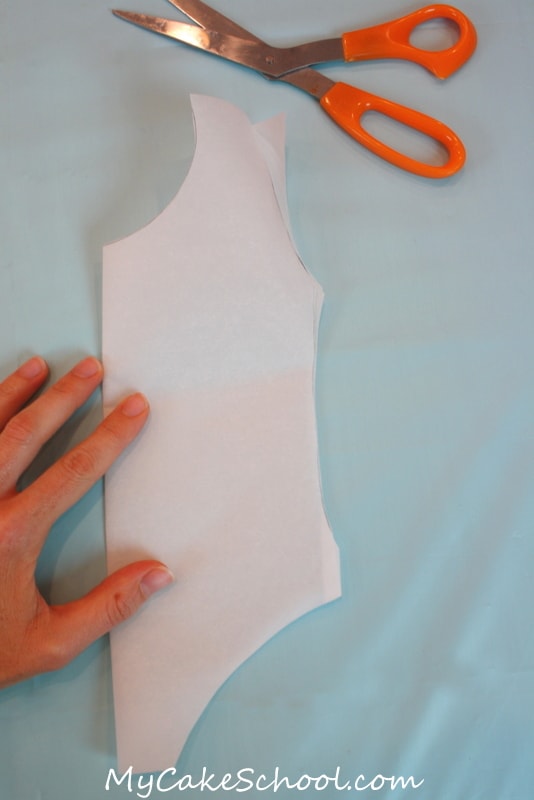
This step will be even easier for you, since I'm giving you my template! Since the template fits a 9x13" sheet cake, I had to divide it into two parts (for you to tape together later). Here are links to the Top Half and Bottom Half.
Let's get started...
First, I made my swimsuit template by cutting a sheet of parchment paper to the size of the 9x13 cake, which I then folded in half so that I could out my shape. Folding ensures that both sides will be symmetrical.
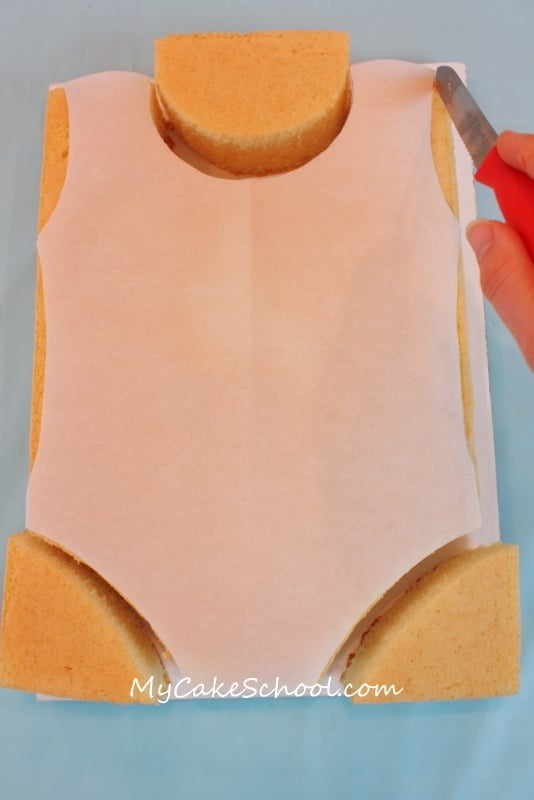
Cutting away the excess...(use a serrated knife!) You may find it easier to do your carving when your cake is partially frozen. I used a fairly dense recipe and so the carving went very quickly.
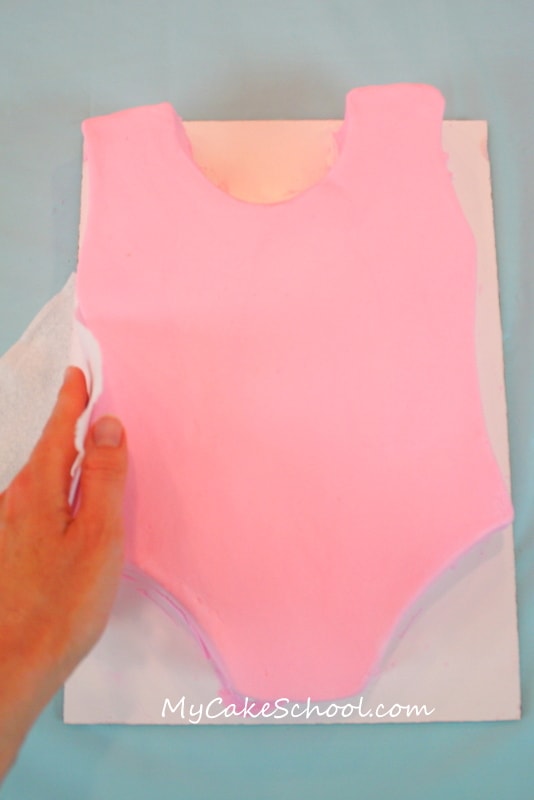
Next, I frosted my cake with a crusting vanilla buttercream (tinted Americolor Deep Pink). You can smooth with your preferred method ( but I like to use a Viva brand paper towel.)
I wanted to have a cute design on the swimsuit...and somehow, today a flamingo seemed like the only way to go ;0)
First, I cut a small circle of pink fondant (tinted with Americolor Deep Pink) for the head using the bottom of a standard piping tip. (I used a tip 12.)
Next, I kneaded in a little bit of tylose before rolling out my fondant. This is optional, but it makes the fondant easier to handle. For the body, I used a circular cutter (2 ½ inch circle).
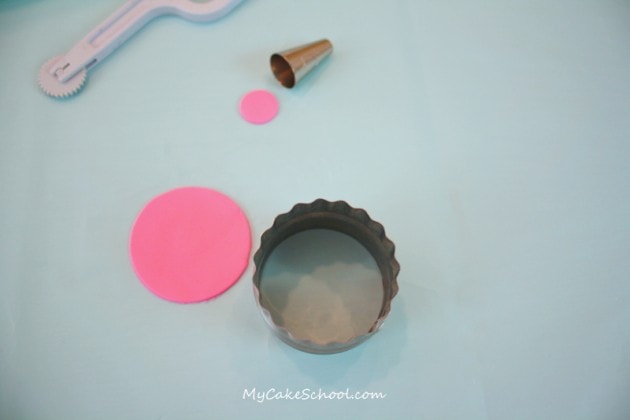
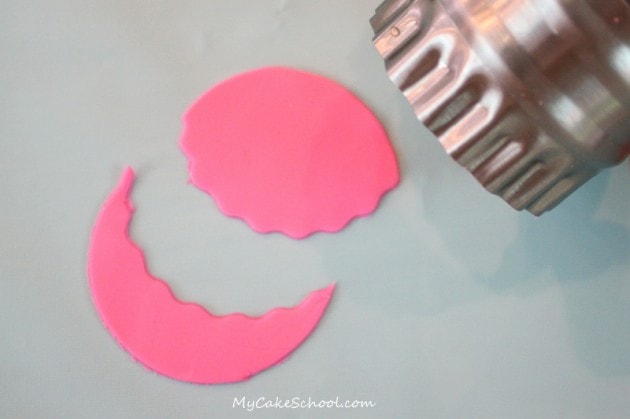
I needed something closer to an oval for the main part of the body, so I used the same cutter to cut away some excess fondant from our circle.
Since my cutter has a scalloped side, I used that....but don't worry if you don't have a scalloped edge. Smooth would be just as cute!
I repeated this process for the wing....only, I cut an even more narrow oval.
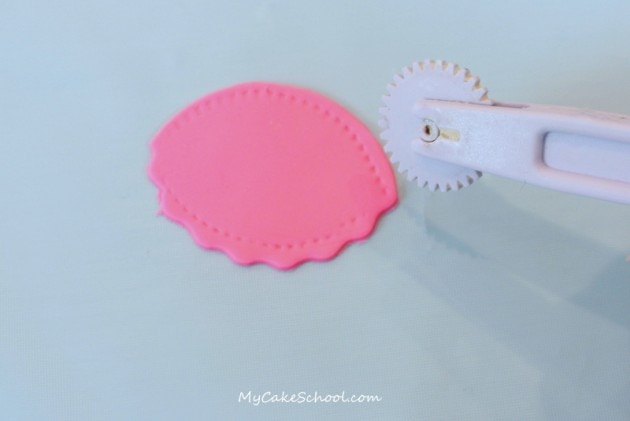
For an extra little detail, I added "stitching" using Wilton's stitching/embossing wheel.
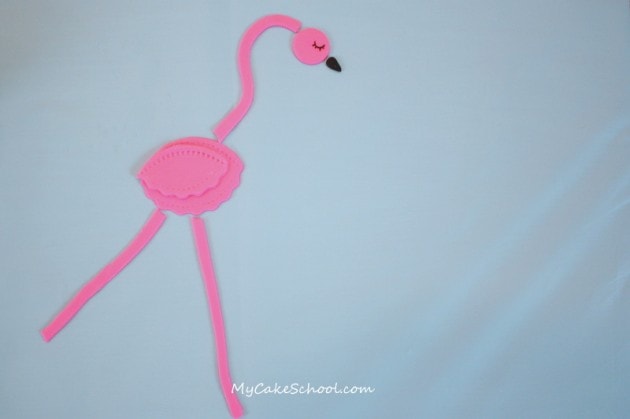
The legs and neck were strips of fondant that I cut with my knife (freehand).
I drew on the eye with an Americolor black food coloring pen, and the beak is a little piece of black fondant. Here is the basic idea.... it was just a matter of placing them on the frosted cake.
(I applied my pieces while still soft...but you could dry in advance if you'd rather.) *Make sure to read my update in green written below re: the legs ;0)!
Since I never miss an opportunity to add some ruffles, I decided to make some for the waist and swimsuit straps! ;0) --
This is fondant tinted Americolor Sky Blue with a little tylose kneaded in. I rolled it out and cut out strips that measured 1 ¼" wide for the ruffles around the waist, and strips approx ¾" wide for the ruffles at the straps.
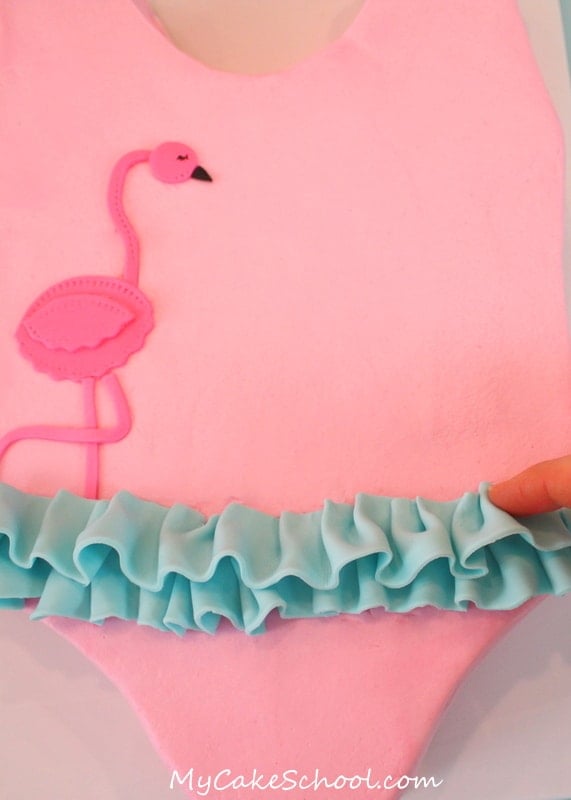
Making the ruffles is very simple. Just make tiny folds as you work your way across the length of your fondant ribbon.
With each fold, I gave it a little pinch along the top so that it would stay in place. The length of the ribbon did not matter so much, since the ruffles are forgiving and you cannot tell where one "ribbon" stops and the next starts.
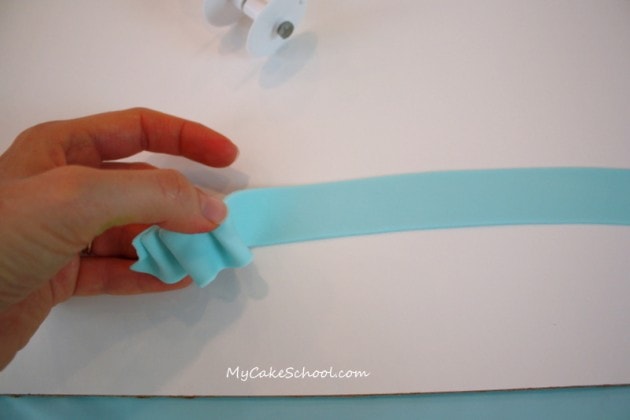
Here I am adding the ruffled ribbon! You'll want to do your lower row of ruffles first and then overlap with the top row. Cuteness!
*** Update: My Sweet Flamingo below is bending his leg the wrong way! I didn't realize that flamingo knees bend backwards rather than forwards until I read through the comments below! So, you can make yours the right way ;0) Thanks for the head's up!
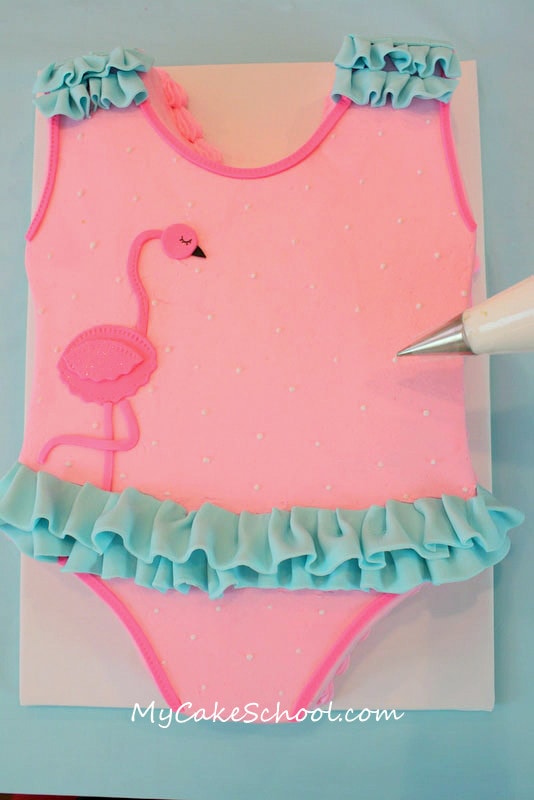
After adding the smaller ruffles to the straps (same process as the waist), I used some pink fondant bands to accent/outline parts of the swimsuit for a little added personality. I debated stepping away from the cake at this point...but just couldn't help myself from adding polka dots. I added tiny white dots of buttercream all over the suit with a Wilton tip 2. :0) Not necessary, but I like it!
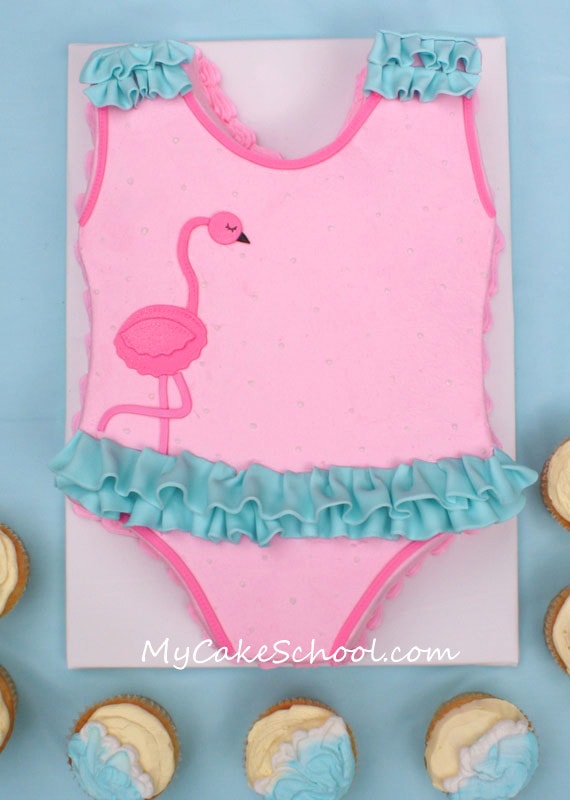
That's it! I think that the swimsuit turned out really sweet and would be perfect for a beach or pool party. If you have a ballerina party in mind, you can still use our basic design and add a larger ruffled fondant or buttercream tutu around the waist!
Easy Beach Cupcakes
I thought that it would be nice to include some cupcakes with our party also.
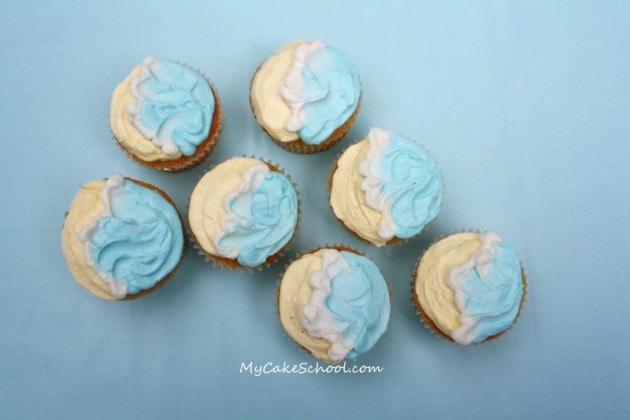
I haven't made beach cupcakes quite like these before--they are so simple & fast to make because it just requires two piping tips, three colors, and no smoothing!
First, I started by using my Wilton Tip 12 (medium round tip) to pipe part of my cupcake with "sand" (Americolor Egg Yellow) and the other half with water (Americolor Sky Blue). Pipe on the sand first, so that the water can slightly overlap.
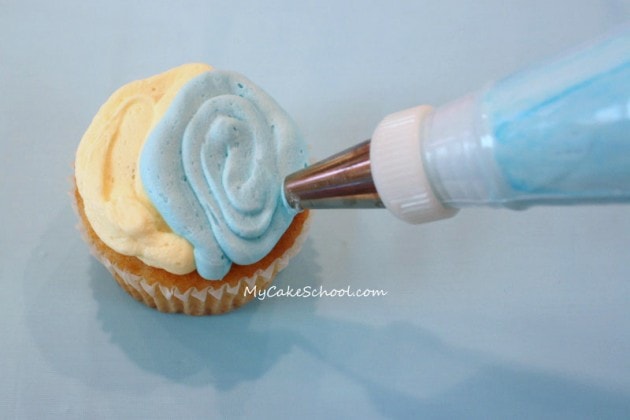
Next, I piped on white "puffs" with a Wilton Tip 2. Any of the small round tips (2, 3, 4) would work great...but I already had my tip 2 bag filled from the polka dots I made earlier!
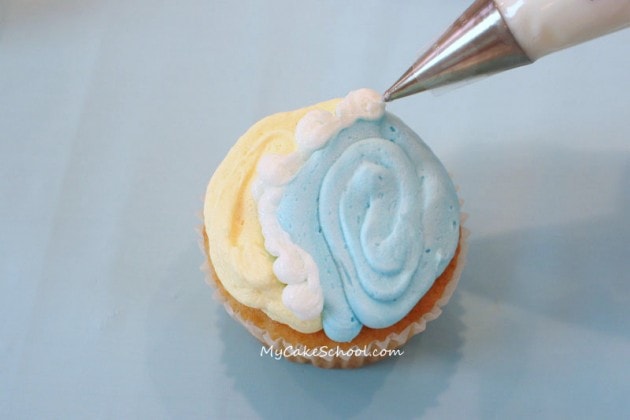
To finish off the look, I took a spatula and spread part of each white "puff" back into a swirly wave. This gives you a little color variation and makes the waves look a little more realistic.
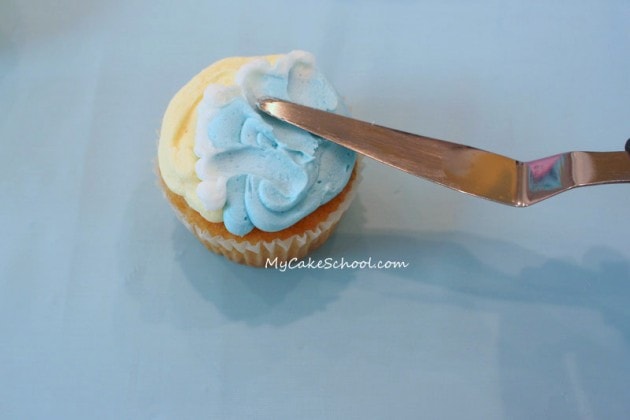
Here are my beach cupcakes! I kept them really simple, since I didn't want to take away from the swimsuit cake that they'll be placed around.
There are lots of different ways to customize these and make them your own! Cocktail umbrellas would be really sweet on the sand side.
 Thanks for stopping by the blog today. I hope that you enjoyed the tutorial---file it away for your future summertime parties! I know that your little ones will love it ;0)

thank you!!! this is absolutely adorable...next summer this will surely be a cake I will make for my grand-daughters!
there is only one thing I might suggest...did you know flamingos legs bend backwards at the knee instead of frontward like ours do...here is a link if you would like to see a picture ... http://www.google.com/imgres?um=1&hl=en&client=firefox-a&sa=N&rls=org.mozilla:en-US:official&biw=1138&bih=501&tbm=isch&tbnid=bUQbovTiHPOf9M:&imgrefurl=http://photos.mongabay.com/en/806Flamingo.htm&imgurl=http:
//places.mongabay.com/south_america/flamingo.jpg&w=595&h=418&ei=_tNDUL3WN9KzqAGyoIC4CQ&zoom=1&iact=hc&vpx=833&vpy=183&dur=2217&hovh=188&hovw=268&tx=130&ty=88&sig=115410518760337908052&page=1&tbnh=123&tbnw=178&start=0&ndsp=12&ved=1t:429,r:5,s:0,i:157
hermoso y super sencillo