The Very Hungry Caterpillar--Pull-Apart Cupcake Cake Tutorial!
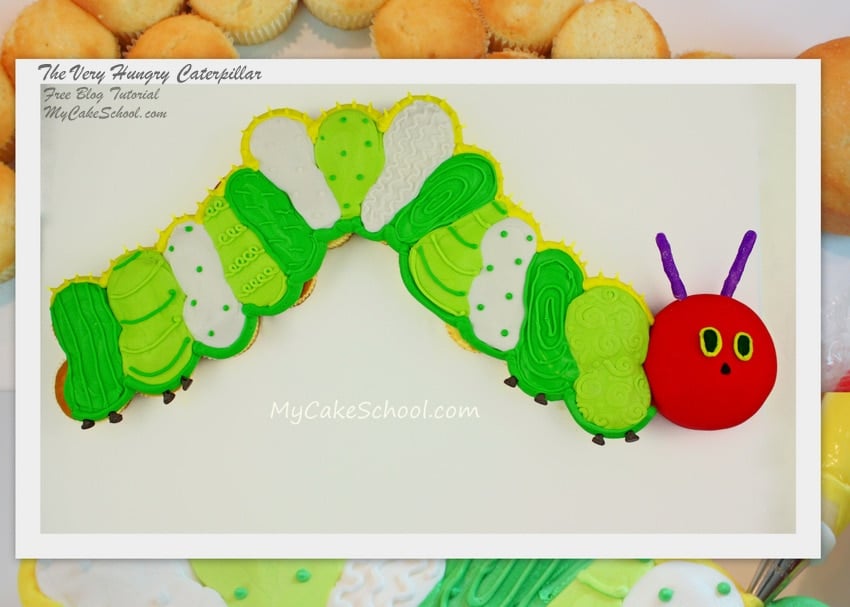
We are excited to share a CUTE cupcake cake tutorial based on one of my favorite children's books--The Very Hungry Caterpillar (by Eric Carle)!
This would make an adorable birthday cake or even baby shower cake.
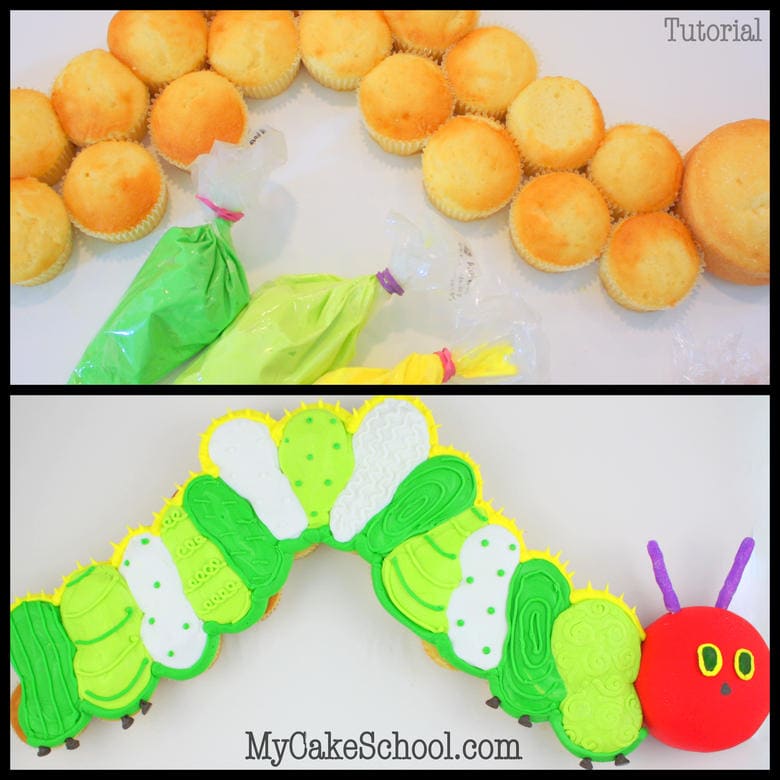
This sweet little hungry guy seems to be making quite a comeback. Lately I've seen birthday party themes, toys, and even Hungry Caterpillar children's bedding--(See Pottery Barn Kids--The Cutest!!!) -- So, the time has come to cupcake-cake him.... you will love it!
Table of Contents
Mapping out the Cupcake Cake Design
In case you've never made a pull-apart cupcake cake, you'll want to make sure to add a dot of icing to the bottom of your cupcakes--this will help them to stay put. Notice the head that I added to the end-- it's a 4" round.
You'll also want to stagger your cupcakes so that they are nicely nestled next to each other---we don't want any large spaces in between. This feels a bit like assembling a puzzle!
I've loaded up my piping bags with a medium consistency crusting buttercream--and fitted them with a piping tip 12.
Let the buttercream piping begin!
Here, I'm piping over the cupcakes wtih alternating "stripes". I'm somewhat staying within the color scheme of the actual caterpillar from the story--but not exactly.
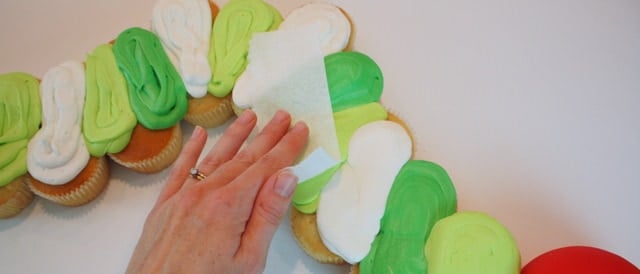
Now, I'm smoothing over my slightly crusted buttercream with a piece of a Viva brand paper towel. This step is optional, I just felt like a smooth finish today!
However a little lumpy bumpy texture would be great too- there's no wrong option.
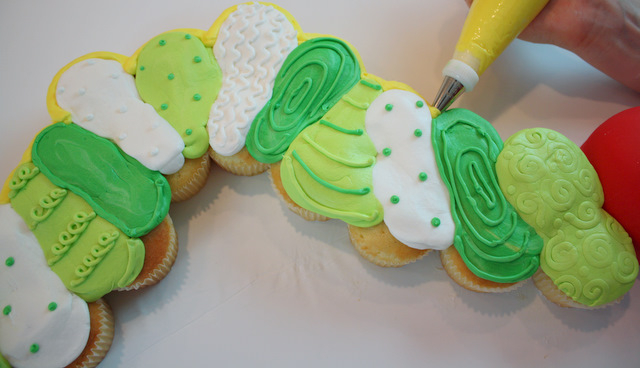
Some of my stripes are pretty chunky and thick--I wanted to add a little extra dimension.
Remember when I said that I wasn't going for the exact look of the caterpillar from the story? Well... now you'll really see what I mean. I love patterns--and I love piping! :0) -- I think that our caterpillar needed a little extra pep!
All of my piping is done with a tip 3 or 4-- with the exception of the outlined border on top and bottom---that is done with a tip 12.
Hungry Caterpillar Face and Final Details
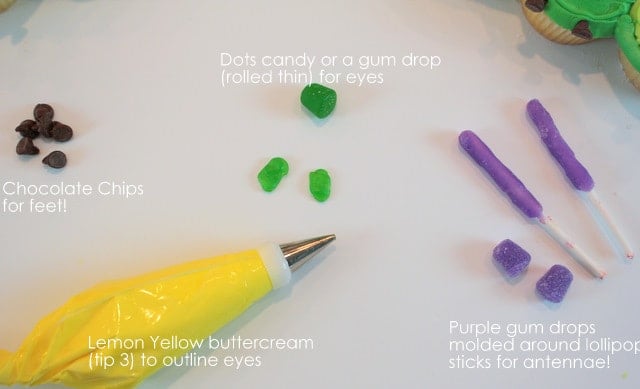
Now, time to make our caterpillar really look like a caterpillar! Earlier, I covered my 4" cake with some pre-colored red fondant. If you are not a fan of fondant, you could also use buttercream.
That's all there is too it! Are you ready? Here he is!
Yay! I love him ;0) I hope that you enjoyed the tutorial! It really is a fun one.
Thanks so much for stopping by the blog today.....now, who's hungry for cupcakes? ;0)


Luvies....big luvies
I am a teacher by day and this is just adorable!!!!!!
So darn cute!!
Melisa, he is so cute.
lov it
LOVE it!!!!!!!!!!!!!!
Wonderful! As a kindergarten teacher I know I will be trying this one out to introduce the unit on The Very Hungry caterpiller!! The kids will be thrilled.
What a wonderful idea. My 4 year old's JK class read the book last year and his birthday is in a couple of weeks....cupcakes would be perfect to send to school. Thanks for the idea!!!!
One of my favorite books as well. You are soooo creative...love it!
Absolutely adorable!!! What size board would I need for the caterpillar??
Hi Lori, we used a 24" x 24" board that was covered with a plastic party tablecloth. Our board was from the pre-cut section of Lowe's Home Improvement store. As you can see, the caterpillar needs that much width. We did have extra space at the top and bottom. That could be filled with writing Happy Birthday on the board or have your board cut to a rectangular shape.
Good Luck
WOW! WOW!! WOW!! My jaw dropped when I saw this! Fantastic job and sooooooo worth the wait! I love, love , love the design. It totally represents your style and that is why you will have me as your student for a very long time. Thanks for all the hard work and effort you are putting into this. It truly shows.