Trick or Treat! Ghost Cake Topper
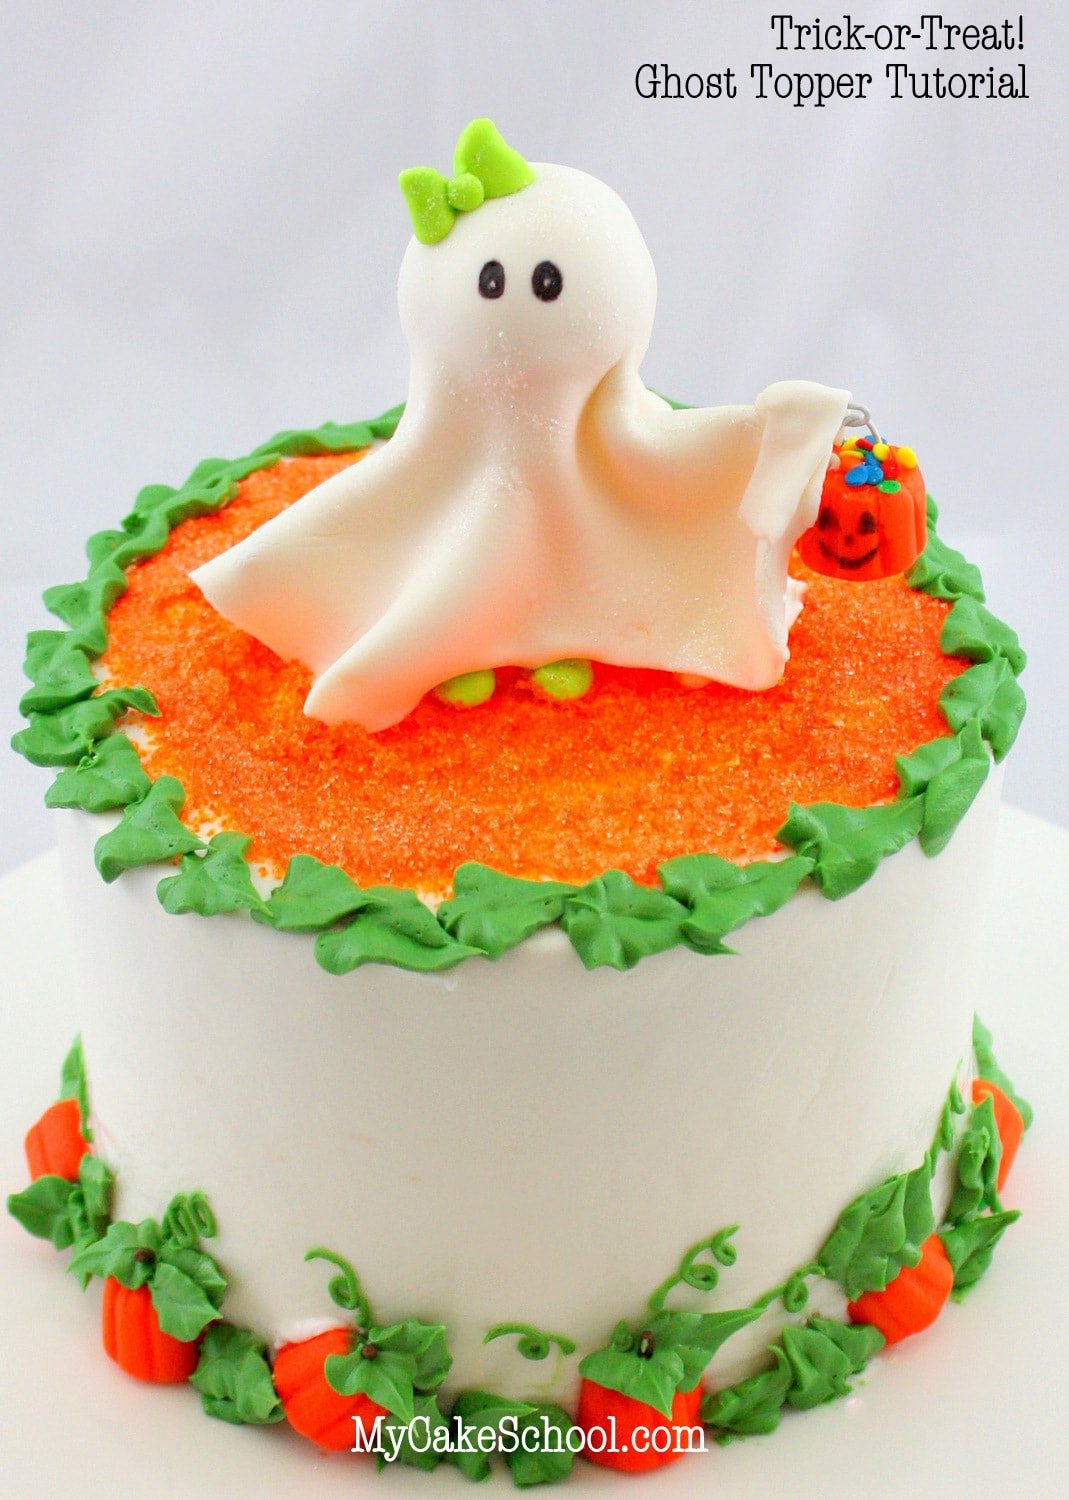
Today I'm going to show you how to make the CUTEST Halloween Cake featuring a sweet Ghost Cake Topper and easy pumpkin patch border! This cake is perfect for kids' Halloween parties!
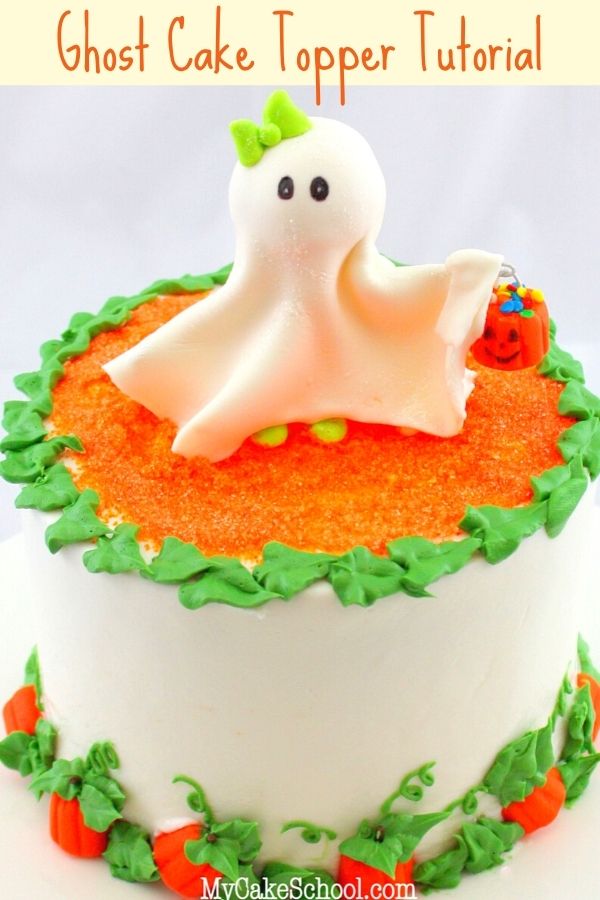
This cake design is perfect for any skill level of cake decorating! Even if you've never created a cake topper before, this is a great place to start. This is one of our favorite festive Halloween cakes, and was one of the first Halloween cakes that we added to our site. So much fun!
Table of Contents
How to Make a Halloween Ghost Cake Topper
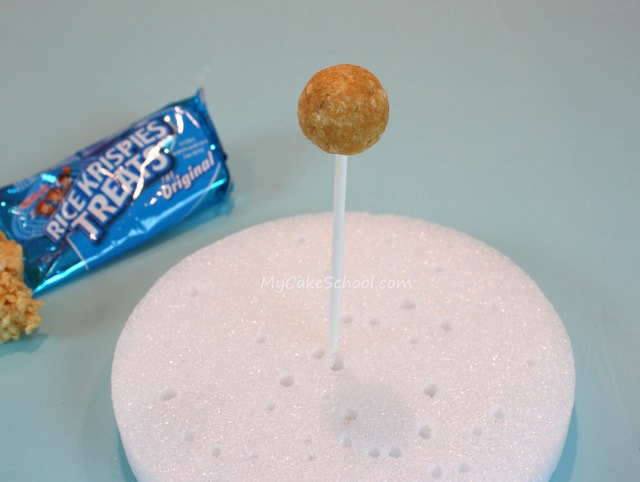
For the ghost's head, I compressed/molded a (22g.) Rice Krispie Treat into a ball approximately 1 ¼ inches wide. Then, I dipped the end of a lollipop stick into a little melted candy melts and drove the stick into my rice cereal ball.
Doing this just helps to keep everything where it belongs. (If you would rather, you could do the same thing with a ball of gum paste or fondant and allow to dry firm.
I just love how quickly rice cereal treats can be molded to create a firm shape. Plus, it's an excuse to keep rice cereal treats around the house!).
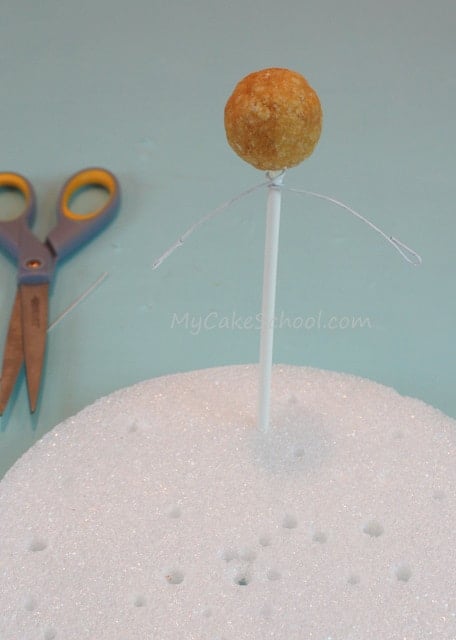
Next, I snipped a piece of 20 gauge floral wire in half and wrapped it around the lollipop stick until secure. I hooked the ends so that my ghosty could hold onto her candy bucket.
You do not have to use 20 gauge wire....just choose something that will be stiff enough to hold it's shape. The wire serves as "ghost arms"...and also will help to give a little movement to our ghost costume.
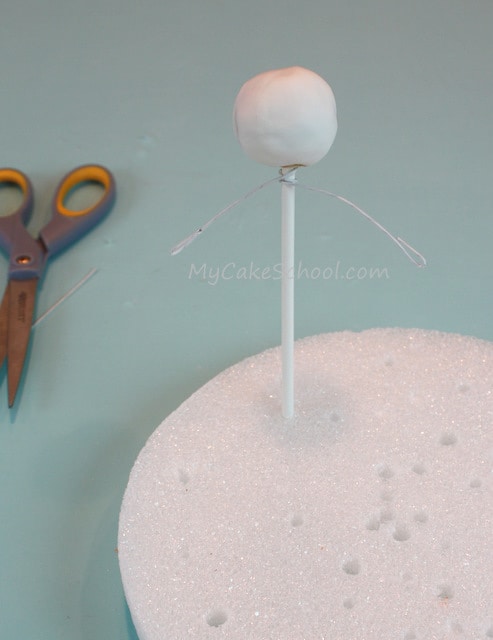
I smoothed a little fondant over the rice cereal treat ball. This is optional, but helps if you feel that your cereal ball is a bit lumpy.
Next, I took fondant with some tylose mixed in (gum paste would be great too, as well as a 50/50 mix of fondant and gum paste) and I rolled it nice and thin....I then draped it over the "lollipop body" we've made.
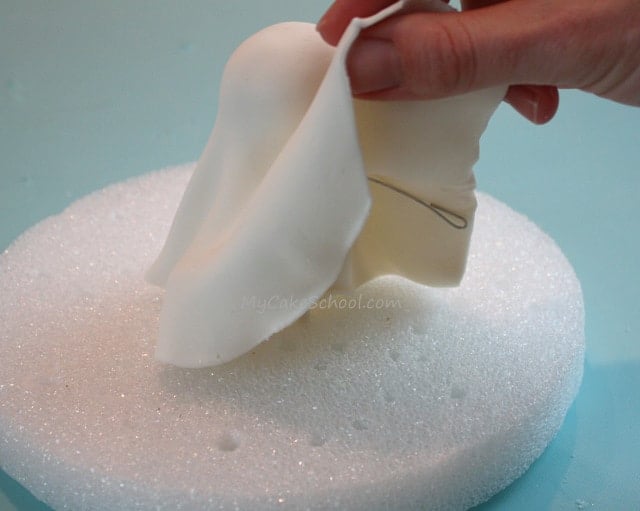
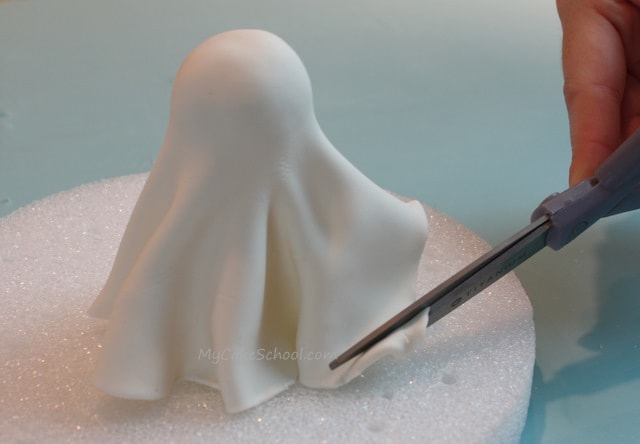
Do a little trimming until your fondant drapes just how you like.
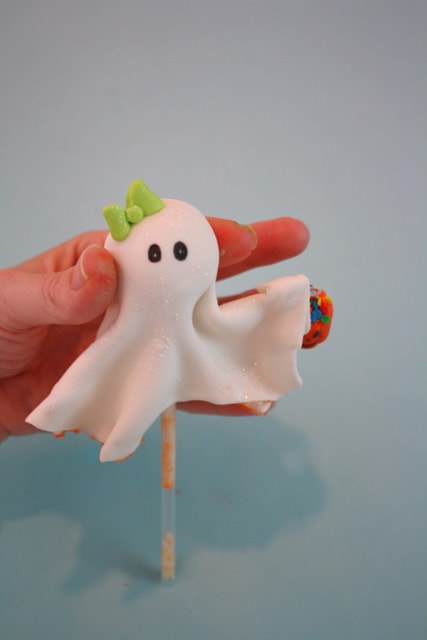
Now, for the candy bucket! I had some candy pumpkins that we'll talk about a little later. I just lopped off the top, brushed with a little piping gel so that my sprinkle "candy" would stick, and then pushed a "u" shaped wire (ends dipped in candy melts) into it.
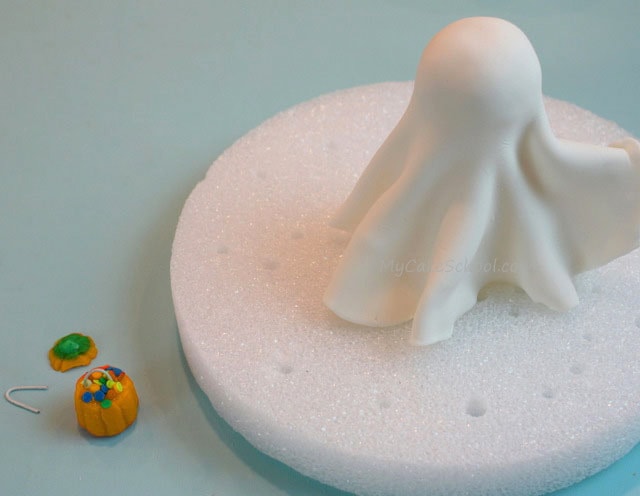
The handle of the bucket easily hangs from the hooked hands that we made earlier. Then, for a little something extra, I added fondant shoes and a bow. The shoes make our ghost look more like a little girl dressed up in a costume rather than an actual ghost that's hungry for candy!
The eyes are drawn on with a food coloring pen....and I decided to draw a face on our pumpkin bucket too!
I used my ghost within a few hours of making her, but for best results...allow to dry for a couple of days. She'll be less fragile.
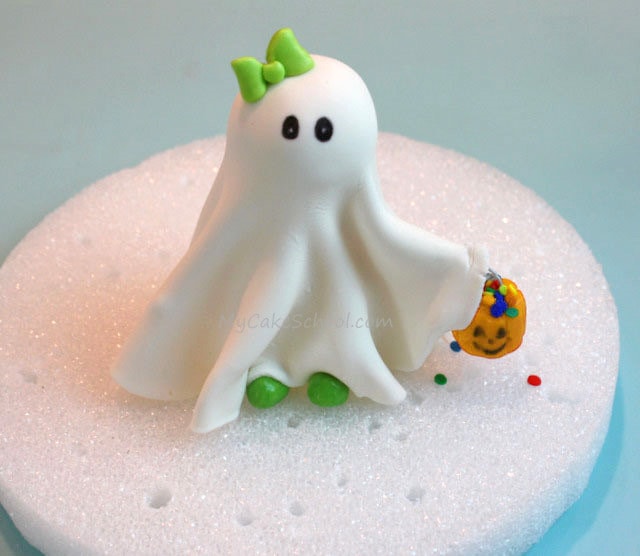
Now our sweet ghost topper topper is finished!
One of the most important things about the topper is the anchor. I like an extra long anchor, and so I snipped a drinking straw to the approximate height of the cake or so, and slid the lollipop stick anchor right into it. Easy! Now our little trick or treater can stand up straight. ;0)
How to Make an Easy Pumpkin Patch Cake Design
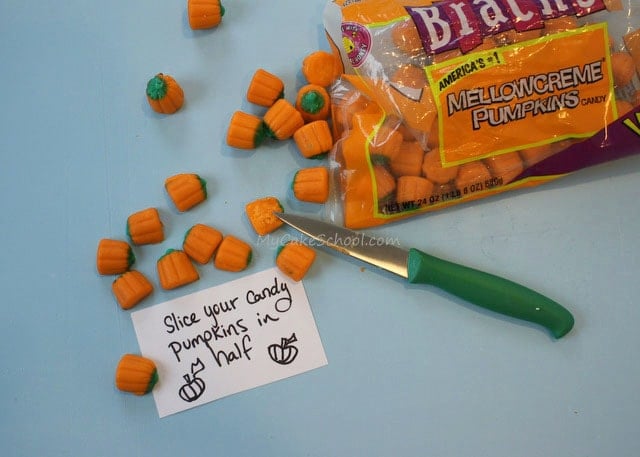
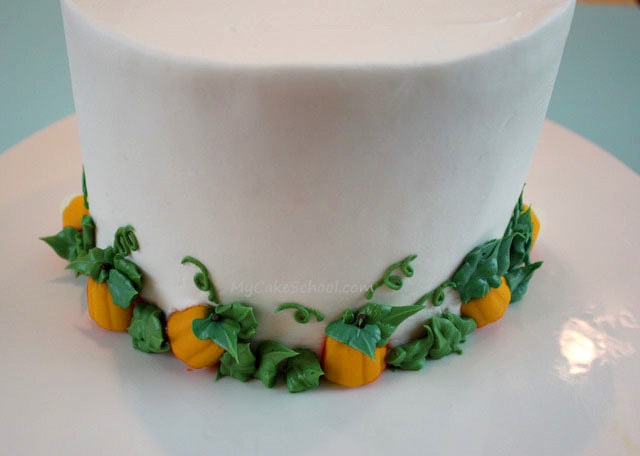
Now that our ghost is ready, let's add some personality to the sides! Today, I did this with a bag of Mellocreme Pumpkins. They remind me a little of Candy Corns as far as texture, in case you haven't seen them. Anyway, these made for a super quick pumpkin patch scene.
I simply sliced the candy pumpkin in half..
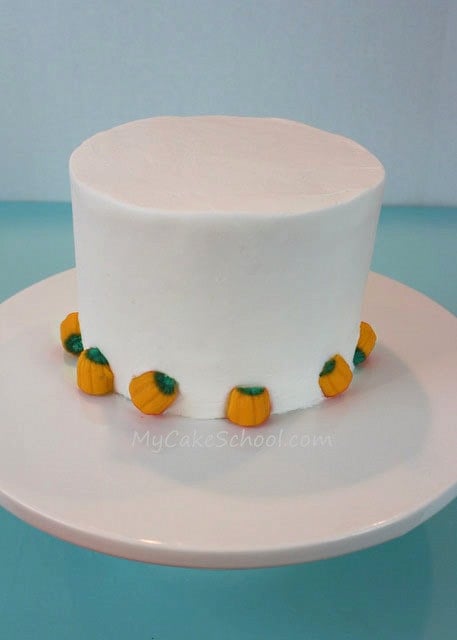
Then, I pressed the pumpkins into the sides of my buttercream-frosted cake. (Use a little buttercream as glue if your frosting has crusted over.) *Use any buttercream that you'd like. We used our delicious Classic Vanilla Buttercream Recipe.
After frosting the cake, we allowed it to crust for a few minutes and then smoothed over it with a simple Viva brand paper towel. (We use Viva brand because it has no quilting or impressions.) You can smooth however you'd like!
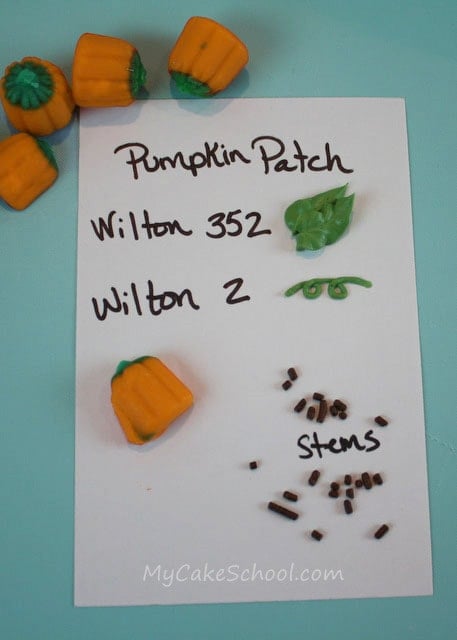
For the buttercream leaves we used a Wilton 352 leaf tip, and then for the vines we used a small round Wilton 2. (Any small round tip will do!)
Our pumpkin stems are simple brown jimmies.
This pumpkin border was so much fun... it only took a few minutes! That's my kind of decoration.
Now let's take a look at the big picture!!!
More Halloween Cakes
We have SO many more Halloween Cake tutorials and videos to share! Don't miss our roundup of the BEST Halloween Cakes HERE!: Best Halloween Cake Designs and Ideas!
We would also love for you to check out our collection of favorite FALL RECIPES! We have everything from pumpkin cake recipes and spice cakes to caramel cakes, gingerbread cake, and more!
You can find them all here: Sharing the BEST Cake Recipes for Fall!
I hope that you enjoyed this tutorial, your friends and family are sure to love this fun design!

*such, not scuba, lol. Auto correct strikes again! :)
Thanks Kristen--love the random auto-correct words ;0) -- I hope you have scuba a good time making this!
Super super cute!!!! Love it!!
That is so adorable.
So cute! I was looking for an idea for the school fall festival cake walk. I think I found my cake. Thanks.
I love it! So creative and cute! I just need the ingredients. What a great idea for a bake sale or cake walk. Thank you for the steps and photos in making this adorable cake and topper.
That is ABSOLUTELY ADORABLE!!!!! Melissa, you are just the best!
Thanks for sharing this one. I can't wait to try it!!!!!! :O
I just love this! Definitely going to give it a try...
This is absolutely adorable & I will definitely make it. Thank you for your wonderful tutorials!!
Just made this with my 8 year old as a mother daughter project. We had a blast! Such a cute idea. Thanks for sharing this wonderful tutorial!!
I'm feeling an "It's the Great Pumpkin, Charlie Brown!" pumpkin patch cake inspired by this one--love it!
This is sooooo cute and simple to do thanks for all your wonderful ideas!